
We have a few ceiling fans in our house and man are they ugly! They scream ’80s with their fake wood finish, brass fixtures and dated frosted glass light shades.
The one in the master bedroom bothers me the most since it literally stares me in the face every time I go to sleep.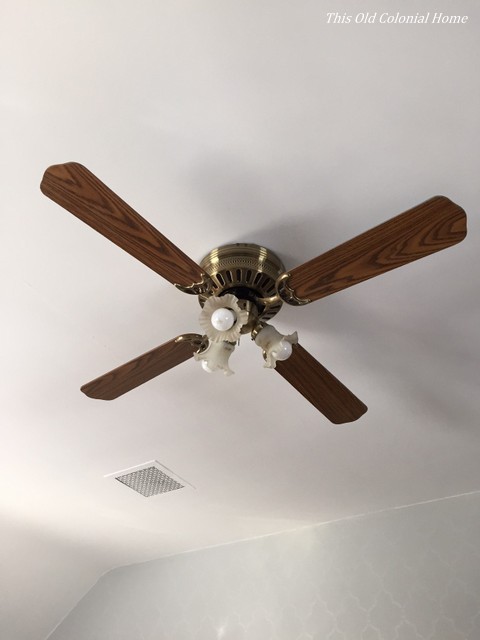 Instead of spending a hundred plus dollars on a completely new fixture, we decided to give it the ole DIY try.
We started by disassembling all of the fan’s pieces. (Don’t forget to cut the power!) Each piece then got a good cleaning. Talk about dusty! Gross.
Now it was time to spray paint. We decided to do the whole thing white using Rust-Oleum Painter’s Touch.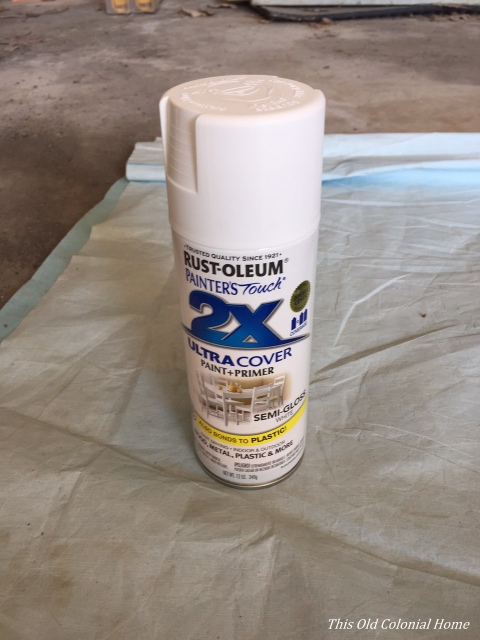 Jamie laid out all of the pieces on a drop cloth in the garage, including the screws, and gave them two coats of paint.
 Meanwhile, I went in search of some new glass light shades to replace the old ones. I came across these at Lowe’s. They’re definitely a nice upgrade and a decent price!
 We let the fan pieces dry overnight and by the next day they were ready to be hung back up.
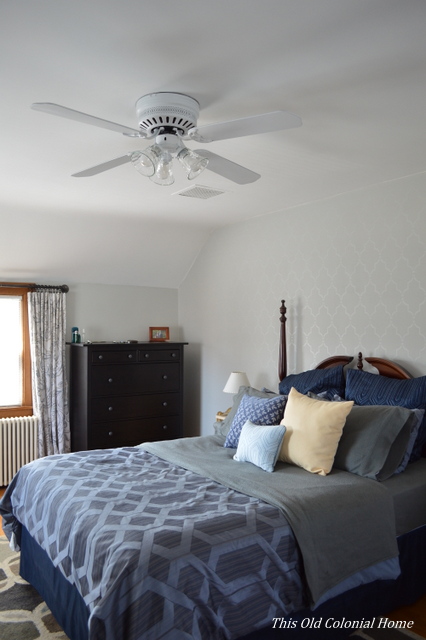
Here’s what it looks like all put back together. What an improvement, right?! Such a quick DIY and it cost less than $20. Can’t beat that!


April 14, 2015 at 11:17 am
Looks great! We recently did the same thing with 2 fans – another 3 to go. It’s such a great, simple, cheap improvement 🙂
LikeLike
May 18, 2015 at 12:18 pm
What an easy and smart change to make! In our old house, we spent A LOT of money changing out perfectly good fans just because we didn’t like their look! Now I wish I had read this before that! We wouldn’t have had to go through the headache of trying to sell them or get them to a donation center! I’m going to share this idea on my own blog in the future for sure! I’d love to link your pictures to it!
LikeLike