This Old Colonial Home

Filling our house with love and a lot of DIY


Leave a comment

Entryway Decor Part 3: DIY Painted Lamp Shade

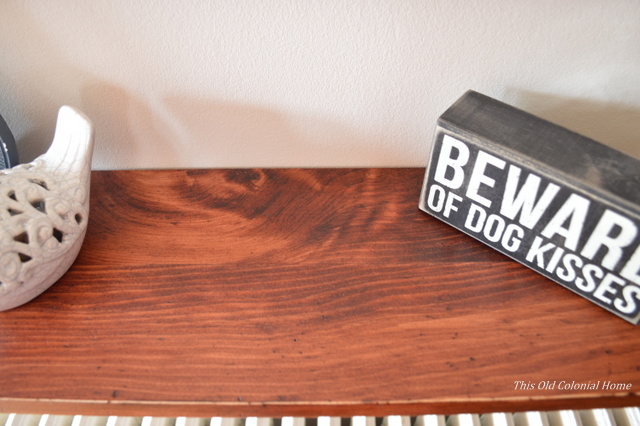
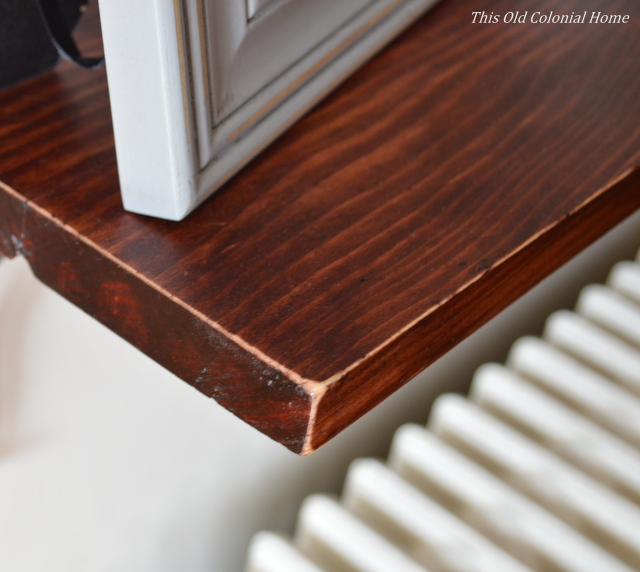
With the shelf and mirror in place, the last order of business was finding a few items to put on the shelf.

Our entryway gets pretty dark and instead of having to always use the bright, overhead light — a table lamp would be perfect. The only problem was finding one narrow enough.

I checked a few stores to no avail before deciding this lamp in our guest bedroom was the perfect size.narrow table lamp
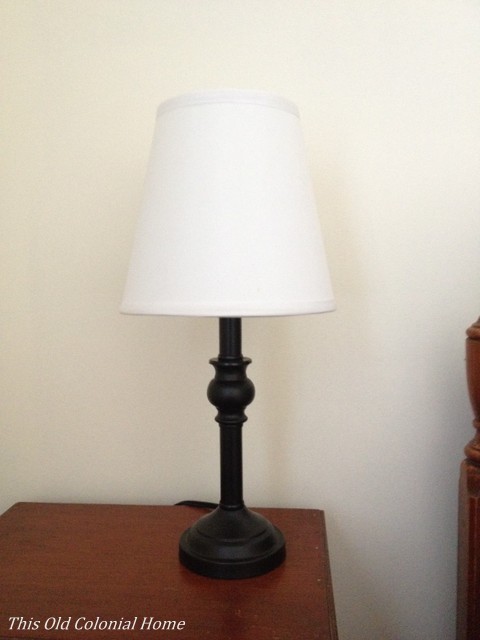
But the white shade needed a little something. I decided I’d try painting it. Why not?!

I wanted to do horizontal lines, but because of its shape, it was easier to line up the painter’s tape vertically. For this pattern I used a strip of tape in the middle and then cut a strip in half length wise for 2 skinnier strips on the sides.using painter's tape to make stripes I used latex paint that we already had on hand. The first coat I used a foam roller, but it didn’t go on very evenly.painting a lamp shade I did a second coat and touch-ups with a foam brush. That seemed to work better. I also ended up painting the white stripes (no, not the band haha!) with paint leftover from the mirror project. This helped give it a cleaner, more even look. Definitely make sure to check the shade with the light on when you think you’re done. It can look completely different and you can see spots where you may have missed. When doing touch-ups, I actually painted it with the light on. Sounds funny, but it worked!painted stripes on lamp shade I then added a few more small items to the shelf that I found at Marshalls. Now with all three projects complete, as well as the mason jar sconce, the entryway feels more welcoming and inviting. shelf scaping easy center hall colonial home
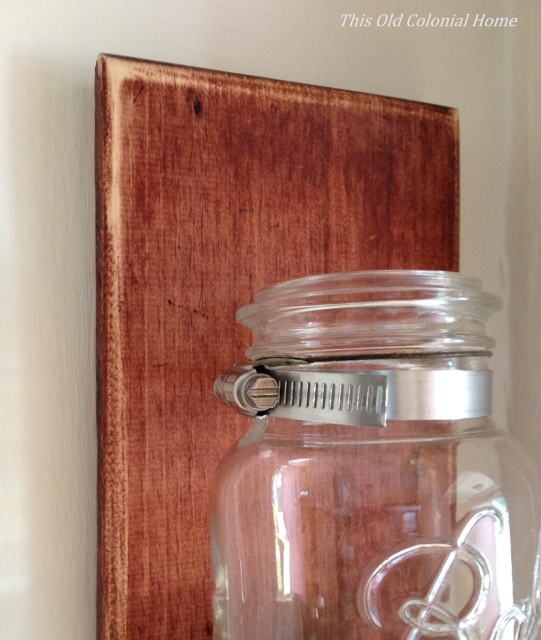
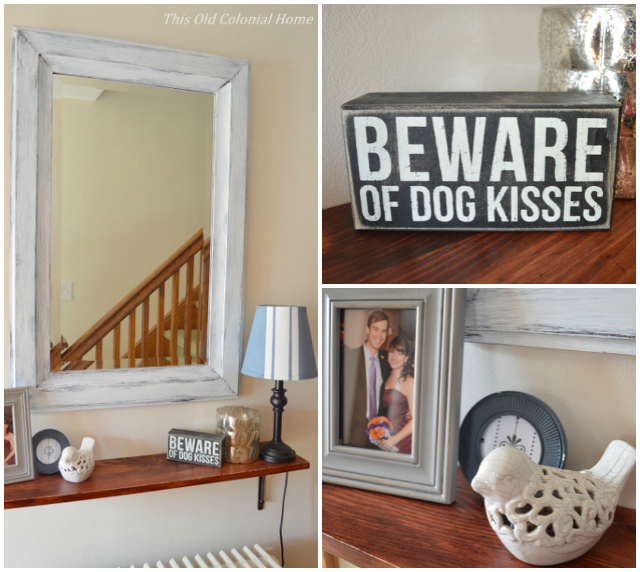
How do you like to make your home feel welcoming upon entering the front door?


1 Comment

Entryway Decor Part 2: Distressed Mirror

In Part 1, I showed you our distressed shelf. Now for the mirror.

Remember the one I got at an estate sale for 20 bucks? (See it here.) That’s the same mirror I used for this project. Originally it had peeling green paint with pink showing through.wood framed mirror with peeling paintI decided to redo it with a white distressed look. I had never done that before. So I started searching online and I found several ways to do it. I used part of one method and then sort of winged it.

I started by sanding the frame. Be sure to cover the mirror so it doesn’t get scratched. (I learned that the hard way. Oops. I really should’ve known better. Luckily it was a small scratch.) The flat part of the frame I was able to easily sand with an electric sander, but the angled edges I had to do by hand. It got pretty tedious so I did it just enough to get the flaky paint off.sanding a wood frame mirrorI then primed the frame using a foam brush. After that, I painted it brown with latex paint I had from a previous project. It took a few coats to get it dark enough. Then, I simply went over the brown paint with white paint using a bristle brush and light strokes — the idea being to let the brown show through a little.distressing a wood frame mirror diyAfter it dried, I sanded parts of the edging and corners by hand to help give it a more distressed look. This might not be the perfect method to distress something, but in the end it achieved the look I was going for.DSC_0486-002Distressed shelf and mirror in entrywayThe only thing I bought for this project (aside from the mirror) was a quart of white paint for around $8. Everything else I already had on hand. I always try to use leftover materials when I can to cut down on cost.

As you’ll see coming up in Part 3, I do just that to make over a plain lamp shade.


Linking up with Dagmar’s Home


2 Comments

Entryway Decor Part 1: Easy DIY Shelf

We’ve been churning out several projects faster than I can post about them!

Take for instance the latest addition to our entryway. This alone contains 3 DIY projects!!shabby-chic-shelf-and-mirrorLet me start with the shelf.

First of all, the walkway by our stairs is somewhat narrow, and having a radiator there doesn’t help much. It used to have a cover over it, but we removed it to make a little more room.Narrow foyer with staircase and radiatorThat worked, but we still needed somewhere to drop our keys, sunglasses, etc. A table didn’t seem logical so we decided to build a shelf instead. We wanted a somewhat rustic look using wood and metal.

Reclaimed wood and old iron brackets would be ideal for something like this. But we didn’t want to have to search high and low for materials, so we headed off to Lowe’s. We picked up a 6 foot piece of 1×4 pine and 2 metal brackets for around $20.

Jamie cut the board in half and screwed them together using pocket holes that he made with a Kreg jig. We now had a shelf that was 36″ long by 7″ deep. The top of it was a little too smooth for my liking … so I beat it up! I put a bunch of screws in an old sock and banged it against the wood. I also made random markings using both a hammer and a screw driver. (This is a good opportunity to release some stress!) Once it no longer looked new, I brushed two coats of Minwax Bombay Mahogany stain on it.Make markings on wood for aged lookAfter it dried, I went over the edges and corners with sand paper to make it look a little more worn. You can do this as much or as little as you want.Sand edges of wood to look agedJamie then attached the brackets to the wood and hung it on the wall. Such an easy and affordable DIY project!Wood shelf attached to wall with bracketsComing up in Part 2, I’ll show you how I distressed a wood-framed mirror.


2 Comments

Blogger Block Party

On Monday I went to my very first blogger-related party! HGTV Magazine hosted a Blogger Block Party in New York City.blogger block party diy hgtvThe details leading up to the event were pretty vague and I didn’t know what to expect. Needless to say I was nervous about going by myself, especially since I’m still a newbie at this whole blogging thing. But one of my good friends encouraged me to step outside my comfort zone. She said the only way people will get to know me is if I go and meet them. Thanks for the advice, Steph!

So I put on my big girl pants and decided to go. Manhattan is just a 45 minute NJ Transit bus ride away, so there really was no reason not to go!blogger block party welcome sign I felt welcome right away! There was free swag right upon entering the door, which is always okay in my book. Plus, everyone I spoke with was nice and friendly. It was a great opportunity to meet fellow bloggers and even non-bloggers who just love DIY. I even got to briefly meet Sara Peterson, the Editor in Chief of HGTV Magazine.Posing with Sara Peterson editor of HGTV magazineThe day consisted of making connections, as well as crafting, and easy DIY demonstrations. The kitchen art was probably my favorite. I kinda really want to try these painted wooden spoons!colorful painted wooden spoonsThe highlight of the day, of course, was when Scott McGillivray – host of HGTV’s “Income Property” – arrived for his demonstration. His presentation was definitely the most interesting and informative. And it doesn’t hurt that he’s easy on the eyes! (Sorry, honey!)contractor confessions blogger block partyI even got up the nerve to ask him a question during the Q&A portion. Hopefully my nervousness wasn’t too noticeable. I asked him what his thoughts were on ripping out a closet and replacing it with a bench and hooks, which is something Jamie and I plan on doing in our entryway. He answered that taking away storage isn’t a great idea, but as long as you replace it with another form of storage it should be fine. Thanks, Scott!

We were then able to get our picture taken with him! When it was my turn, I simply thanked him and said it was nice meeting him. I tried to act nonchalant on the outside, but inside I was super giddy!Posing with HGTV star Scott McGillivrayI stayed a little bit for the cocktail hour that followed, chatted with a few more people and then decided after nearly 8 hours I would head home.

I definitely enjoyed myself and I’m glad that I went. I learned a lot from more experienced bloggers and left with my head spinning and full of ideas.

While I am just a little guppy in this massive sea of home décor/DIY blogs, this doormat at the party is my new inspiration and motivation!blogging motivation We all have to start somewhere — so keep calm and blog on!


5 Comments

Mason Jar Sconce

In our entryway we have a doorbell niche. It’s a long, narrow cutout in the wall with only the chime at the top. It’s a plain feature that’s been begging for a little pizazz. (Sorry, I forgot to take a “before” picture.)

I toyed with the idea of tiling it or painting it a different color. I still may do the latter someday. But for now, I decided it would be a good place for flowers. I thought maybe a nice, faux orchid … but while scouring Pinterest I stumbled upon a mason jar sconce. It seemed like an easy and inexpensive DIY project and one that would go with our vintage style décor.

Simple jar sconce

Found on Pinterest

For this project all we needed was a mason jar, a piece of wood, a pipe clamp, stain, and flowers. We already had a mason jar and we used a piece of scrap wood as well as stain left over from Jamie’s awesome coffee table. I picked up a pipe clamp from Home Depot for only around $1.50. More on the flowers in a moment.

Jamie ended up taking the lead on this quick DIY while I worked on another project. He cut the board, sanded it, rounded the edges and stained it. Once it was dry, I simply hand sanded the corners a little to make it look worn. He added a sawtooth hook to the back and then nailed the pipe clamp to the board and tightened it around the mason jar.Nail pipe clamp to wood

Attach mason jar to wood with pipe clampAs for the flower part of it, I found some clear, vase filler gems at Target for under $5 and I chose a fake hydrangea from A.C. Moore for under $4. You could really fill it however you want. But I like how this adds a little pop of color to the room!Easy DIY wall sconce

Shabby chic decorBall jar with hydrangeas and vase fillerPop of color in entrywaySuch a simple solution that helps make the entryway feel a little more welcoming.

We’re adding a few more additions to the foyer … so look for that soon!


Linking to:

Serenity Now | DIY on the Cheap | The Shabby Nest


Leave a comment

Luca to the Rescue

black border collie mixSome might say that a house is not a home without paw prints. I know our house wouldn’t be the same without Luca, our border collie mix. Sure, we’d have less dirt and dog hair tumble weeds trailing along the floors and furniture, but it would feel empty without him. Since Luca is a rescue, we don’t know his actual birthday. So on August 5 we celebrate his Adoption Day! It was two years ago today that I picked up this little guy with his now-dubbed “lazy left ear” — and life hasn’t been the same since.luca in backseatWe may have lost a few socks, sweaters, pillows and blankets in that time due to his chewing skills, but what we’ve gained is priceless: love, affection, and loyalty. Yes, we joke that he’s part donkey (because he’s a stubborn ass), but when push comes to shove we still love every bit of him and we know he loves us back — dog kisses included!

He is our “first born.” While we may only be dog parents for now, that doesn’t mean we’re not learning something. He teaches us kindness and patience every day. He is friendly and outgoing and hasn’t met a person yet that he doesn’t like. I truly believe he helps make us better humans.giving luca a hug

cuddling luca He is our goofball. He fills our rooms with smiles and laughter. He enjoys a good butt rub and will let you know by nuzzling into you.

He is our protector. He will bark if there is someone outside or if there’s a bunny in our yard. He gets excited at the sound of the doorbell … even if it is just on the TV! It’s silly and adorable! But we always feel safer at night knowing he’s there at the top of the stairs looking out for his owners.luca the black beautySo while Jamie and I work so hard to make our old colonial house into a home — with Luca there, it already is. We love you, pal!poses of luca