I’ve been talking about it for months, and now the day is finally here! Our renovated bathroom is done! Are you ready to see it?! (Drum roll, please!)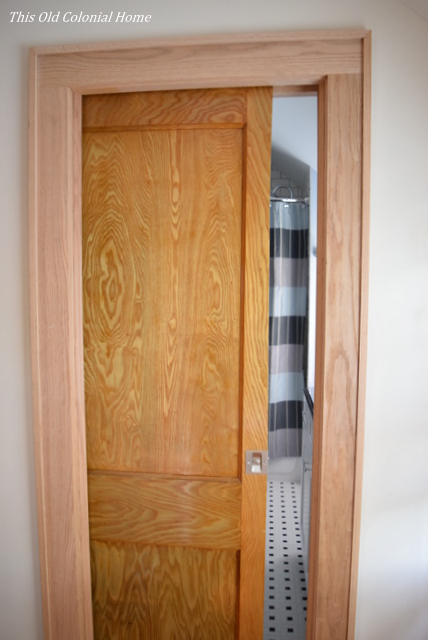 Come on in!
It’s such a rewarding feeling seeing the classic black and white bathroom that we had envisioned for our 1930s house actually come to fruition. This is the first major renovation that we took on. And while yes, we had contractors do the work, the design was all us. That is something I am extremely proud of!
Let’s take a look around.
For the shower, we chose white subway tile and charcoal grout. To me, this is a look you can never go wrong with. It’s timeless and affordable.

 The same goes for our black and white floor!
 Even though our window and door trim is wood (which still needs to be stained or polyed), we chose black bull nose tile to go around the floor base for something a little different and I love it!
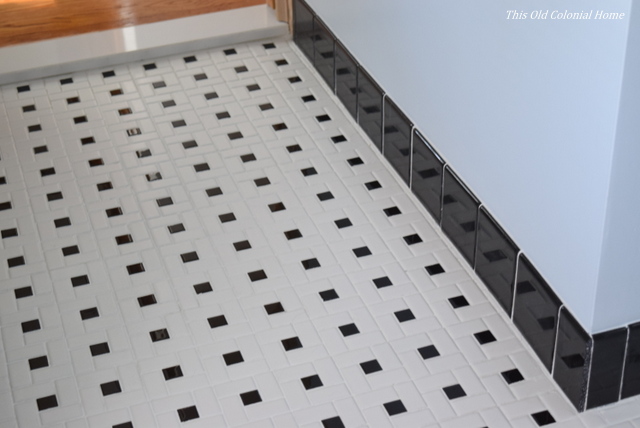 The vanity was definitely a splurge. We needed one with a narrow depth, which is hard to find right off the shelf, so we ended up ordering a custom one.
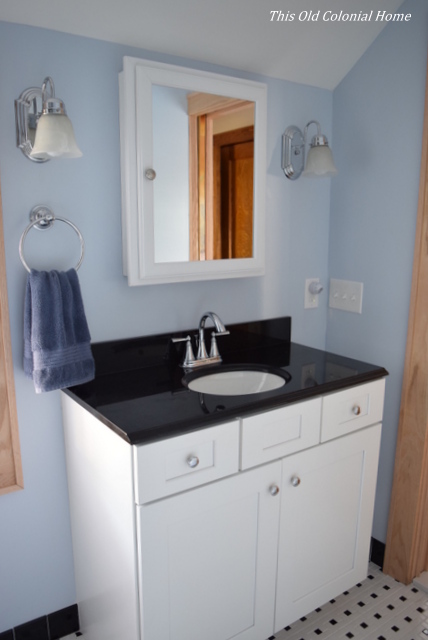 We chose white shaker style cabinets and a black granite counter top. I think it adds such beauty to the room. And talk about an upgrade from the pedestal sink that used to be in here! I don’t know about you, but I hate pedestal sinks. There’s no storage and no counter space. Now we have both!
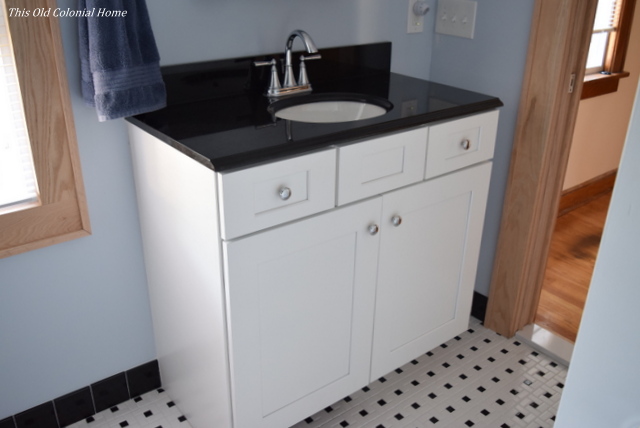 Where did we get the extra room from to put in a real sink? That’s where the new pocket door comes in super handy. What a space saver! Before, the door used to swing in leaving an unusable, dead area behind it.
  We used the same door that was there before. Jamie had the awful, tedious task of stripping the paint that had been on the one side, and then our contractor cut it to fit the narrower doorway.
Of course, we also have new lighting, a new medicine cabinet, and finally an electrical outlet! (It’s the little things.) To save some money, we kept the same toilet since it was in perfectly fine working condition. And believe it or not, pretty much everything in here — from the vanity, to the tub, to all the tiling and faucets — came from either Home Depot or Lowes! Not bad, right?!
We still have a few minor things to add — like wall decor and accessories. But look how far it’s come from the time we bought the house to now: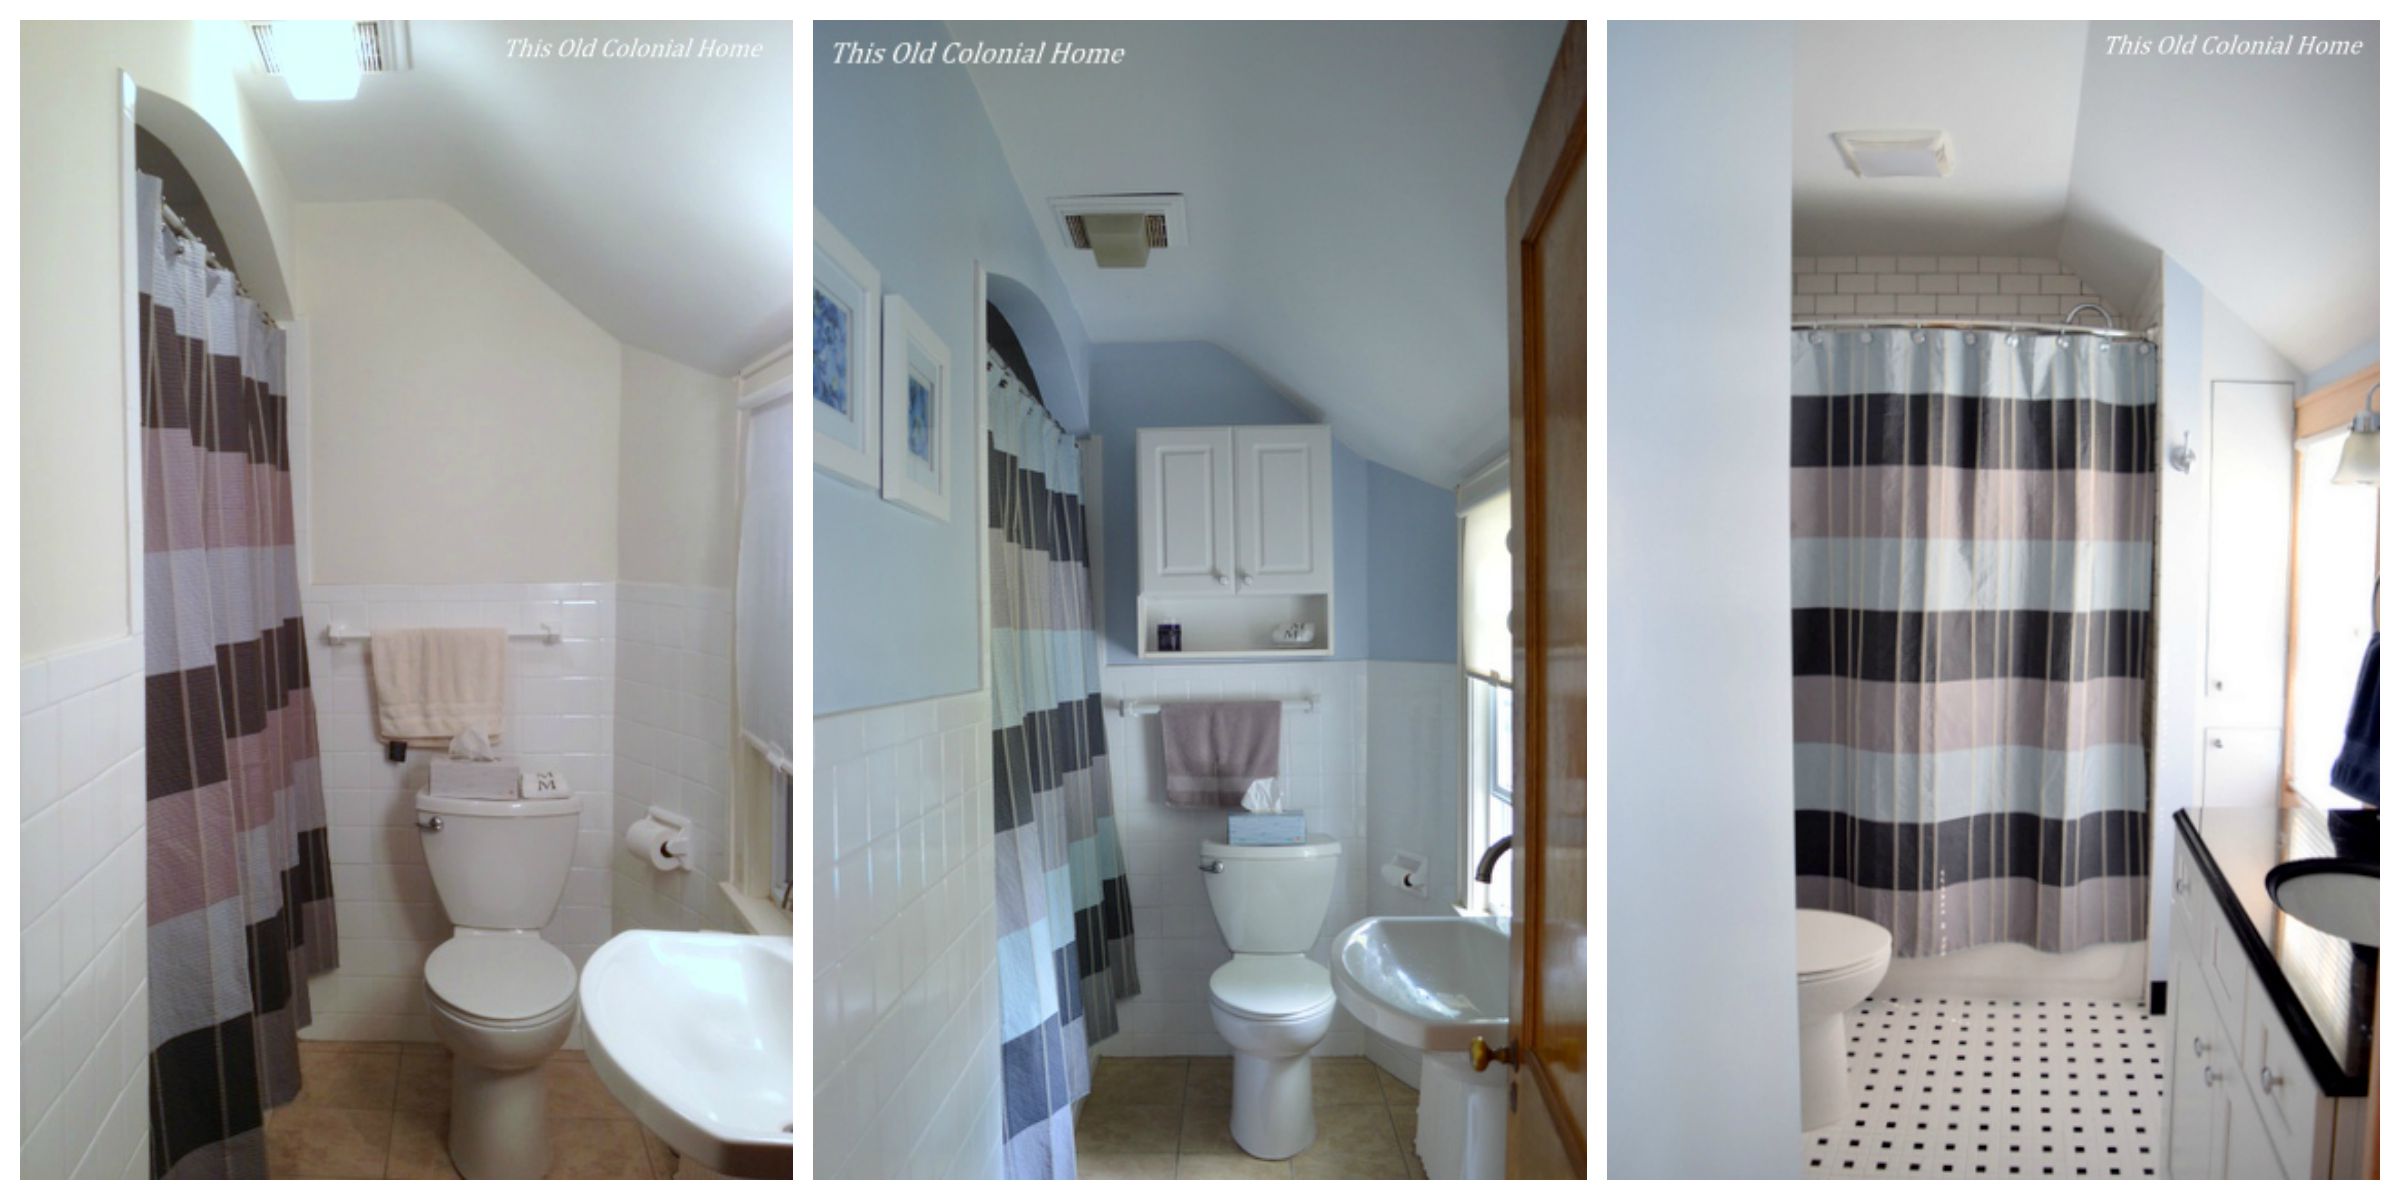 So I may or may not have been freaking out a bit about the timing and duration of this renovation, but like anything else, it eventually came together. And it was definitely worth the wait!