This Old Colonial Home

Filling our house with love and a lot of DIY


6 Comments

A Sweet Makeover

Well I can’t show you the bathroom just yet, but I can show you the nursery! I wasn’t sureĀ I was going to be able to before the baby arrived, but luckily he or she is still cooking … giving us a little more time to get things done (and putting my mind at ease)!

You may recall this is how the room used to look – reserved for guests.Guest Bedroom
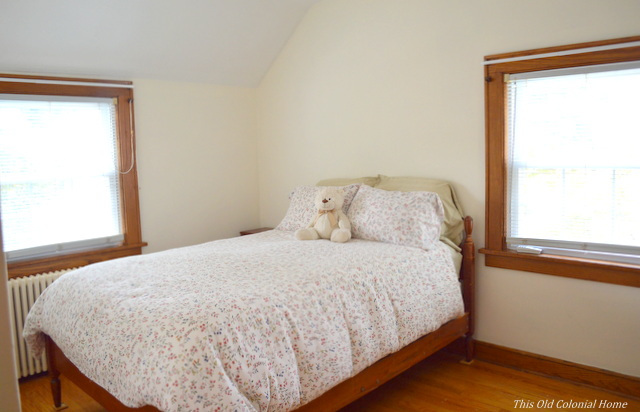
And here’s how it looks now – reserved for our little one. šŸ™‚Gender neutral nursery room decor Since we don’t know what we’re having (aside from a baby of course), we went with gender neutral colors of gray, yellow, and white.

My husband took on the task of painting the room since I really shouldn’tĀ be around the fumes. We chose the color PassiveĀ from HGTV Home by Sherwin Williams.

I wanted a little something extra in the room, so on one of the walls Jamie added the white stripes. (No, not the band!)Paint stripes in nursery using Frog's Tape White stripes in gray nursery
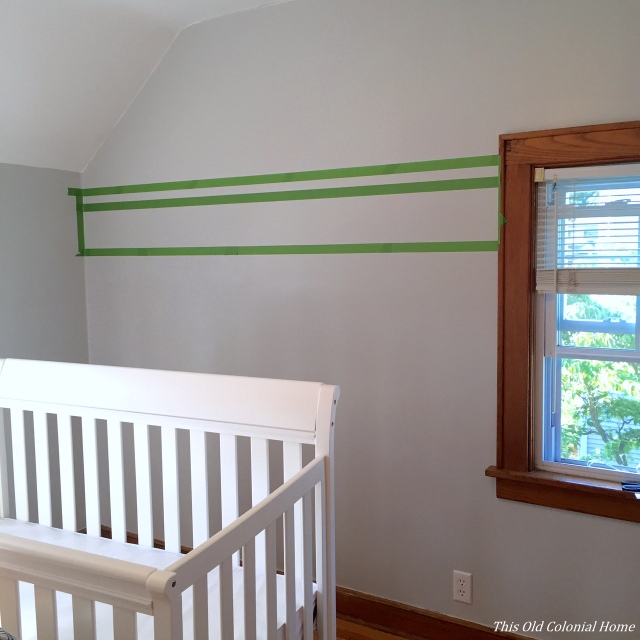
I love how it turned out! Simple and subtle, but so cute!White crib in gray nursery
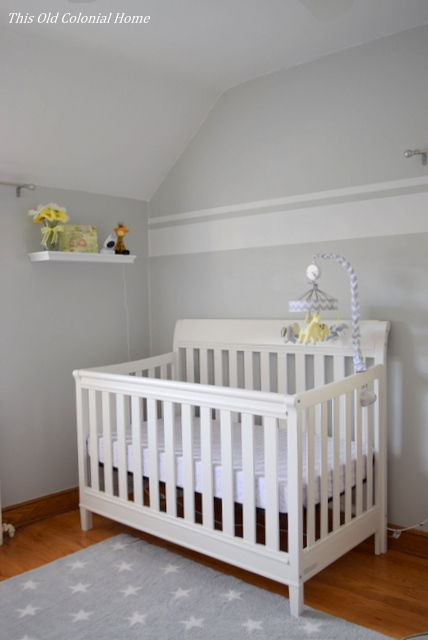
Now, let me take you around the room to show you some of the other details.

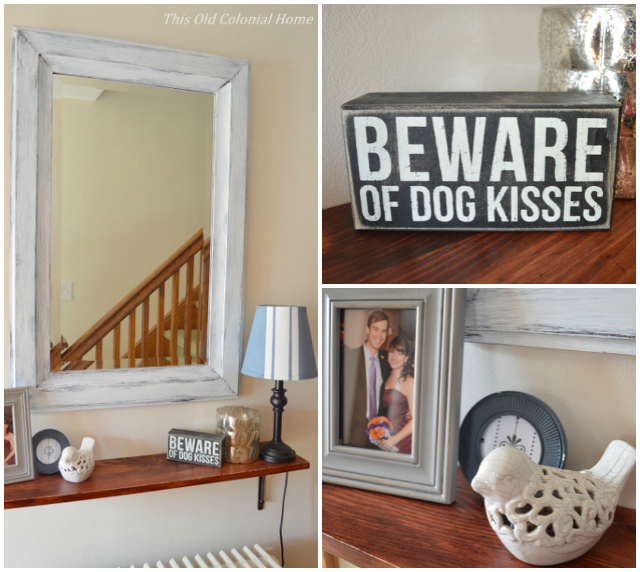
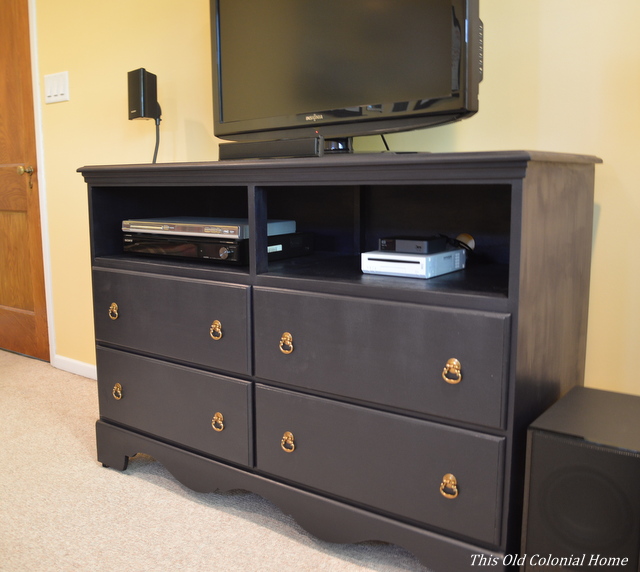
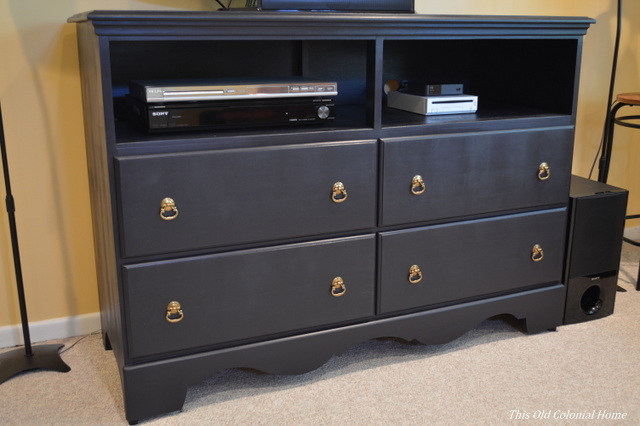
Here’s a little shelf above the crib that not only holds our video monitor, but also has faux flowers from my baby shower (see more about that here), a cute little giraffe from my friend who threw the shower, and a Beatrix Potter puzzle frame that came directly from the author’s hometown in England!Nursery shelf vignetteThis, of course, is the dresser/changing area. What I love most about it is the colorful gallery wall. But I’ll have more on that in my next post šŸ˜‰Nursery dresser and gallery wall Did you notice the rug?! We had a few issues purchasing it from Target. It kept going out of stock and then we had some shipping issues, but I’m so glad it ended up working out. It’s so soft and adds such coziness to the room. Those stars are just too cute!Circo gray stars area rug And this corner of the room might just be my favorite spot. I can already envisionĀ all the feeding, rocking, and reading to Baby M that will happen here!Gray glider gender neutral nursery I’m so glad this room finally came together. As a mom-to-be, it was important to me to be able to create a space where our little one will grow, have dreams, play, imagine, and make memories!


2 Comments

Master Bedroom Reveal

I am so happy to report that our master bedroom is finally done!Master bedroom reveal It has taken more than a year to get this room all pieced together. Gasp! Certain things just tend to hold up the process: time, money, jobs, weekends away, a baby on the way … but that’s alright. This is what real life looks like (at least for us). Who are these people anyway who can knock out a room in a weekend?!

It all started in March of last year when Jamie painted our room Cliffside Gray by Benjamin Moore and I tackled my first stencil wall. (See all the details here.)Stencil wall project in progress
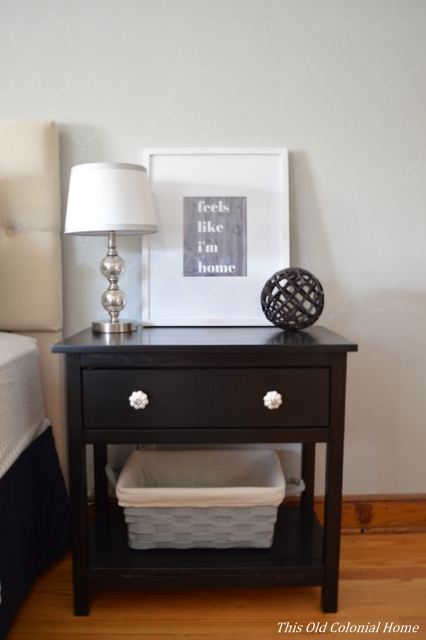
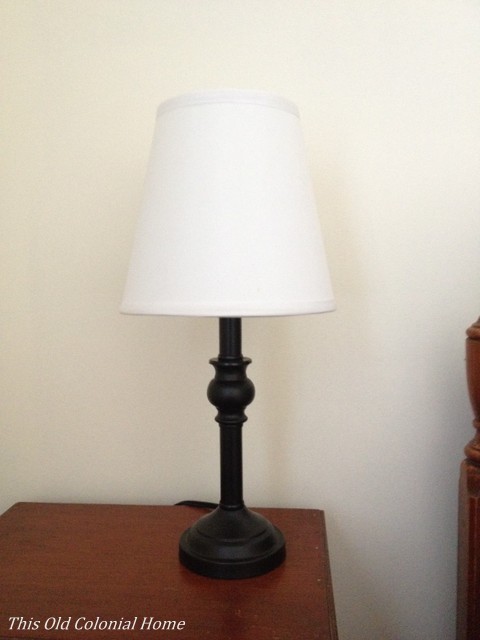
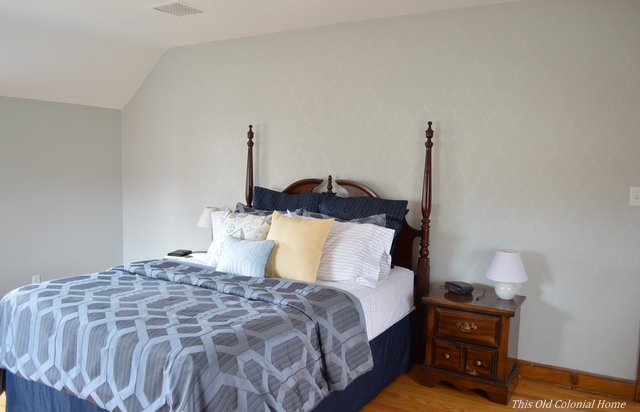
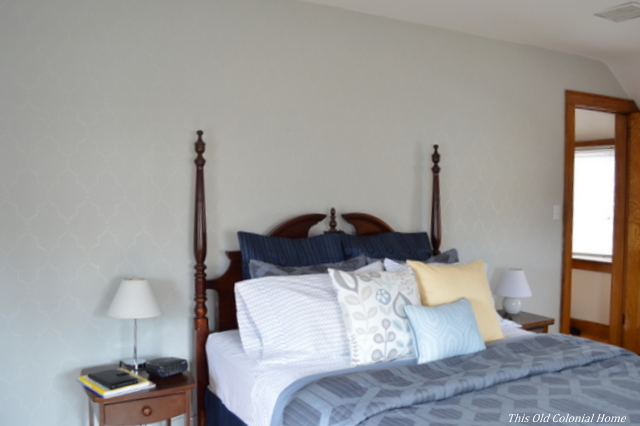
The furniture remained a hodgepodge of pieces that didn’t go together. I had bought a yellow nightstand at a garage sale for $5 that I loved. The original thought was to add another yellow nightstand on the other side of the bed, but as usual I eventually changed my mind. So the room remained in a state of mismatchedness. (Is that even a real word?!)Yellow distressed nightstand found at garage saleThe plan now is to put this pretty little piece in the nursery.

Over this past winter, the furniture started to come together a little bit better. We bought dressers from Ikea and started adding some decor.Round rustic mirror painted woodI then splurged on this accent chair from Marshalls. We had the space for it, and it was just too cute to pass up!Navy chair with silver nailhead trim We also added curtains with some industrial pipe rods (see it here). It’s amazing how curtains can make a room look so much more complete! Master bedroom curtainsAt this point I wasn’t feeling our headboard anymore. I just didn’t like the color of the wood with the new dressers. So onto Craigslist it went and the search began for a tufted one. After a few months, I found the perfect headboard on Wayfair for a crazy, awesome price! (This is not a sponsored post, but I’m telling you, you should sign up for those daily deal emails. They will literally pay off!)Tufted headboard from WayfairAnd after just a few days of ordering it, our headboard finally sold too. It was meant to be!

The ceiling fan in our room also got a nice little update. (You can read more about that here.)

So now we’re down to the final pieces of the puzzle: the nightstands.

My ever-so-handy husband built us two nightstands using these free plans from ana-white.com. Here are a few shots of his work in progress:DIY nightstand wood cuts DIY wood nightstand build progressDIY farmhouse nightstands with drawerI was then tasked with finding drawer pulls, lamps, and decor. Again, each item took a little bit of searching, but it finally all came together.DIY wood nightstand DIY wood nightstand stained ebonyMy favorite part is the artwork. Instead of buying some generic saying in the store (sorry, but I’m over the ‘Love you to the moon and back’ signs), I used Canva to create something that has more meaning to us as a couple. “When I’m with you feels like I’m home” is a lyric from the Duncan Sheik song ‘Home,’ which is the first song we danced to as husband and wife!

So as you can see, this room went through a lot of different phases. Here’s where we originally started when we first bought the house.Accent wall beforeAnd this is how it looks now!Gray blue master bedroom revealTufted headboard and bed with DIY nightstandsI truly love our master bedroom! I find it to be such a calming and relaxing space, and a true reflection of us. Is it time for bed yet?!


1 Comment

Kitchen Chalkboard Wall

Well it’s official. The entire first floor of our house is finally all repainted. The last piece of the pie was the kitchen. (Mmm … pie.) Jamie wiped the white walls goodbye with some Mint Frost by Valspar. It’s the same color we used in our dining room. I think it makes the two rooms flow nicely together.Painted galley kitchen One of the walls we left white … well only temporarily. On this wall we decided to use chalkboard paint!Chalkboard wall prepBefore painting, Jamie sanded down the wall to make it as smooth as possible. We let the paint cure for a few days before doing anything else to it. And really it sat bare for longer than it needed to because I couldn’t figured out what I wanted to do with it šŸ˜›Blank kitchen chalkboard wallI finally came up with what I wanted to display. But before doing that, I took a piece of chalk and went over the entire wall.Chalking up chalkboard paintI then wiped it clean with a little soap and water. It took a few wipe downs to get all the streaks out. I also had some residue from the rag I used, so I just took a vacuum brush to the wall once it was dry. Now I was good to go!

I found some cute kitchen pun printables on Pinterest. Since I stink at drawing and can’t really do fancy handwriting, I used a method similar to Lauren’s over at Bless’er House. I printed each pun then traced over the letters and design on the back side with chalk. Then I taped the sheets of paper to the wall and went over each letter and design on the front with a pencil. This pressed the chalk onto the wall, transferring the image.Transferring chalkboard printI could then easily color in or trace any areas that needed it. This is what it looked like after I did all four.Fun kitchen chalkboard prints It still needed something though. So I added a little border around it, included another saying (that one I did freehand, woah!), and hung a cute little bucket to hold chalk.Bucket chalk holder on chalkboard But I still really wanted something along the top. I had been thinking about an EAT sign. And it must’ve been fate because I found this beauty at Michael’s!Eat stencil letters from MichaelsHere’s the final product. I love how it turned out! It think it’s the perfect dose of industrial decor.DIY kitchen chalkboard wall Industrial kitchen chalkboard wall DIY kitchen decorWhat cool projects have you made with chalkboard paint?


2 Comments

Office Paint Job

This isn’t the most glamorous room, but it’s kinda the only DIY project that we’ve done as of late. So let’s just get real life for a moment.

Pale green home office

Before

I’ve never shown our home office before because, well, it looked like this. Please excuse the drabness. I mean it is an office after allĀ filled withĀ papers and bills and mail. Ideally, I would want it to look more like this:houzz-organized-officeBut c’mon people, is anyone’s home office legitimately that organized and clutter-free all the time? If so, then I’m seriously jealous intrigued.

Eventually we hope to improve the décor in here, but for now we decided to at least give it a new color. Jamie painted it Silver Blueberry by Olympic.

Blue home office

After

Even though they say you shouldn’t paint small rooms dark colors, I like it! It definitely feels more office-y. Maybe now I’ll be more efficient. (Probably not.)

As you can seeĀ we each have our own desks and separate computers. Jamie doesn’t want to share with me. šŸ˜› The plan is to one day build a desk in the back corner, possibly similar to the one in the above Houzz picture.

I also really want to make some pipe shelves. I think these are so awesome! Like this one. But, man, piping is pricey!pipe shelvesWe also desperately need organizers of some sort and maybe a bulletin board. Piece by piece it will eventually get there. But remember, this is real life. We have a whole entire house that we’re painting, improving, decorating, etc. It takes time and we can’t do it all at once. But it’s fun to dream up ideas and future DIYs. Am I right?


8 Comments

Bathroom Improvements

Our downstairs bathroom is finally getting a little attention. This is what it has looked like for the past year.plain white bathroom No personality and all white. Pretty boring, right? Well not anymore! Jamie breathed some life into it by painting the room Cliffside Gray by Benjamin Moore. bathroom painted Cliffside Gray by Benjamin MooreIt’s actually the same color we have in our master bedroom. Don’t you love how something as simple as paint can improve a room?!

But the biggest improvement has to be the new cabinet doors he made!

Above the toilet we have a built-in cabinet.sliding bathroom cabinet doors cabinet above toilet with paper holderIt’s great for storage, but looks kinda blah. Plus, the doors slide open and it’sĀ hard to get anything out that’s in the middle of the shelf. Also, notice where the toilet paper holder is. Not very convenient. Any new guest in our home would always comment they had the hardest time finding it! Haha! Don’t worry, Jamie fixed that too.

If you follow me on Instagram, you would’ve seen that we picked up some supplies a few weeks ago.cart with wood suppliesThis project is what we were up to. We picked up some 1×2 pineĀ boards as well asĀ some beadboard. Jamie decided to take the existing doors, make them hinged, and reface the fronts.

He started byĀ removing the doors fromĀ their trackĀ andĀ removing the handles.Ā He thenĀ used the backsĀ of the doors to be the new front. He cut the 1×2 boards and glued and screwedĀ them on to get this pattern.Refacing cabinet doors in progressJamie also spackled the seams.Ā He then decided to cut the beadboard to fit inside each individual triangle, making sure to keep theĀ pattern lined up. He attached them usingĀ glue.Ā You could put the beadboard down first, but to make it flush, you would have toĀ use a tongue and groove type process.

Once all of the pieces were in place, Jamie primed it and thenĀ gave it a few coats of white paint. He then added the hinges — 3 on each side.

Hanging themĀ ended up proving to be moreĀ difficult than we thought.Ā It was definitely a 2-person job between holding the doors up, lining it up properly, and screwing everything into place. ItĀ took some trial and error, but we eventually got it.

I think they turned out great, don’t you?! It’s hard to believe these are the same doors!Redone bathroom cabinet doorsBeadboard and x-patterned doors And here’s the highly anticipated new locale for the toilet paper holder. Much more logical!Relocated toilet paper holderWe also added these cool towel hooks that I picked up at Hobby Lobby.Towel hooks from Hobby Lobby Of course there’s more we want to do in here eventually — like replace the vanity, mirror, and lighting.Ā  But for now, this is a pretty good start!


Linking up with Bless’er HouseĀ | The Shabby Nest | Serenity Now


Leave a comment

Entryway Decor Part 3: DIY Painted Lamp Shade

With the shelf and mirror in place, the last order of business was finding a few items to put on the shelf.

Our entryway gets pretty dark and instead of having to always use the bright, overhead light —Ā a table lampĀ would be perfect. The only problem was finding one narrow enough.

IĀ checked a few stores to no availĀ before decidingĀ this lamp in our guest bedroom was the perfect size.narrow table lampBut the white shadeĀ needed a little something. I decidedĀ I’dĀ try painting it.Ā Why not?!

I wantedĀ to do horizontal lines, but because of its shape, it was easier to line up the painter’s tape vertically. For this pattern I used aĀ strip of tape in the middle and thenĀ cut a strip in half length wiseĀ for 2Ā skinnier strips on the sides.using painter's tape to make stripes I used latex paint that we already had on hand. The first coat I used a foam roller, but it didn’t go on very evenly.painting a lamp shade I did a second coat and touch-ups with a foam brush. That seemed to work better. I also ended up painting the white stripes (no, not the band haha!) with paint leftover from the mirror project. This helped give it a cleaner, more even look. Definitely make sure to check the shade with the light on when you think you’re done. It can look completely different and you can see spots where you may haveĀ missed. When doing touch-ups, I actually painted it with the light on. Sounds funny, but it worked!painted stripes on lamp shade I then added a few moreĀ small items to the shelf that I found at Marshalls. Now with all three projects complete, as well as the mason jar sconce, the entryway feels more welcoming and inviting. shelf scaping easy center hall colonial homeHow do you like to make your home feel welcoming upon entering the front door?


1 Comment

Entryway Decor Part 2: Distressed Mirror

In Part 1, I showed youĀ our distressed shelf. Now for the mirror.

Remember the one I got at an estate sale for 20 bucks? (See it here.)Ā That’s theĀ same mirrorĀ I used for this project. Originally it had peeling green paint with pink showing through.wood framed mirror with peeling paintIĀ decided to redo it withĀ a white distressed look. I hadĀ never done that before. So IĀ started searching online andĀ I found several ways to do it. I used part of one method and then sort of winged it.

I started by sanding the frame. Be sure to cover the mirror so it doesn’t get scratched. (I learned that the hard way. Oops.Ā I really should’ve known better. Luckily it was a small scratch.) The flat part of theĀ frameĀ I was able to easily sand with an electric sander, but the angled edges I had to do by hand. It got pretty tedious so I did it just enough to get the flaky paint off.sanding a wood frame mirrorI then primed the frame using aĀ foam brush. After that, I painted it brown with latex paint I had from a previous project. It took a few coats to get it dark enough. Then, I simply went over the brown paint with white paint using a bristle brush and light strokes — the idea being to let the brown show through a little.distressing a wood frame mirror diyAfter it dried, I sanded parts of the edging and corners by hand to help give it a more distressed look.Ā This might not be the perfect method to distress something, but in the end it achieved the look I was going for.DSC_0486-002Distressed shelf and mirror in entrywayThe only thing I bought for this project (aside from the mirror) was a quart of white paint for around $8. Everything else I already had on hand. I always try to use leftover materialsĀ when I can to cut down on cost.

As you’ll see coming upĀ in Part 3, I do just thatĀ to make over a plain lamp shade.


Linking up with Dagmar’s Home


2 Comments

Dresser Makeover

You may recall several months ago I snaggedĀ a freeĀ dresser that someone was throwing away. It was literally sitting in the snow amongst other garbage before I rescued it.Dresser set out for curbside trashFree 6-drawer dresser The plan was to turn it into a TV stand. After a good cleaning and sitting in our dining room through the remainder of our endless winter, that idea has finally come to fruition!

It needed to be refinished and I knew I wanted to paint it, so I started with the drawers. I took off the hardware and began sanding it with my new electric sander. (Thanks, honey!)Dresser drawer with hardware beforeUnscrewing hardware from drawerUsing electric sander on drawersI highly recommend using an electric sander for big jobs. I had a battery-powered one for a previous project and it always died quickly. Electric is way better because, in my best Tim the Tool Man Taylor impression, it has more power!Ā  I used course sandpaper – 80-grit – to start and then went back over with finer 150-grit to smooth it out.Drawer sanded downTwo drawers one sanded one not I then took the same approach on the base, going over some of the smaller areas by hand.Dresser base before sanding Dresser base after sanding The plan was to keep the top two drawer areas open. This is where we would put our DVD player and such. My husband drilled out two holes in the back for the cables to go through … and he measured, cut and added plywood to make for a sturdier shelf.Holes drilled in back of dresser for TV cablesPlywood inside dresser for sturdier shelf He also added a few brackets on the inner sides to support some minor splits in the wood.

After wiping it all down with a wet cloth, I then started to prime it. I used one coat of Zinsser Primer that I applied with a paint brush. Once it dried, I lightly sanded it with 180-grit sand paper and then wiped it down one more time. It was finally ready to paint!Drawers primed and ready for paint Dresser base primed and ready for paint I chose regular latex paint – MystifiedĀ by Valspar in semi-gloss. I applied light coats using a foam roller and foam paint brush. To get the dark look I was going for it actually ended up needing 4 coats! I thought the painting would never end! The drawers weren’t so bad, but doing the shelf area was kind of a pain.Navy painted drawers In progress painting of dresserPainted dresser with 4 coatsI’m not sure how necessary it was, but I also ended up sealing it with Minwax Polycrylic. It was easy to spray on and I was able to do the recommended 3 coats pretty quickly.Polycrylic spray can Once it was dry, I added new hardware, which I had ordered from Lowe’s. Love this antique look!Brass drawer pulls from Lowes The entire project definitely took me way longer than I had anticipated (3 separate weekends), but IĀ am so happy withĀ how it turned out! And all of my hard work paid off, literally —Ā the total cost was less than $100!!

Dresser before diy project

Quick reminder of the before

Dresser turned TV stand for family room DIY dresser into TV console TV stand from old dresser Turn a dresser into a TV stand DIY


Leave a comment

Shades of Gray

I’ve beenĀ wanting to paint our master bedroom gray, but little did I know howĀ hard it would be to find the right shade. IĀ picked up aĀ few paintĀ cards from Lowe’s. But I really didn’t like any of them once I had them on the wall.Gray paint card samples with undertonesThe problem with gray is it has so many different undertones – brown, blue, green, etc. IĀ was really looking for a true gray without an undertone. After doing a lot of online searching, I then started looking at Benjamin Moore paints. After going through several options …Pile of gray paint card samples … my husband and I finally decided on Cliffside Gray by BM. ItĀ looked to be the truestĀ gray inĀ the lighting in ourĀ bedroom.

Of course, once we actually got the paint on the walls it was a little darker and had more blue in it than I wanted, but it still looked nice. I think part of the problem was that our blue bedding was affecting the color.Dark blue bedding with gray walls Gray walls with dark blue comforter I hadn’t anticipated needing or wanting to change our bedding, but I had to do something soĀ the roomĀ didn’t look so dull.

In between that search, we also planned on adding an accent wall using a stencil.Ā  I found thisĀ one called Marrakech TrellisĀ from Cutting Edge Stencils.Cutting Edge Stencils Marrakech TrellisJamieĀ had painted the whole room in a matte finish. For the stencilĀ I used the same Cliffside Gray color, but in a semi-gloss finish. This isĀ a shot taken during the process.Stencil wall project in progress It was fairly easy, but painstakingly slow. The main thing I struggled with was getting each section to line up. But IĀ love how it turned out!Ā Here are some pictures of the transformation from when the room was all white to where it is today.

Master bedroom before

Before

Master bedroom after

After

Accent wall before

Before

Accent wall after

After

Master bedroom bedding before

Before

Master bedroom bedding after

After

Did you notice the improved bedding as well?! Instead of breaking the bank by getting a whole new set, I made 3 simple changes.Ā I added the white and grayĀ chevron patternedĀ sheets, which IĀ found at Kohl’s for only $30 (after a 30% off coupon). I added the colorful pillow, which I found at Marshall’s for $17. And I simply changed the way I make the bed – pulling the comforter down and folding it halfway up to expose more of the sheets. I feelĀ this helpsĀ break up the blue. Doesn’t the bed look so much more inviting now?!Cutting Edge Stencil accent wall in master bedroom


Leave a comment

Another Paint Job

Our family room is still very much a work in progress. But at least now it has new paint color, and we can check another all-white room off the list! We went with Honey Butter by Olympic. Here are some before and after shots. (Please ignore our current TV setup.Ā It will eventually get changed when I get that dresser redone.)

IMG_1678

Before

DSC_1484

After

IMG_1680

Before

DSC_1492

After

IMG_1679

Before

DSC_1486

After (We also hung some wedding photos)

Aside from the dresser, I’m also working on trying to find a coffee table and end tables for this room, as well asĀ dĆ©cor to fill the other blank walls. Little by little.

Meantime, next up on the paint list is our bedroom!! I’m thinking a light gray.Ā What are some of your favorite colors for the boudoir?