This Old Colonial Home

Filling our house with love and a lot of DIY


1 Comment

Entryway Decor Part 2: Distressed Mirror

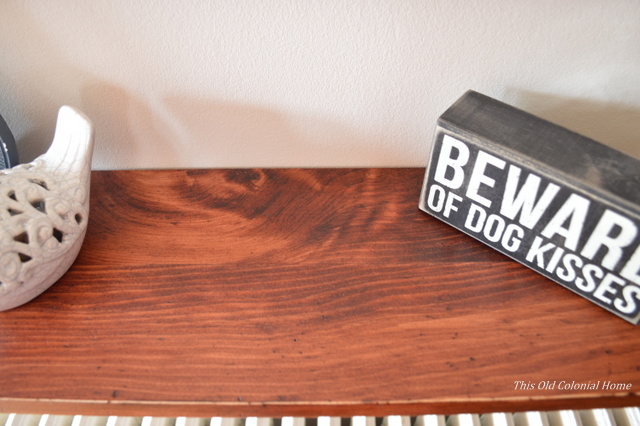
In Part 1, I showed you our distressed shelf. Now for the mirror.

Remember the one I got at an estate sale for 20 bucks? (See it here.) That’s the same mirror I used for this project. Originally it had peeling green paint with pink showing through.wood framed mirror with peeling paintI decided to redo it with a white distressed look. I had never done that before. So I started searching online and I found several ways to do it. I used part of one method and then sort of winged it.

I started by sanding the frame. Be sure to cover the mirror so it doesn’t get scratched. (I learned that the hard way. Oops. I really should’ve known better. Luckily it was a small scratch.) The flat part of the frame I was able to easily sand with an electric sander, but the angled edges I had to do by hand. It got pretty tedious so I did it just enough to get the flaky paint off.sanding a wood frame mirrorI then primed the frame using a foam brush. After that, I painted it brown with latex paint I had from a previous project. It took a few coats to get it dark enough. Then, I simply went over the brown paint with white paint using a bristle brush and light strokes — the idea being to let the brown show through a little.distressing a wood frame mirror diyAfter it dried, I sanded parts of the edging and corners by hand to help give it a more distressed look. This might not be the perfect method to distress something, but in the end it achieved the look I was going for.DSC_0486-002Distressed shelf and mirror in entrywayThe only thing I bought for this project (aside from the mirror) was a quart of white paint for around $8. Everything else I already had on hand. I always try to use leftover materials when I can to cut down on cost.

As you’ll see coming up in Part 3, I do just that to make over a plain lamp shade.


Linking up with Dagmar’s Home


2 Comments

Entryway Decor Part 1: Easy DIY Shelf

We’ve been churning out several projects faster than I can post about them!

Take for instance the latest addition to our entryway. This alone contains 3 DIY projects!!shabby-chic-shelf-and-mirrorLet me start with the shelf.

First of all, the walkway by our stairs is somewhat narrow, and having a radiator there doesn’t help much. It used to have a cover over it, but we removed it to make a little more room.Narrow foyer with staircase and radiatorThat worked, but we still needed somewhere to drop our keys, sunglasses, etc. A table didn’t seem logical so we decided to build a shelf instead. We wanted a somewhat rustic look using wood and metal.

Reclaimed wood and old iron brackets would be ideal for something like this. But we didn’t want to have to search high and low for materials, so we headed off to Lowe’s. We picked up a 6 foot piece of 1×4 pine and 2 metal brackets for around $20.

Jamie cut the board in half and screwed them together using pocket holes that he made with a Kreg jig. We now had a shelf that was 36″ long by 7″ deep. The top of it was a little too smooth for my liking … so I beat it up! I put a bunch of screws in an old sock and banged it against the wood. I also made random markings using both a hammer and a screw driver. (This is a good opportunity to release some stress!) Once it no longer looked new, I brushed two coats of Minwax Bombay Mahogany stain on it.Make markings on wood for aged lookAfter it dried, I went over the edges and corners with sand paper to make it look a little more worn. You can do this as much or as little as you want.Sand edges of wood to look agedJamie then attached the brackets to the wood and hung it on the wall. Such an easy and affordable DIY project!Wood shelf attached to wall with bracketsComing up in Part 2, I’ll show you how I distressed a wood-framed mirror.


5 Comments

Mason Jar Sconce

In our entryway we have a doorbell niche. It’s a long, narrow cutout in the wall with only the chime at the top. It’s a plain feature that’s been begging for a little pizazz. (Sorry, I forgot to take a “before” picture.)

I toyed with the idea of tiling it or painting it a different color. I still may do the latter someday. But for now, I decided it would be a good place for flowers. I thought maybe a nice, faux orchid … but while scouring Pinterest I stumbled upon a mason jar sconce. It seemed like an easy and inexpensive DIY project and one that would go with our vintage style décor.

Simple jar sconce

Found on Pinterest

For this project all we needed was a mason jar, a piece of wood, a pipe clamp, stain, and flowers. We already had a mason jar and we used a piece of scrap wood as well as stain left over from Jamie’s awesome coffee table. I picked up a pipe clamp from Home Depot for only around $1.50. More on the flowers in a moment.

Jamie ended up taking the lead on this quick DIY while I worked on another project. He cut the board, sanded it, rounded the edges and stained it. Once it was dry, I simply hand sanded the corners a little to make it look worn. He added a sawtooth hook to the back and then nailed the pipe clamp to the board and tightened it around the mason jar.Nail pipe clamp to wood

Attach mason jar to wood with pipe clampAs for the flower part of it, I found some clear, vase filler gems at Target for under $5 and I chose a fake hydrangea from A.C. Moore for under $4. You could really fill it however you want. But I like how this adds a little pop of color to the room!Easy DIY wall sconce

Shabby chic decorBall jar with hydrangeas and vase fillerPop of color in entrywaySuch a simple solution that helps make the entryway feel a little more welcoming.

We’re adding a few more additions to the foyer … so look for that soon!


Linking to:

Serenity Now | DIY on the Cheap | The Shabby Nest


Leave a comment

Lighten Up

My husband and I currently have several little projects going on all at once. One of those projects was replacing the two light fixtures in our entryway. They were simply old, ugly, dated and not our style.

entry lights

Before

Ideally, I wanted something simple above the door and something a little fancier in the main part of the hallway, and of course, something that would go well together. After much time spent searching online, we finally found two we liked. We ended up receiving the fixtures for Christmas (thank you Barb, Jim & Maureen!)

It was one of the first things Jamie tackled when we returned home. It’s amazing how such a small change can make such a big difference!

light 2

After

light 3

Above the door

light 1

Main hallway

Jamie is also working on painting the upstairs bathroom and the dining room, while I’m working on some artwork for the living room. What projects are you working on already in the new year?


Leave a comment

There’s No Place Like Home

After 4 months, our house is finally starting to feel like home! Every change we make, it becomes more and more our own.

In the living room, we finally have furniture. It’s been an empty and echoey room up until now. We picked up a sectional my mother-in-law had for us. So that went in the family room where our nicer couches had been, and we could finally move these into the living room.

DSC_0002

DSC_0003

We also changed out the chandelier in the dining room. That wasn’t something we planned on doing right away, but my dad had this beauty lying around and gave it to us. I think it really softens up the room and even matches our table really well! It had been a gold candle chandelier before.
DSC_0005

DSC_0006

And the biggest difference is in the entryway. We had a stair runner installed last week. I love the sage color! We also took down the handrail that ran up the wall, which I think gives it a much cleaner look.

DSC_0011

DSC_0012

It’s all about baby steps (no pun intended!) What changes have you made to make your house feel more homey?


Leave a comment

We’re Floored

Our hardwood floors are finally finished, and wow what a difference! We brought professionals in to do the job. For the past week they worked hard to bring them back to life. They spent a few days just sanding them down. Then they stained them Minwax Golden Oak and added a feature strip in the entryway per our request. They added several coats of water-based poly and finished it off with shoe molding (that’s the molding that fills the gap between the baseboard and the floor). I’ll let the pictures speak for themselves, with a reminder of where we started just a short time ago.Colonial house living room with fireplace beforeCarpet ripped up in living room hardwood floors refinished minwax golden oak Colonial house dining room with carpet before Dining room with carpet removedDining room hardwood floors refinished minwax golden oak Center hall colonial stairs with carpet before Carpet removed from stairs Entryway floors refinished Minwax golden oakEntryway landing with unfinished floors Entryway floor feature strip in progress Refinished entryway landing with feature accenting herribone pattern


Leave a comment

Uncovering the Past

I will never understand why people cover up hardwood floors. Obviously styles change throughout the years, but I just feel hardwoods are timeless. So after years of being hidden under carpets, our 75-year-old floors are once more revealed! My husband and I, with some help from my father-in-law, pulled up the carpets ourselves. None of us had ever done it before, but it was a fairly easy – and FREE – project.

IMG_1233  IMG_1236

The carpet, padding and staples all came up with little effort. The tack strips, however, were the hardest part. The guys eventually got it down to a science. But needless to say, I wasn’t much help in that department. My job was to make sure our dog didn’t step on the nails!

IMG_1224  IMG_1247

All that’s left to unearth are the stairs. That’ll be for another day in the near future.

IMG_1239  IMG_1248

The condition of the floors aren’t too bad, but they will need to be refinished. And for that, we’re calling in the pros. I realize we could save some money if we rented a sander and did it ourselves, but for something like this we don’t want to run the risk of screwing it up! Plus, did you notice the awesome herringbone edging?! I’d hate to mess that up.IMG_1249We’re still debating whether we want to do a darker stain trim around the edge to accentuate it. We definitely plan on doing something in the entryway, but I’m torn on doing it in all three rooms. Any thoughts? Either way, I can’t wait to see these babies shine! Be sure to check back to see the final product!