This Old Colonial Home

Filling our house with love and a lot of DIY


10 Comments

Improvised Thanksgiving

In just one week, we will gather with family and friends to give thanks for the blessings in our lives and sit down to what is — in my opinion — the best meal of the year!

Even though we aren’t hosting Thanksgiving, I wanted to create a tablescape nonetheless because it simply makes my heart happy 🙂Thanksgiving table set up in living room with fireplace I decided to create and share a sort of “makeshift” Thanksgiving table. Some of us might not have the ideal setup — maybe you don’t have a formal dining room, maybe your table isn’t big enough to fit everyone, maybe you don’t have fine china. That doesn’t mean you have to sacrifice a welcoming place to eat.

All it takes is a little improvising.

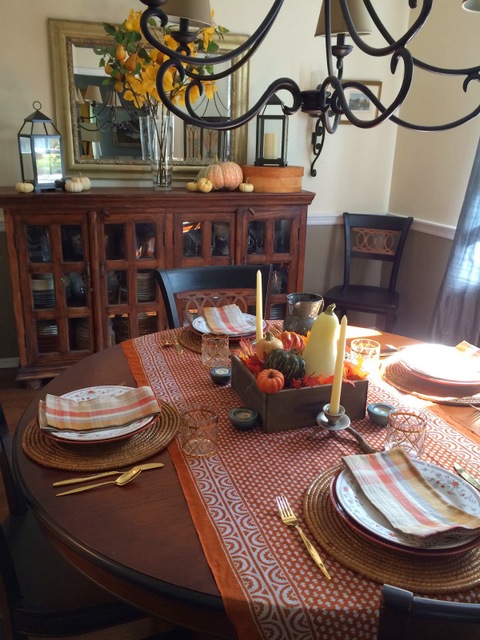
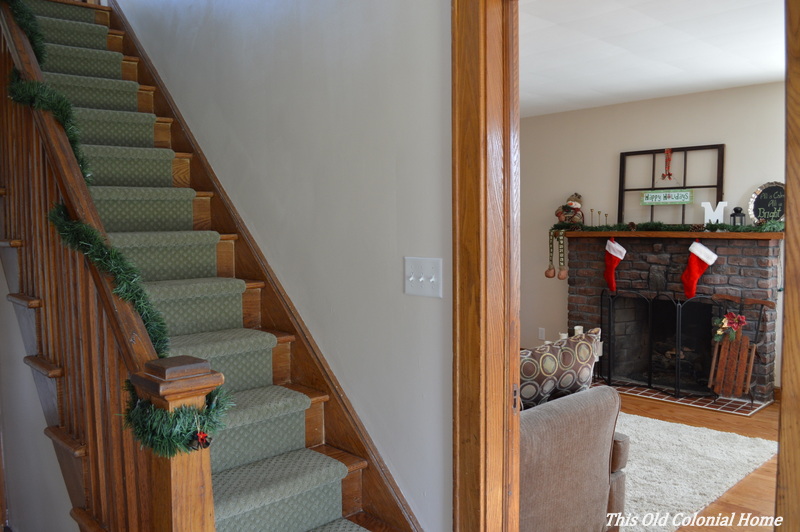
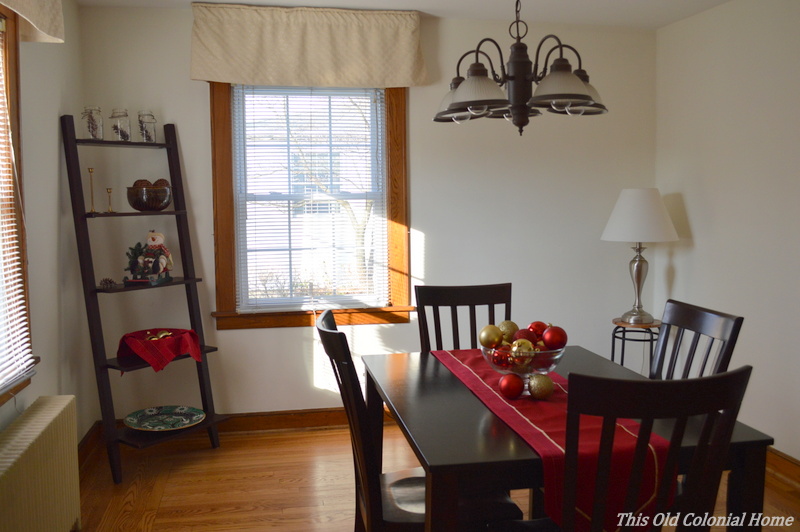
Jamie and I have a formal dining room, but not a big, formal dining room table. So I chose to set up a folding table in our living room where we could have more seating and better ambiance. I moved the coffee table out of the room in order to have enough space.Makeshift folding table for Thanksgiving Since we don’t have a big table that means we also don’t have a big tablecloth. But not to worry — I just used a full-sized flat sheet.  Bed sheet as tablecloth
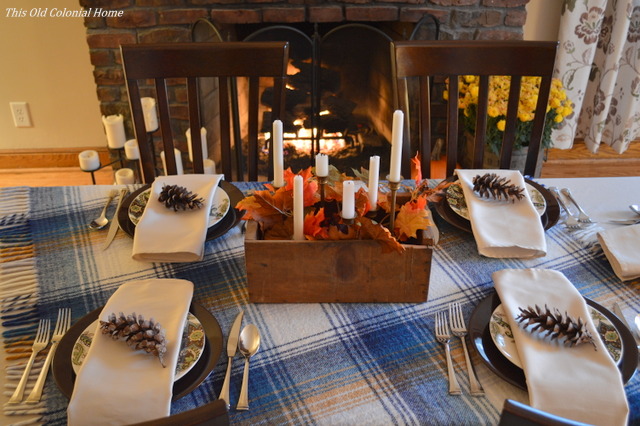
To give the table some more texture and color I added a plaid throw (which by the way I found at an estate sale for $4!)Plaid throw blanket as part of tableclothI then assembled each place setting. We don’t have charger plates or fancy china, so I just used our everyday plates (the ones that aren’t chipped) and our Oneida flatware that we also use daily.Brown, green, and blue dinner plates with flatware 
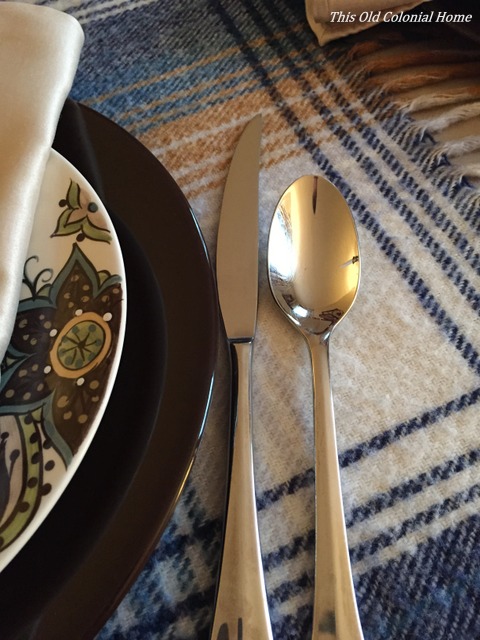
I love the pattern on our salad plates. The brown goes nicely with the dinner plate and the blue pairs well with the throw. I then simply put a folded linen napkin on top of the plates and added a pine cone to each setting.Thanksgiving place setting with napkin and pine coneI love bringing in a little bit of nature. It adds such a sense of warmth, don’t you think? Plus it’s free!!

As for the centerpiece I used a wooden box that we had, filled it with a faux leaf garland (though you could certainly use real leaves if you like), and inserted brass candlesticks of varying heights.Wooden box with candles and leaves for centerpieceRustic, wooden Thanksgiving centerpiece I used our dining room chairs for seating and incorporated our living room accent chair for the head of the table. I also used my new, no sew placemat pillow. I like how they both add to the color palette and even tie in nicely with our plates!Accent chair at head of table 
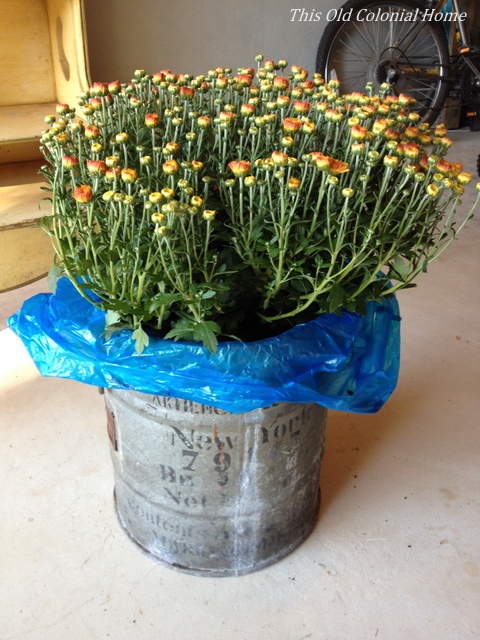
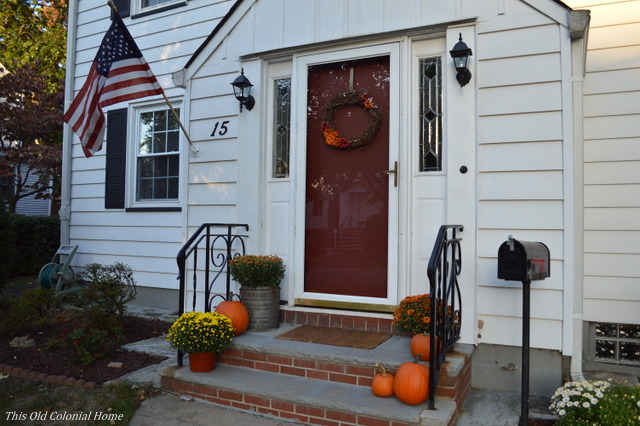
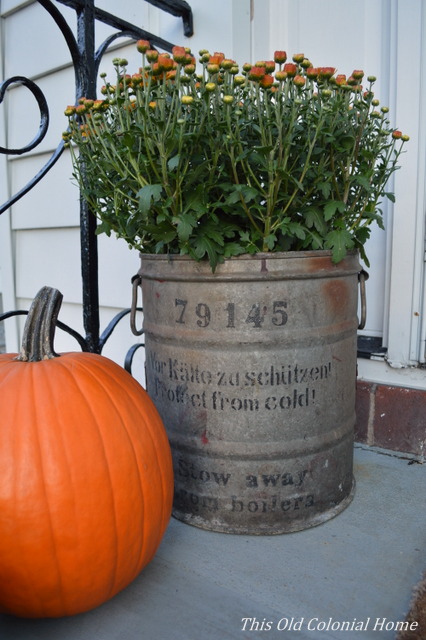
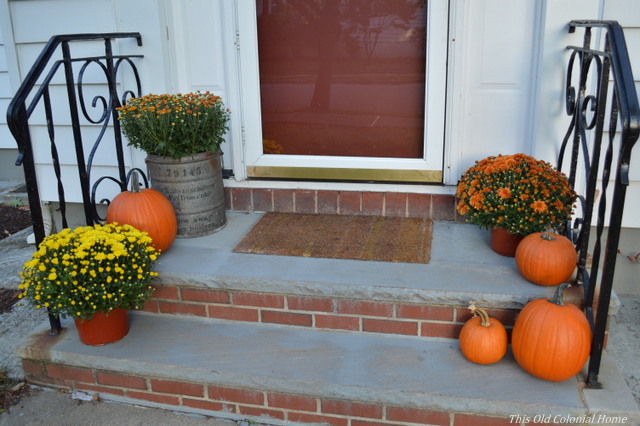
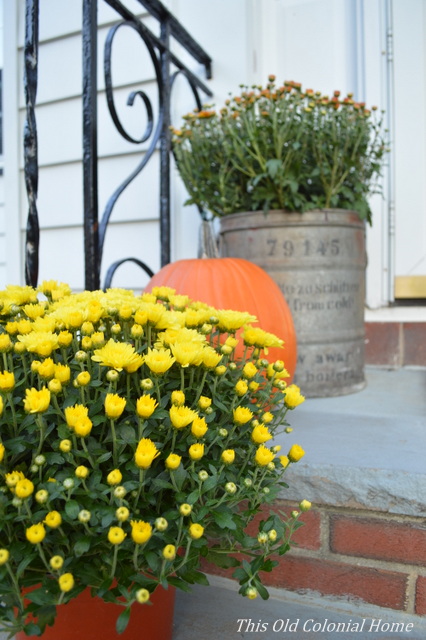
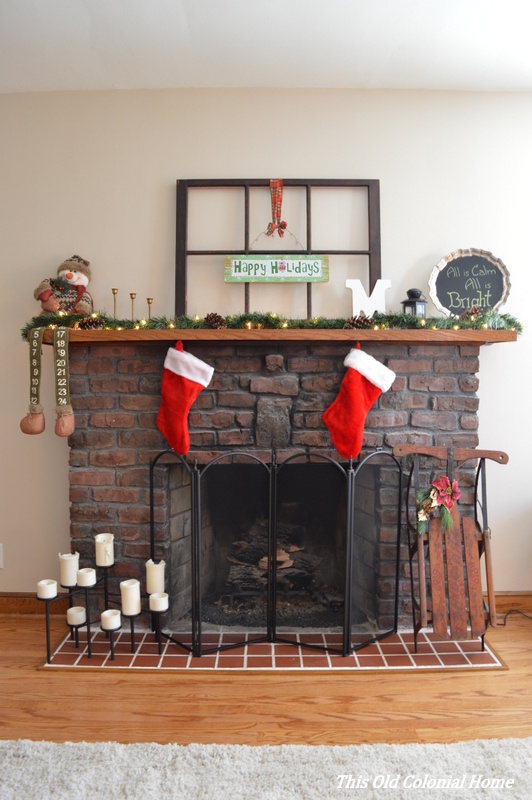
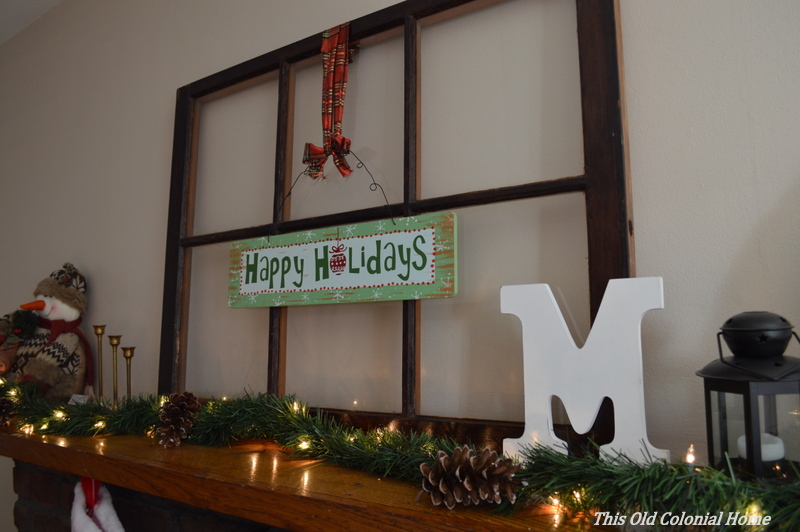
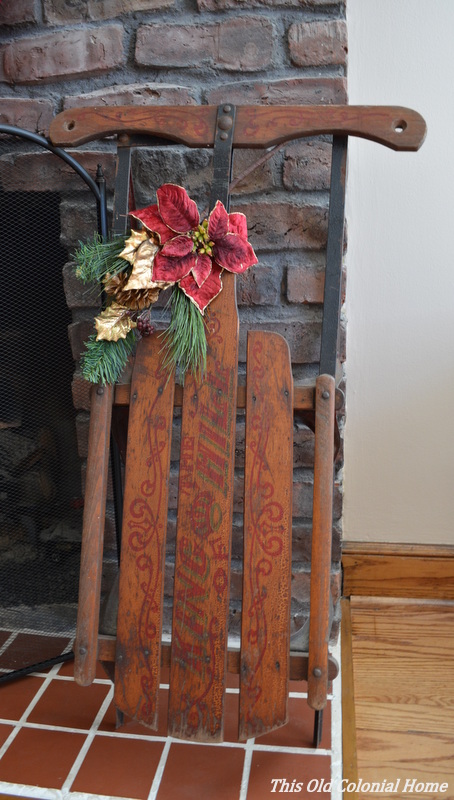
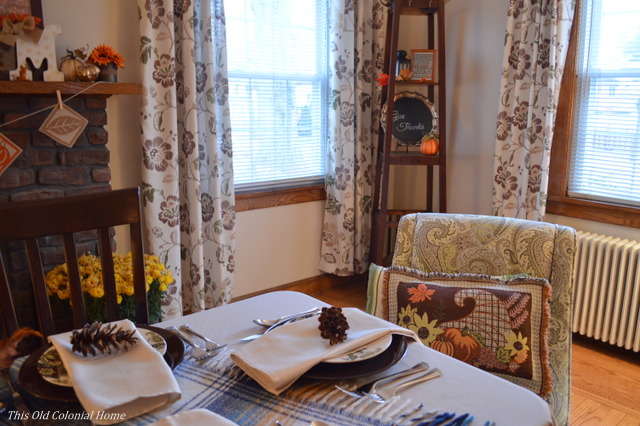
The only other thing I did was add a few pieces to the mantel and hearth. I brought in a pumpkin and mums from our front steps to make it feel more rustic. And of course I lit the fire. Now we have a cozy and inviting Thanksgiving table!Rustic Thanksgiving mantel and tablePlaid and rustic Thanksgiving tablescapeWarm candlelit Thanksgiving table
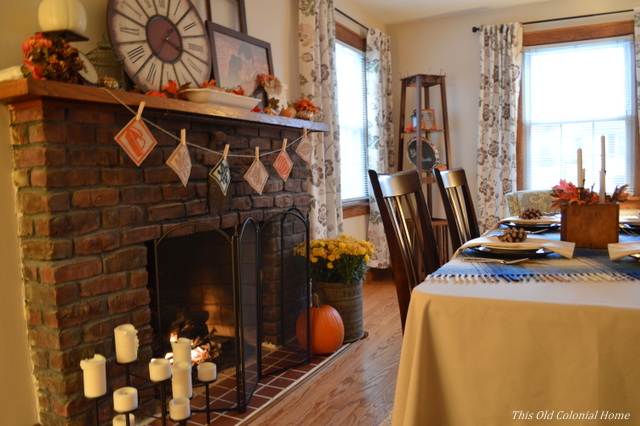
I love creating a special place to eat, but what’s really important is not the table, but those gathered around it.

I hope your Thanksgiving is filled … er stuffed with blessings!


6 Comments

Gather ‘Round the Table

Halloween is over, which means it’s time to start thinking about Christmas Thanksgiving. Though the carols are already playing and the stores have quickly converted, let us not forget this beautiful holiday that falls between October 31 and December 25.let-us-give-thanks-graphicAnyone who knows me, knows that Thanksgiving is my favorite holiday. In my opinion, it’s the epitome of the autumnal season with its crisp air, cozy fires, and delicious aromas. It’s a day we give thanks and are grateful for all the blessings in our lives (and consumerism gets checked at the door). It is also a day to slow down and gather ’round the table with family and friends. And since the table is such an integral part of Thanksgiving, I always try to make it special.Big Thanksgiving tablescapeHere is my table from last year. I made menus and place cards, and brought in natural elements like pine cones. I also used candles in the centerpiece and the chandelier. (You can see more here.)

As I’m starting to plan for this year, I am so inspired by fellow bloggers and their creativity.ballyhoo-and-bedbugs-thanksgiving-tablescapeI immediately fell in love with this tablescape from Eleanor at Ballyhoo and Bedbugs. The colors are so warm and inviting. Her plates are vintage and elegant. And I love how she sprinkled in gold with the flatware and glasses. The napkins radiate the colors of the season and blend so nicely with the table runner. And speaking of the table runner — can you believe it’s actually a scarf from Old Navy?! Genius!++++Fall and rustic elements just seem to be the perfect combination, don’t you think? Amy over at Home Remedies encaptures this beautifully in her dining room. I love the big, overflowing wooden box centerpiece and the burlap runner. They pair so well with her classic white dishes and antique table. You also can’t go wrong with pumpkins and a big chalkboard on the buffet. So lovely!white-buffalo-styling-co-thanksgiving-tablescapeI can’t get enough of this table from Lindsay at The White Buffalo Styling Co. There are so many natural elements incorporated here. I just want to wrap myself in a throw and take in this beautiful outdoor ambience. Don’t you just love those wood round chargers?! I also love how she used little tree stump platforms in the centerpiece. Even the napkin rings and place cards are fantastic. The rings are made of small grapevine wreaths and the cards tied with twine. Absolutely divine!

I could search for hours and gaze at everyone’s beautiful tables! I am truly inspired! And based on my selections, I think it’s safe to say that I’m leaning toward a warm, rustic approach this year. I hope to share my creation with you later this month. I invite you to come back and gather ’round my table.

What elements and ideas do you like to use when creating tablescapes?


4 Comments

Fall in a Bucket

A few weeks ago I snagged a rusty, metal bucket at a garage sale. (Where else?) It has this cool German and English writing on the side.Rusty bucket with German writing I don’t know its history, but I loved it too much to pass it up, so I bought it even though I didn’t know what to do with it. (Story of my life.) I took to Hometalk to get some ideas. A few dozen people offered up some great suggestions. Danke schon!

My original thought was to turn it into a planter, and I decided to stick with that. It would be a great addition to my fall décor! So this weekend I finally tackled the project.

I started by giving the bucket a good cleaning – using the hose and bar keepers friend. Jamie then drilled some holes in the bottom for drainage.Drill holes in bucket for planterDrill holes for drainage The bucket is kind of deep and I didn’t want to use a lot of potting soil (I had a limited supply), so I put some milk jugs in the bottom.Plastic milk jugs as fillerGardening is not really my thing, but since I don’t know what this container used to hold, I figured it wouldn’t hurt to use a plastic bag as a liner. I cut holes in the bottom of that too and then put the soil in it.Potting soil in liner bag for bucketOnce I had enough soil in place, I inserted potted mums that I had bought and then filled in more soil around it.Cut away remaining visible bag Afterwards I cut off the remainder of the bag that was visible. And that’s it! This was such a quick and easy project! That’s so rare. I just hope it works out for the flowers!

So — for now at least — we have this fun, new piece on our front steps among a few other mums and pumpkins. What do you think?Pumpkins and mums on front steps Rusty bucket turned fall planterFall front stoopYellow mums and planter Metal planter and pumpkinWhat would you have done with this rusty piece?


5 Comments

Mason Jar Sconce

In our entryway we have a doorbell niche. It’s a long, narrow cutout in the wall with only the chime at the top. It’s a plain feature that’s been begging for a little pizazz. (Sorry, I forgot to take a “before” picture.)

I toyed with the idea of tiling it or painting it a different color. I still may do the latter someday. But for now, I decided it would be a good place for flowers. I thought maybe a nice, faux orchid … but while scouring Pinterest I stumbled upon a mason jar sconce. It seemed like an easy and inexpensive DIY project and one that would go with our vintage style décor.

Simple jar sconce

Found on Pinterest

For this project all we needed was a mason jar, a piece of wood, a pipe clamp, stain, and flowers. We already had a mason jar and we used a piece of scrap wood as well as stain left over from Jamie’s awesome coffee table. I picked up a pipe clamp from Home Depot for only around $1.50. More on the flowers in a moment.

Jamie ended up taking the lead on this quick DIY while I worked on another project. He cut the board, sanded it, rounded the edges and stained it. Once it was dry, I simply hand sanded the corners a little to make it look worn. He added a sawtooth hook to the back and then nailed the pipe clamp to the board and tightened it around the mason jar.Nail pipe clamp to wood

Attach mason jar to wood with pipe clampAs for the flower part of it, I found some clear, vase filler gems at Target for under $5 and I chose a fake hydrangea from A.C. Moore for under $4. You could really fill it however you want. But I like how this adds a little pop of color to the room!Easy DIY wall sconce

Shabby chic decorBall jar with hydrangeas and vase fillerPop of color in entrywaySuch a simple solution that helps make the entryway feel a little more welcoming.

We’re adding a few more additions to the foyer … so look for that soon!


Linking to:

Serenity Now | DIY on the Cheap | The Shabby Nest


1 Comment

Garage Sale Scores

If you’ve been following my blog, you know by now that I love a good garage sale, yard sale, estate sale, etc. I go through the classifieds of the local paper every Friday morning to see where sales are happening on the weekend. I also get a weekly email for estate sales in my area. I don’t get a chance to go every weekend, but I try to make an effort when I can. And lately I’ve been snatching up some pretty good stuff!

A few weeks ago I snagged this wooden rustic-looking mirror at an estate sale.wood framed mirror with peeling paintIt was $20 and I thought it’d be perfect for our entryway. However, once I got it inside the color didn’t really go. I’m now in the middle of painting it. (Look for that post soon.) I think it’s still a bargain when mirrors tend to be $50 and up!

Yesterday I stopped at a sale on my way home from work that I had seen going on the day before. I managed to get this white medicine cabinet for only $10!medicine cabinet from garage sale We could use one in our upstairs bathroom. I thought it might need to be spray painted but it just needed a good cleaning. Now we’re just hoping it fits in the space above the toilet. Even if it doesn’t, I can always resell it.

Oh I also picked up these two Christmas pillows for $5 total (Christmas in July)!red and green christmas throw pillows People always seem to be getting rid of decorations, so yard sales are a great way to find a bargain. Plus can you ever have too many Christmas decorations?! Well, maybe if you’re Clark Griswold!

And then just today I was running around town doing errands when I passed a garage sale. I went around the block and came back around to check it out. You never know what you might find! And I’m glad I stopped. I walked away with this cool bottle and this pretty sweet book shelf for only $15!!clear glass bottle with stopper rustic wood and metal bookshelfI’m still not sure what I’m going to do with it yet. But I liked the wood and metal of it too much to pass it up for that price! We’ve got a lot of house to fill so I’m sure I’ll find a spot for it somewhere.

What treasures have you come across lately?


6 Comments

Final Piece

You’d think with it being summertime I’d have plenty of finished projects to share with you. But that’s not quite the case. My husband and I have been spending our free time traveling and doing summery things (i.e. barbeques and relaxing) and not too much around the house.

But just so you don’t think we’re completely lazy, there is one minor thing worth noting. I FINALLY picked out curtains for the living room — which makes the room done!! It’s something that I’ve had in the back of my mind since at least March. That’s when I bought curtains from Home Goods that I thought I liked, but really only liked the price (2 panels for $16.99). I only just returned them this past weekend. Oy!

I had also picked up curtains from Lowe’s that later got returned. And then I bought 2 other curtains from Lowe’s in the same pattern but different colors. I even took a survey on Instagram (@oldcolonialhome) to get some opinions. Why is this such a tough decision?! curtainsOf the 2 I chose these! And I love them! I thought I would want blue to pick up the other accents in the room, but the brown/green ones ended up looking better in person. DSC_0462The best part about being indecisive? The price came down! All 4 panels cost less than $60 total after tax!! I’m so happy this is done. It was the very last piece to the puzzle. The living room is completely finished! Check mark! DSC_0446DSC_0453DSC_0450And in case you missed it, our living room is also “award-winning.” 😛  I entered a contest on Pinterest — #PinItToWinIt by HouseHunt.com. All you had to do was post before and after home improvement pictures to become entered to win a $50 gift card to Home Depot, and they ended up choosing my entry! Fun! You can check out their article here.

Jamie and I hope to accomplish a few more projects this summer … unless the dog days get to us first! What about you — do you plan on using the warmer months to get stuff done or to slow down a little?


Leave a comment

Mirror, Mirror on the Wall

A few months ago I was visiting a friend and I noticed she had window-pane mirrors in her finished basement. They looked awesome! I immediately knew I wanted to incorporate something similar in our own house. After doing a little online searching, I realized it would be more affordable if I took matters into my own hands. Besides, I already had a 6-pane window going unused. (It’s the bottom half of the window that’s on our mantel.)6-panel window pane Now I had to figure out how to turn the window into a mirror.

Solution found: Rust-Oleum Mirror Effect spray paint!Mirror effect spray paintI ordered it from Home Depot. It’s a little pricey at $8.50 for a 6 oz. can (and I bought two), but when I consider that $17 is all I spent for this project, I’d say that’s pretty good.

So I started by taping off the window. It has dark wood on one side and light wood on the other. I wanted the lighter side to be the front so I taped off the back. You spray paint the reverse side to create the reflective mirror-like finish. Taping the window was pretty time consuming. You might even say it was a pain! Haha get it?!Tape off mirror before painting Taped off window pane for spray paintingMy first attempt at trying to paint it back in January didn’t go so well. The can says it needs to be between 50 and 90 degrees with 85% or less humidity. I tried doing it in our garage on a rainy day and I think it was just too humid out. The paint was very runny. So I had to wait for better weather, which meant I had to wait awhile since it’s Winter in the Northeast. Spraying inside definitely wasn’t an option. The smell is very strong. But finally, this past weekend was nice enough, and this go around was much better! It took several light coats to get the desired mirror effect.Spray light layers of paint on glass Thin layers of mirror effect spray paint Final layers on reverse side of window It doesn’t have a perfect mirror finish, almost an aged look to it. But I love how it turned out!View of mirror effect from the front After adding some hardware to the window and using anchor screws, we decided to hang it above the love seat in our living room.diy window pane mirror in living room easy window mirror using mirror effect spray paint 6-pane window mirror above couch easily turn a window into a mirrorThere actually used to be a window along this wall (most likely this very window) but it was closed up after an addition was put on the back of the house. I kind of like that part of it is now back where it used to be!


1 Comment

Everyday Mantel

Yes, I’m doing yet another post on our fireplace. You’ve seen it decked out for Fall and Christmas, but now I wanted to share our ‘everyday’ mantel.

With all of the other projects we’ve been working on (aren’t there always projects?!) – it’s taken me a little while to get to this. But I finally incorporated some new items we received and I’m pretty happy with it. It just needs some candles, though I don’t mind the candlesticks just by themselves. What do you think?Brick fireplace with rustic mantel decorI decided to keep the old window, which I had used at Christmas. We got this great clock from Hobby Lobby as a Christmas gift from my parents. The crock was a gift from Jamie’s mom. All the other items we already had, except for the brass owl. That was a flea market find from my Dad. And don’t you just love old, hardcover books?Vintage scale and old hard-covered booksRustic mantel with window pane and clock So I think this will pretty much be how the mantel remains throughout the year – until I get bored with it haha! But right now I’m loving its simple, vintage vibe!


3 Comments

Deck the Halls

Since Thanksgiving fell so late this year, we quickly had to turn from thankfulness to the Christmas craziness. I don’t know about you, but I just can’t allow myself to get into the holiday spirit until after Thanksgiving, even if that does mean there are only 4 weeks left (eek!). That being said, we wasted no time this past weekend getting ready for the first Christmas in our new home.

The first thing I tackled – after cleaning – was the mantel. I didn’t really have a plan of attack. The only thing I knew I wanted to incorporate was a 6-pane window I found in the attic of our garage. So I started with that and worked around it using items I already had. One issue I encountered – there’s an outlet on the wall above the mantel, which you can easily hide with a picture or clock, but with a window, not so much. In comes the “Happy Holidays” sign. I decided to hang that from the window using gift wrapping ribbon and voila, the outlet is now strategically hidden!

window-001

I continued to go through our Christmas storage bins, picking out anything that caught my eye and might work. I used pre-lit garland, candle sticks, my favorite chalkboard platter, and real pine cones left over from my Thanksgiving place card holders! Oh and remember those two wooden sleds I snagged for free (see post here)? I used the smaller one by the fireplace, adding a little faux garland to it. Here’s the final result:

DSC_0022-001

 DSC_0023 DSC_0025 DSC_0026  DSC_0029-002DSC_0033

In the dining room, I changed out the table runner and added a simple glass bowl filled with ornaments. I also put a few decorative items on the ladder shelf, including 3 mason jars with pine cones inside, to carry over from the living room.

DSC_0057

DSC_0036 DSC_0040 DSC_0043

Outside, I used the larger sled on our front steps. I added real pine branches, which I found in someone’s curbside leaf pile, and I used that same gift wrapping ribbon for the bow! I am beyond happy with this decoration. It was completely free!

sled

And, of course, it wouldn’t be Christmas without lights! I placed candles in all of the front windows and my husband adorned the bushes. I love white lights, they’re so classy!

DSC_1046

Next weekend we get the tree! What are some of your decorating tricks?


2 Comments

One Man’s Trash Is This Woman’s Treasure

I’m so excited about the major find I just scored that I had to share! I was walking our dog, Luca, around our neighborhood when I came across these out on the curb for trash (gasp!)

sled 1

sled 2

Two gentlemen happened to be outside at the time so I asked if they really didn’t want them. They said no because they’re rusty (which is even better I think) and said I could take them. They’re perfect for Christmas decorations! I quickly walked Luca home and returned right back to pick them up. Best part – they were free!! Check back later to see how I incorporate both into my holiday décor.