This Old Colonial Home

Filling our house with love and a lot of DIY


Leave a comment

Celebrating One Year in Our Home

colonial-home-family-photoToday marks one year since Jamie, Luca and I moved into our very first house. On June 8, 2013, we said goodbye to renting and hello to home ownership! It’s been a year full of hard work, but I wouldn’t change it for anything. In the past year we have managed to:

Rip up the cranberry carpeting on the first floor

Refinish the hardwood floors hiding underneath said cranberry carpets

Install a stair runner

Replace the switch plates and outlet covers throughout the entire house

Install a smart thermostat

Paint the living room, family room, dining room, first and second floor hallways, upstairs bathroom, and master bedroom (including a stencil wall)

Replace the light fixtures in the dining room and entryway

Create a gallery wall in the living room

Add decor – artwork, pictures, curtains, etc.

Make a mirror out of a window pane

Refinish a dresser into our new TV stand

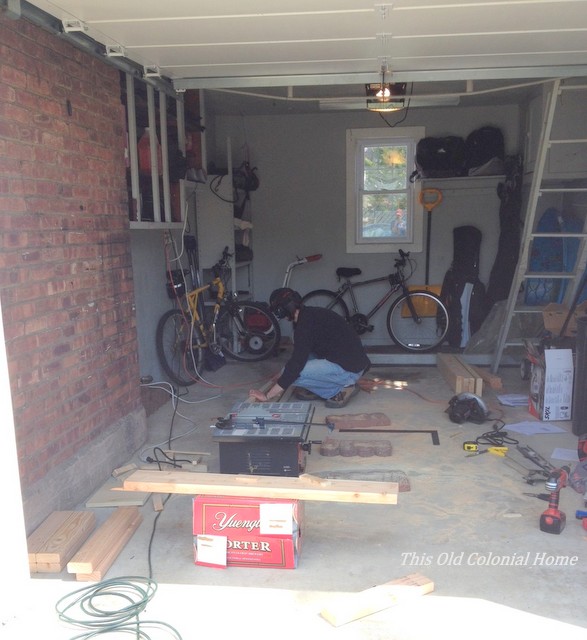
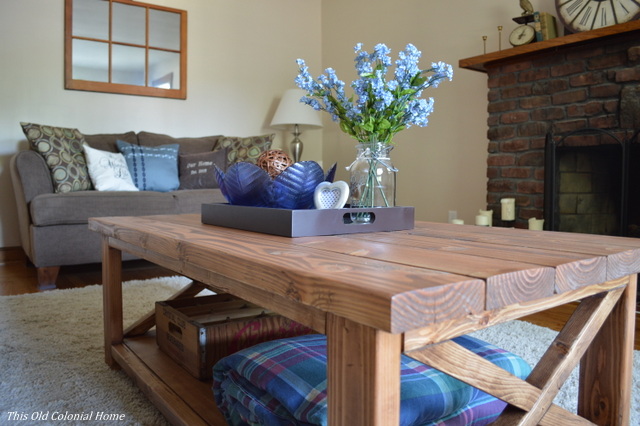
Build a coffee table for the living room

Freshen up the front flower beds – ripping out dead bushes and adding mulch

And of course we’re not done — there are always more projects on the list. But the sense of pride in owning your own home makes it all worth it! So please join us for our second year in this old colonial home to see what we’ll be up to next!


4 Comments

DIY Coffee Table

Aside from finding the plans, I certainly can’t take any credit for our awesome, new coffee table.

It all started when I saw this lovely post on Pinterest/Hometalk, which then led me to the incredible site ana-white.com.

Rustic wood coffee table using Ana White plans

Courtesy Creative Little Daisy via Hometalk

If you’re not already following her – START! Her pieces are gorgeous and she provides free, easy-to-follow plans to make your own furniture — saving you some cash.

Jamie picked up the necessary materials, any tools we didn’t already have, and even got a table saw from his dad. (Thanks, Jim!)Supply of pine and douglas fir boards for coffee table Making cuts for the coffee tableWhile I was working on my dresser makeover, Jamie began working on this project. He followed the cut list and then began assembling the pieces step-by-step.The cut list of boards ready for assemblying Screwing the coffee table frame togetherCoffee table base assembledThis is what it looked like when he was done. Pretty impressive for a novice, right?!Base and top of coffee table togetherDIY coffee table assembledHe did have one slight hiccup that needed to be fixed. When we brought it inside to test if it was level – it wasn’t. After taking the top off and apart, he determined that the base was level, but some of the boards on top were warped causing it to be thrown off balance. Jamie eventually replaced the boards with new ones and – voila! All better!

After that, he filled any major holes with wood filler and gave it a good sanding. He then applied a wood conditioner before moving on to the stain. (We picked Minwax Special Walnut.) He brushed on the stain, let it sit for a few minutes and then wiped it off with a rag.Applying pre-stain before stainingA can of Minwax stain Special WalnutApplying the first coat of stainIt took 3 coats to get the look we were going for.Coffee table completely stained with 3 coatsI just LOVE how it turned out! Who knew my husband was so handy?! (I think I’ll keep him around!) Here it is in our living room, where I think it fits in perfectly!DIY coffee table in living room DIY wood coffee table and gallery wall in living room  Close-up of wood coffee tableDIY coffee table and decor Side view of coffee table with XRustic coffee table with blue and green accentsFront view of DIY coffee table Rustic living room with handmade coffee table In the end, this project cost only about $100! Try finding that in a furniture store!