I love decorating for fall. The colors of the season bring such a sense of warmth and coziness. I’m a little late to the party this year thanks to a late summer getaway the hubby and I took. (Not that I’m complaining because it was nice to relax). But I couldn’t focus on fall until just this past weekend.
I finally dug out our box of decorations and started embracing the new season. I took my time going through different rooms adding pieces here and rearranging there. I found myself decorating the house completely differently from last year. I suppose it makes sense since I’ve added to our collection. But what I really wanted to share was how I found some easy and inexpensive ways to decorate using yard sales finds and, of course, a little DIY! In the living room, I added a berry garland to the mantel that I had picked up for 75 cents at an estate sale. At the time I bought it, I didn’t know where it would go, but knew I’d find a place for it eventually. Some of the berries were broken, exposing its white foam center, but that was nothing a little red nail polish couldn’t fix! I also switched out the blue bowl on the coffee table with a brown one I had in the kitchen. (Never underestimate the value of shopping your own house!)
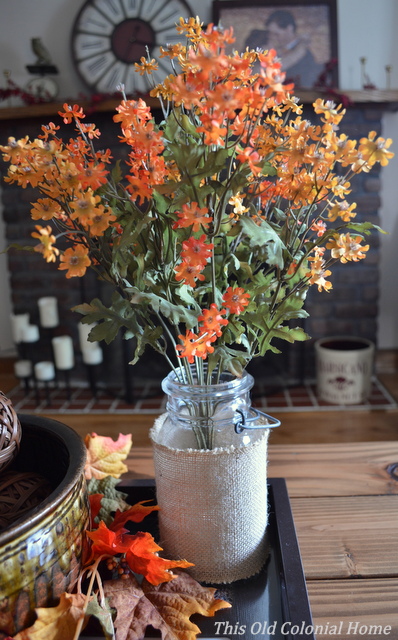 I changed the faux flowers on the coffee table from summery to more festive ones. I had found these at a yard sale last year for 50 cents. I also added a strip of burlap to the mason jar. I picked up a spool of 6″ burlap at Michael’s on sale for around $2. It’s such a great texture for fall and handy for hanging wreaths! I did just that for the wreath I added to our window mirror as seen above.
 The newly installed shelf in our entryway needed some updating. I removed some of the items and rearranged the layout, adding a strip of burlap as a little runner. The pumpkin candle was 25 cents at a garage sale. The lantern was $1 at an estate sale. I filled it using leaf garland and pine cones I already had. The orange flowers were a splurge at $3.50 found at Michael’s.
 Our mason jar sconce also needed a seasonal change. I switched out the hydrangea for mums that I bought at Michael’s for only 80 cents a piece. I also took out the clear stone filler and replaced them with acorns from our backyard.
 I made two fall wreaths. This was something I had never attempted before. (If I can do it, so can you!) I bought a grapevine wreath from Michael’s for $4.99 and hot glued faux flowers and berries onto it. It’s simple, but serves its purpose.
 This straw wreath I picked up a yard sale for 50 cents. I took garland I already had and pinned it on. It literally took me less than 5 minutes to make!
 Remember that bookcase I scored a few months back? It’s currently making a home in our kitchen and is turning out to be a great spot for decor. Everything on the shelves is thrifted, minus the towels and the metal bucket. One of my favorite “new to me” items is that basket. I grabbed it for 25 cents just this weekend!
 And I don’t like to let our bathroom go without a little something seasonal. I love incorporating purple for fall. So I took some faux flowers and put them in a cute milk jar (only 10 cents!) to sit on our vanity. And the little brown box is actually a favor from our wedding!
I still have a little more decorating to do. Look for a DIY pumpkin sign soon!
What kind of decorator are you? Are you thrifty or like to splurge? Do you like to switch things up from year to year? I’d love to hear some of your favorite tips and tricks.