This Old Colonial Home

Filling our house with love and a lot of DIY


8 Comments

Baby Shower Decor

I recently hosted a baby shower for my good friend who’s expecting a girl later this summer. Because I love my friend and am so happy for her … and because, let’s be honest, I just can’t help myself … I crafted/created a few little things in hopes of making her shower extra special.

First, guests were welcomed to my friend’s home right away with a festive porch.Pink and white flower balloonsI can’t take credit for this. The flower balloons were a Pinterest find and the mama-to-be’s sister-in-law put them together. Aren’t they cute?!

Guests were further greeted by the front door with this little display.baby shower porch decorbaby shower umbrella decorGet it?! ‘Cause it’s a baby shower! 😛 (And it actually did rain that day.) But seriously, how cute are these little rain boots with baby’s breath?!baby shower rain boots decorOnce inside the entryway, there was a welcome chalkboard sign, framed sonogram picture, and favors. (I’ll get to those later!)baby shower chalkboard signThere wasn’t a theme for the shower, but we did go with a pink, gray, and white color scheme. I kept envisioning a garden party style and even though the weather didn’t allow us to be outside, I was still able to incorporate that idea and the colors inside!garden party baby shower
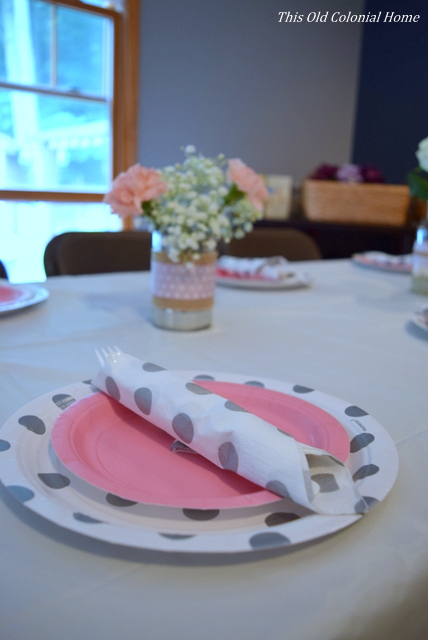
I love the look of a long table with place settings. Even though these are paper plates, they still add to the decor!baby shower table settingpink gray polka dot baby shower plates 
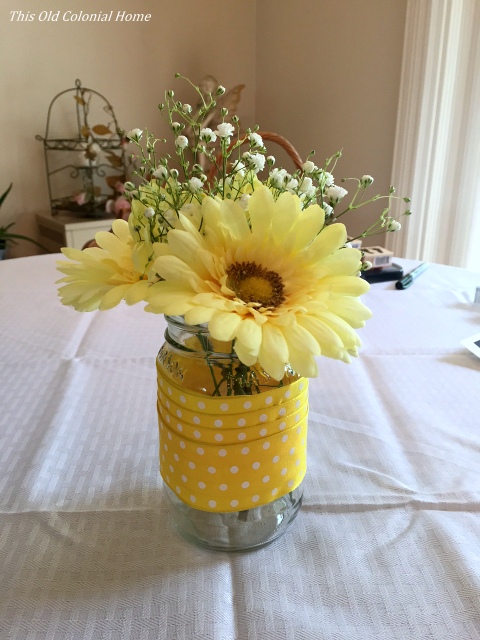
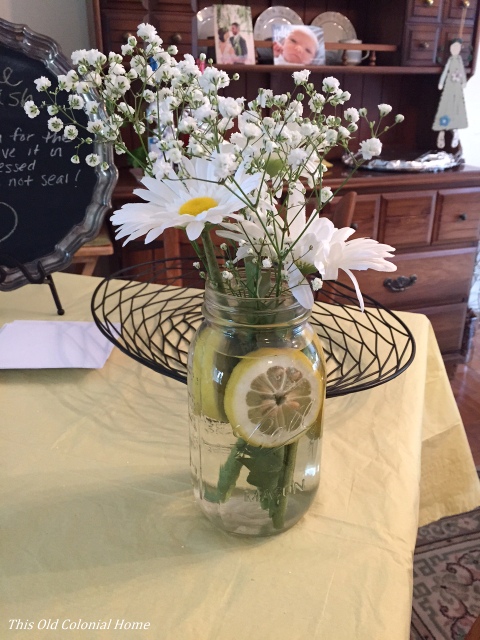
I crafted all of the centerpieces using mason jars and aluminum cans and wrapped them with a few different types of ribbon that I got from Michaels. I filled them with fresh flowers – hydrangeas, carnations, and baby’s breath.pink gray polka dots tablebaby shower mason jar centerpiecesDid you notice my DIY banner in the background? Here’s a closer look.baby shower banner diybaby doily bannerI made it using doilies, craft paper, twine, and clothes pins. I also made a little circle banner, which you can kind of see below hanging in the doorway. I’m such a sucker for banners!!baby-shower-tableWould anyone like a drink?mason jar beverage dispenserI put together this little beverage area using my recently painted drawer. (See it here.) Guests could easily grab a cup, napkin, and straw and fill up with some pink lemonade. There was also punch, but I didn’t manage to get a shot of that or the food. But don’t worry, I did get a picture of the dessert table. 😉 (Priorities, right?!)baby girl block cakedessert tableThe cake, which we ordered from a local bakery, turned out so adorable! We had way more sweets than we needed, but after all, little girls are made of sugar and spice and everything nice! (P.S. I also made the tiered platter using 2 plates, a candlestick, and some gorilla glue.)

And speaking of sugar …hershey bar favorsbaby-shower-hershey-favorsThese are the favors I made for the guests. I colored in the ‘she’ in Hershey’s using a pink sharpie, and then added the ribbon and little tag. (I like puns!)

I’m so glad I was able to do this for my friend so her family and friends could shower her with so much love. We can’t wait to meet the little one!


Leave a comment

Spring Into Decor

The Spring season has me all excited. The trees are starting to bloom. The days are getting a little longer. And the house is starting to feel light, bright, and fresh again!

In the midst of being a mom to a 7-month-old who just started crawling, I’ve been trying to find some time to work on our home decor. (Usually 9 o’clock at night when the baby is fast asleep.) I know I probably shouldn’t even bother, but the DIY desire is strong with this one! 😛

So over the course of a few nights and weekend days, I got my craft on again. Oh how I’ve missed it!

I changed up the tray vignette on our coffee table and made two spring banners using scrapbook paper and twine.Books and flowers spring tray Scrapbook paper flag banner diyMini flag banner on rustic windowI also spray painted a clear glass vase. I had been seeing white vases and pitchers all over Instagram lately and was drooling over them, so I decided to make one myself. I simply used one of those 1-800-Flowers vases I had sitting around and some white spray paint. Voila!Clear generic glass vaseWhite spray painted glass vaseThe bigger project I tackled was painting one of the drawers left from the dresser I turned into a TV stand a couple years back. (See it here.)

I wanted the drawer to be shabby chic so I thought I’d finally try out chalk paint. Problem: it’s expensive! Solution: I made my own!

I knew I wasn’t going to need a lot of paint, so I used a paint sample that was just sitting on a shelf in the basement collecting dust.Sample paint from LowesI poured the paint into an old tupperware bowl, mixed up half a cup of baking soda and 3 tablespoons of water, and mixed that in with the paint. And that’s it. Hooray for free chalk paint! Well, technically $3 for the sample and whatever the baking soda cost (which I already had), but still!

The best part about using chalk paint is you don’t have to sand beforehand. So once I took off the handles and wiped it down I was ready to start!Dresser drawer beforeDresser drawer with one coat of paint The DIY chalk paint was a little grainy, but it served its purpose. I did lightly sand it between coats. It only needed two coats of paint. Once it dried, I then lightly sanded it again to distress it and give it that aged look.Dresser drawer with distressed chalk paintDistressed drawer close upI decided to line the bottom with pretty paper. I used some of the same scrapbook paper that I used for the banners. Apparently I suck at cutting and measuring, so it took a few trials and errors to get it to fit just right. 😛 But once I got it, I simply used spray adhesive to attach it to the drawer. I then popped on some knobs I had laying around and my project was complete!Shabby chic drawer with lined bottomI’m so happy with how it turned out! It’s actually just how I pictured it in my mind!

Now you’re probably wondering what the heck I’m going to do with it. Well, it’s a great photo prop. I already used it for a cute Easter photo shoot with the baby!Shabby chic drawer used as prop for photo shoot I also think it’ll be a great piece to use for parties to display glasses or food. And maybe I’ll even eventually hang it up and use it as a shelf. So many possibilities!


6 Comments

Happy New Year!

Well hello, old friends! It certainly has been awhile. I’ve been wanting to get back to blogging, but I haven’t had time to write and honestly I didn’t have anything to write about. The baby has kept us both pretty busy these past few months. Our home projects have been traded in for diaper changes, feedings, baths, sleepless nights, and snuggles.children-distraction-001I’m certainly not complaining. Our little one truly is a blessing. But I do miss decorating and DIYing and sharing it with you on this little blog.

So for now I figured I’d play catch up and share some of my favorite Fall and Christmas decor that I managed to put together this year. (My apologies if you’ve already seen some of these on Instagram.)fall-living-room-decor fall-vignette-coffee-table fall-mantel-displaychristmas-tree-chalkboard christmas-stockings-staircase christmas-pillows-and-signs christmas-tree-reflection christmas-tree-presents
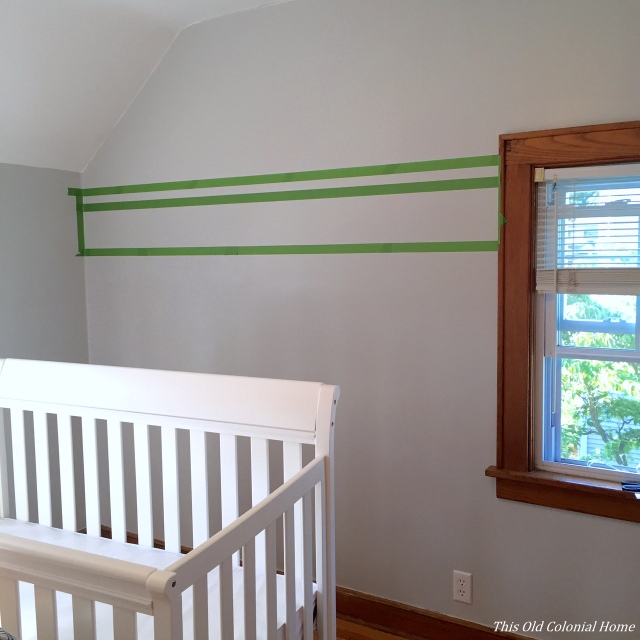
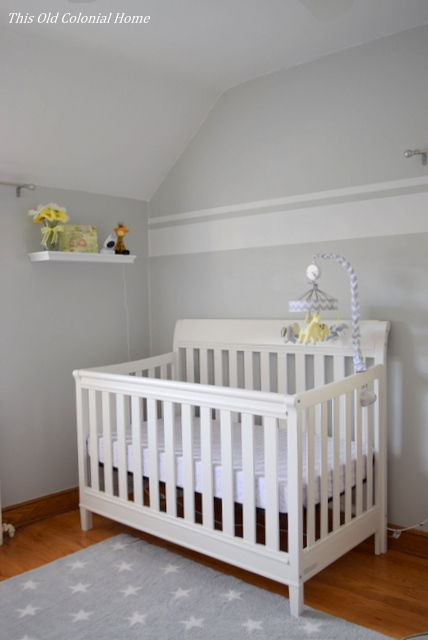
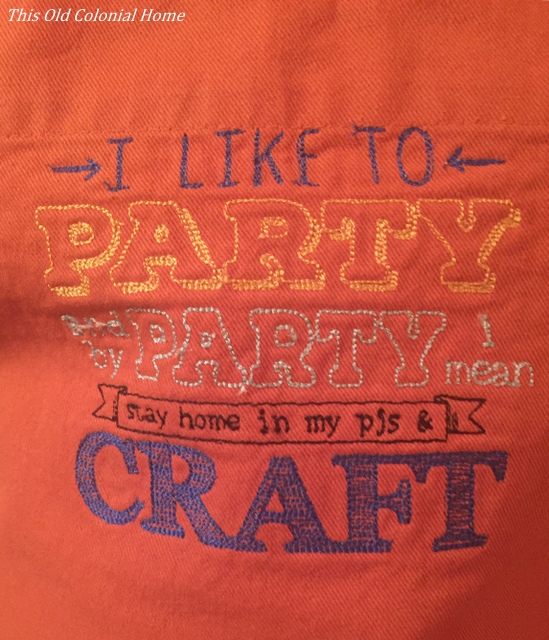
Also, I just had to share some gifts I received for Christmas. Check out this crafting apron!crafting-apron party-craft-apronAnd how cute are these chalkboard mugs?!chalkboard-mugs(Thanks, family. You get me!)

Hopefully in 2016 we’ll get back to some more projects. On my wish list: new carpet and couch for our family room, a DIY coffee table with storage, and maybe a new front door. Hey, a girl can daydream!

Wishing you a prosperous, productive, and peaceful New Year!


4 Comments

Bathroom Reveal

I’ve been talking about it for months, and now the day is finally here! Our renovated bathroom is done! Are you ready to see it?! (Drum roll, please!)Bathroom pocket door peekCome on in!

It’s such a rewarding feeling seeing the classic black and white bathroom that we had envisioned for our 1930s house actually come to fruition.Black and white bathroom renovationThis is the first major renovation that we took on. And while yes, we had contractors do the work, the design was all us. That is something I am extremely proud of!

Let’s take a look around.

For the shower, we chose white subway tile and charcoal grout. To me, this is a look you can never go wrong with. It’s timeless and affordable.Subway tile in the shower Rain shower head Tub faucetsThe same goes for our black and white floor!Black and white pinwheel tileEven though our window and door trim is wood (which still needs to be stained or polyed), we chose black bull nose tile to go around the floor base for something a little different and I love it!Black bullnose tile trim The vanity was definitely a splurge. We needed one with a narrow depth, which is hard to find right off the shelf, so we ended up ordering a custom one.Black and white vanityWe chose white shaker style cabinets and a black granite counter top. I think it adds such beauty to the room. And talk about an upgrade from the pedestal sink that used to be in here! I don’t know about you, but I hate pedestal sinks. There’s no storage and no counter space. Now we have both!Shaker style bathroom vanityWhere did we get the extra room from to put in a real sink? That’s where the new pocket door comes in super handy. What a space saver! Before, the door used to swing in leaving an unusable, dead area behind it. Pocket door space saver in small bathroom We used the same door that was there before. Jamie had the awful, tedious task of stripping the paint that had been on the one side, and then our contractor cut it to fit the narrower doorway.

Of course, we also have new lighting, a new medicine cabinet, and finally an electrical outlet! (It’s the little things.)Medicine cabinet and sconce lighting To save some money, we kept the same toilet since it was in perfectly fine working condition. And believe it or not, pretty much everything in here — from the vanity, to the tub, to all the tiling and faucets — came from either Home Depot or Lowes! Not bad, right?!

We still have a few minor things to add — like wall decor and accessories. But look how far it’s come from the time we bought the house to now:Bathroom updates and changesSo I may or may not have been freaking out a bit about the timing and duration of this renovation, but like anything else, it eventually came together. And it was definitely worth the wait!


1 Comment

DIY Nursery Decor

In my last post (see it here) I showed you the finished nursery.Gender neutral nursery room decorNow I want to share with you some of the DIY decor I incorporated.

Let me start with these book shelves.Gray glider gender neutral nurseryAfter perusing Pinterest for some inspiration, I decided to buy two wooden crates, which you can pick up from any craft store.

Using leftover paint from previous projects, I painted the inside of each crate. One a mint green and one a dark blue.Painted inside of wooden crateAfter letting that dry, I then painted the outside white. This turned out to be a pretty tedious task. It took several coats to get the look I wanted. I also didn’t really tape anything off so I did have some bleeding, which I later touched up.White painted wooden crate DIYIf I were to do this again I would either prime it first or just buy the crate in white instead of natural wood to save time.

Since I stink at hanging things, my husband took the lead and used two anchor screws to attach each crate to the wall.

I then filled the now shelves with children’s books and toys. I love how this little nook turned out!Gray nursery reading nookDIY wood crate bookshelves for nursery Nursery glider and book shelf crates Next, I want to share this gallery wall. (I’m such a sucker for gallery walls!)Nursery dresser and gallery wallIt all started at my shower where we had guests write a wish for the baby on little paper circles.Baby wishes chalkboardLater on I laid out all the circles on a piece of 11×14 paper since I knew that was the frame size I wanted to use. But since that’s not a standard paper size I just cut down a piece of 11×17 paper. The idea was to make the circles look like balloons being held by an elephant, which I simply printed from Google Images.DIY elephant balloon artworkBaby wishes used for nursery decor Once I had the layout I wanted, I glued each circle to the paper and drew lines to look like strings.Glue circles to paper Nursery balloon decor DIYAfter I found the perfect frame, I used this piece as the center and picked up a few more frames to surround it. Do you know what I used to fill those frames? One is my shower invitation and the rest are simply cut up gift bags!Colorful nursery gallery wall DIY gallery wall for gender neutral nursery Gray nursery gallery wall DIYTalk about a simple, easy and affordable project! But also one that has so much meaning!


6 Comments

A Sweet Makeover

Well I can’t show you the bathroom just yet, but I can show you the nursery! I wasn’t sure I was going to be able to before the baby arrived, but luckily he or she is still cooking … giving us a little more time to get things done (and putting my mind at ease)!

You may recall this is how the room used to look – reserved for guests.Guest BedroomAnd here’s how it looks now – reserved for our little one. 🙂Gender neutral nursery room decor Since we don’t know what we’re having (aside from a baby of course), we went with gender neutral colors of gray, yellow, and white.

My husband took on the task of painting the room since I really shouldn’t be around the fumes. We chose the color Passive from HGTV Home by Sherwin Williams.

I wanted a little something extra in the room, so on one of the walls Jamie added the white stripes. (No, not the band!)Paint stripes in nursery using Frog's Tape White stripes in gray nurseryI love how it turned out! Simple and subtle, but so cute!White crib in gray nurseryNow, let me take you around the room to show you some of the other details.

Here’s a little shelf above the crib that not only holds our video monitor, but also has faux flowers from my baby shower (see more about that here), a cute little giraffe from my friend who threw the shower, and a Beatrix Potter puzzle frame that came directly from the author’s hometown in England!Nursery shelf vignetteThis, of course, is the dresser/changing area. What I love most about it is the colorful gallery wall. But I’ll have more on that in my next post 😉Nursery dresser and gallery wall Did you notice the rug?! We had a few issues purchasing it from Target. It kept going out of stock and then we had some shipping issues, but I’m so glad it ended up working out. It’s so soft and adds such coziness to the room. Those stars are just too cute!Circo gray stars area rug And this corner of the room might just be my favorite spot. I can already envision all the feeding, rocking, and reading to Baby M that will happen here!Gray glider gender neutral nursery I’m so glad this room finally came together. As a mom-to-be, it was important to me to be able to create a space where our little one will grow, have dreams, play, imagine, and make memories!


Leave a comment

Bathroom Renovation Progress

Living through a renovation can be tough. It’s even tougher when you’re 9 months pregnant! I had mentioned in previous posts that our upstairs bathroom was getting a makeover.Upstairs bathroom beforeWork started nearly two months ago and has been painstakingly slow. But we might (fingers crossed) actually be turning a corner. So I thought I’d share some of the progress.

Gutting the bathroom was done fairly quickly. I think it took less than 2 days.Bathroom renovation partial gut jobBathroom being guttedBathroom gutted down to the studsThen came the extremely slow part — patiently waiting for the plumbing and electric work. Since we’re changing the layout of the room, the pipes and wiring all had to be re-routed. (Upside: we’re finally getting an outlet!!) Once that was done, the subfloor could then be put down, and the closet re-framed. We had decided to take some space from the closet of the adjoining bedroom — and still soon-to-be nursery — to make a little more room in the tight bathroom.Bathroom subfloor and closet reframedThe plumber had a little more work to do and even had a new apprentice one day! 🙂 Luca the apprenticeSo now the tub has been installed, the window moved, and the pocket door framed in. Pocket door framed in for bathroom renovationA few different inspections were needed before the contractor could move forward. So again we waited.

But luckily it all passed inspection and drywall is finally up! The room is starting to take shape once more!Drywall installationBathroom renovation drywallBathroom renovation takes shapeThere’s still a lot left to do, like painting and tiling, but it should start moving more quickly at this point.

I’ve been a nervous wreck this whole time because things haven’t been going the way I had hoped. (Honestly, I think I watch too many edited reno shows on HGTV and expected everything to go just as quickly. Hah!) It also caused work on the nursery to get delayed. The house is a mess from the construction and there’s baby stuff sitting in the dining room waiting to be put away. So my vision of everything being perfect for baby’s arrival has pretty much been thrown out the window. It’s certainly frustrating, but it’s also out of my control. I guess we’ll see which comes first: the baby or the bathroom!


2 Comments

Showered with Love

I’ve been debating whether to post about the baby shower one of my best friends recently threw for me and our little one on the way. It was such a beautiful event and there were so many little details that I decided I just had to share!

So first let me start with the fun details. Check out these centerpieces!Yellow mason jar centerpiece with ribbonDaisy and lemon slice mason jar centerpieceThey are so simple, yet so sweet. There’s just something about flowers and mason jars!

The punch was cute and creative — made to look like a bubble bath with rubber duckies!Baby shower bath punchBaby shower punch with rubber ducksMy talented friend also made this adorable fruit bassinet and diaper cake!Baby bassinet made of fruit DIY diaper cake for baby showerI hate to have to take it apart, but those diapers are certainly going to be needed 🙂

The shower games were kept to a minimum. We did the one where guests cut a piece of string to how big around they think I am. It was silly, but fun. There was also a pool for people to guess the gender and date of Baby M’s arrival using little pink or blue feet stamps.Baby pool calendar with feet stamps*Winner will be determined once the baby makes his/her debut!

My favorite activity was the wishes that family and friends wrote for the baby.Baby wishes chalkboard I have a little project up my sleeve for those. Stay tuned and look for a sneak peek on Instagram!

And before guests left, these cute favors of popcorn were handed out.Ready to pop baby shower favorsReady to pop! Haha, get it?! 😛

Now for the more serious side. As I said, the day was truly beautiful. It was filled with so much love. The best moment ended up coming from my husband, who wasn’t there. I was opening the card to the very last gift and I was surprised when I read that it was from him! I was taken aback and started to tear up. When I opened the gift I saw it was a brand new Nikon camera! I couldn’t help myself and started to cry. (Thanks hormones!) It was such a thoughtful and unexpected gift. It might sound silly, but in that moment I felt a true sense of love from him. He knows how much I love photography and it meant so much to me. The camera won’t just be used for this little blog, but for capturing so many moments that lie ahead with our child … as parents … as a family!

I want to say thank you to all of our family and friends for their generosity and kind, giving hearts. It means a lot to Jamie and me knowing how much this baby is already loved and cared for as we prepare for his or her arrival.Baby shower onesie cake


2 Comments

Master Bedroom Reveal

I am so happy to report that our master bedroom is finally done!Master bedroom reveal It has taken more than a year to get this room all pieced together. Gasp! Certain things just tend to hold up the process: time, money, jobs, weekends away, a baby on the way … but that’s alright. This is what real life looks like (at least for us). Who are these people anyway who can knock out a room in a weekend?!

It all started in March of last year when Jamie painted our room Cliffside Gray by Benjamin Moore and I tackled my first stencil wall. (See all the details here.)Stencil wall project in progress
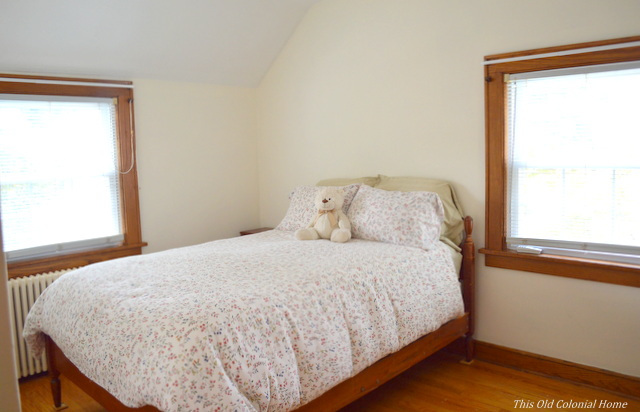
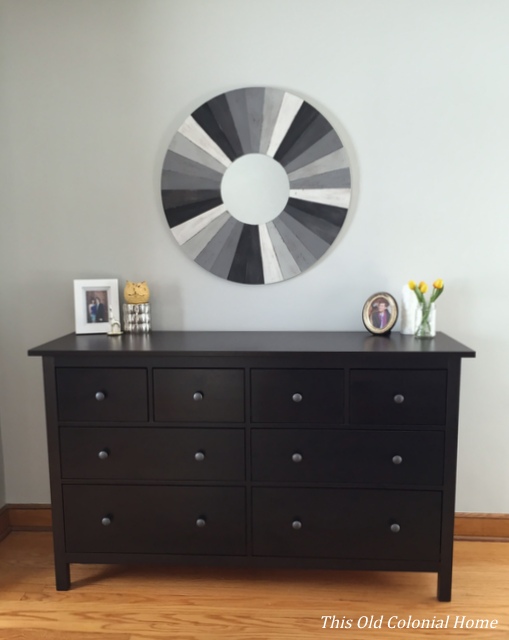
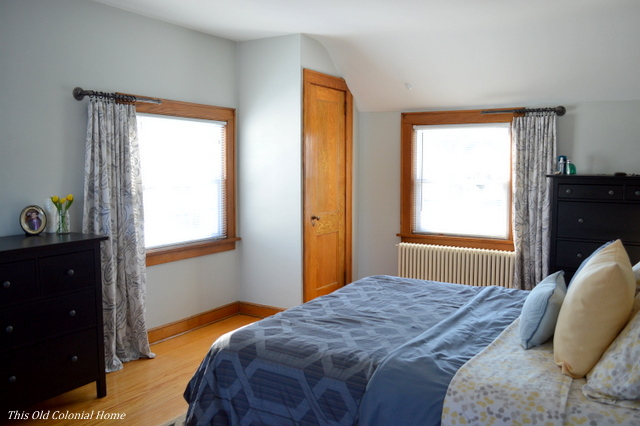
The furniture remained a hodgepodge of pieces that didn’t go together. I had bought a yellow nightstand at a garage sale for $5 that I loved. The original thought was to add another yellow nightstand on the other side of the bed, but as usual I eventually changed my mind. So the room remained in a state of mismatchedness. (Is that even a real word?!)Yellow distressed nightstand found at garage saleThe plan now is to put this pretty little piece in the nursery.

Over this past winter, the furniture started to come together a little bit better. We bought dressers from Ikea and started adding some decor.Round rustic mirror painted woodI then splurged on this accent chair from Marshalls. We had the space for it, and it was just too cute to pass up!Navy chair with silver nailhead trim We also added curtains with some industrial pipe rods (see it here). It’s amazing how curtains can make a room look so much more complete! Master bedroom curtainsAt this point I wasn’t feeling our headboard anymore. I just didn’t like the color of the wood with the new dressers. So onto Craigslist it went and the search began for a tufted one. After a few months, I found the perfect headboard on Wayfair for a crazy, awesome price! (This is not a sponsored post, but I’m telling you, you should sign up for those daily deal emails. They will literally pay off!)Tufted headboard from WayfairAnd after just a few days of ordering it, our headboard finally sold too. It was meant to be!

The ceiling fan in our room also got a nice little update. (You can read more about that here.)

So now we’re down to the final pieces of the puzzle: the nightstands.

My ever-so-handy husband built us two nightstands using these free plans from ana-white.com. Here are a few shots of his work in progress:DIY nightstand wood cuts DIY wood nightstand build progressDIY farmhouse nightstands with drawerI was then tasked with finding drawer pulls, lamps, and decor. Again, each item took a little bit of searching, but it finally all came together.DIY wood nightstand DIY wood nightstand stained ebonyMy favorite part is the artwork. Instead of buying some generic saying in the store (sorry, but I’m over the ‘Love you to the moon and back’ signs), I used Canva to create something that has more meaning to us as a couple. “When I’m with you feels like I’m home” is a lyric from the Duncan Sheik song ‘Home,’ which is the first song we danced to as husband and wife!

So as you can see, this room went through a lot of different phases. Here’s where we originally started when we first bought the house.Accent wall beforeAnd this is how it looks now!Gray blue master bedroom revealTufted headboard and bed with DIY nightstandsI truly love our master bedroom! I find it to be such a calming and relaxing space, and a true reflection of us. Is it time for bed yet?!


4 Comments

Upcoming Transformations

Maybe you noticed, maybe you didn’t. But the posts have been slacking as of late. (I apologize.) That’s not to say we aren’t still busily working on the house — we are. Well, Jamie is. I’ve had to take a backseat approach … because in just a few short months we are expecting our first child!Our family is growing by 2 feetI guess you could say we are undergoing our biggest home transformation yet! We are so overjoyed!

So as you can imagine that has been keeping us plenty busy. And Jamie being the good husband and future daddy that he is, is making sure I stay away from projects that involve a lot of physical labor (no pun intended). He is working so hard to get some of our outstanding projects crossed off the list. He is currently in the midst of building two nightstands for the master bedroom.Cut list for nightstandsAna White plans for farmhouse nightstandIsn’t this great?! He’s still working on sanding and staining them. I’m working on finding knobs and new lamps. Decorating is pretty much what I’m left with 😛  We also just ordered a new headboard. I can’t wait until it’s all put together and I can show you the reveal. In the meantime, be sure to follow me on Instagram at @oldcolonialhome for sneak peeks along the way!

We will also, obviously, need to start working on the nursery. What was the guest room will be transformed this summer into a room for our little one.Guest Bedroom I can’t wait to get going on that!

And because we don’t have enough on our plate, we will also soon be undergoing a bathroom renovation!Upstairs bathroom beforeYes, I’ve been saying that for months, but we can thank town bureaucracy for holding up the permit approval. And of course now the timing kind of stinks since a certain someone needs to get up a few times a night to use said bathroom, but it’ll be worth it in the end! I hope to show you a fantastic before and after once it’s done.

So we certainly have a lot to do, but also a lot to look forward to … in more ways than one!

Luca, however, isn’t quite sure yet 😉Luca no longer going to be an only child