This Old Colonial Home

Filling our house with love and a lot of DIY


2 Comments

Master Bedroom Reveal

I am so happy to report that our master bedroom is finally done!Master bedroom reveal It has taken more than a year to get this room all pieced together. Gasp! Certain things just tend to hold up the process: time, money, jobs, weekends away, a baby on the way … but that’s alright. This is what real life looks like (at least for us). Who are these people anyway who can knock out a room in a weekend?!

It all started in March of last year when Jamie painted our room Cliffside Gray by Benjamin Moore and I tackled my first stencil wall. (See all the details here.)Stencil wall project in progressThe furniture remained a hodgepodge of pieces that didn’t go together. I had bought a yellow nightstand at a garage sale for $5 that I loved. The original thought was to add another yellow nightstand on the other side of the bed, but as usual I eventually changed my mind. So the room remained in a state of mismatchedness. (Is that even a real word?!)Yellow distressed nightstand found at garage saleThe plan now is to put this pretty little piece in the nursery.

Over this past winter, the furniture started to come together a little bit better. We bought dressers from Ikea and started adding some decor.Round rustic mirror painted wood
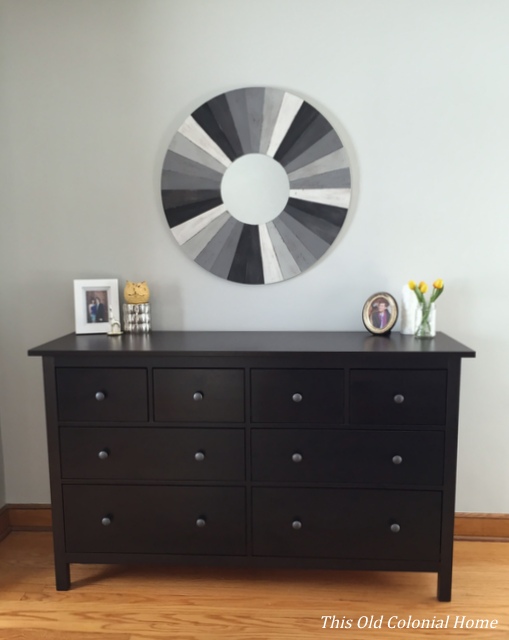
I then splurged on this accent chair from Marshalls. We had the space for it, and it was just too cute to pass up!Navy chair with silver nailhead trim 
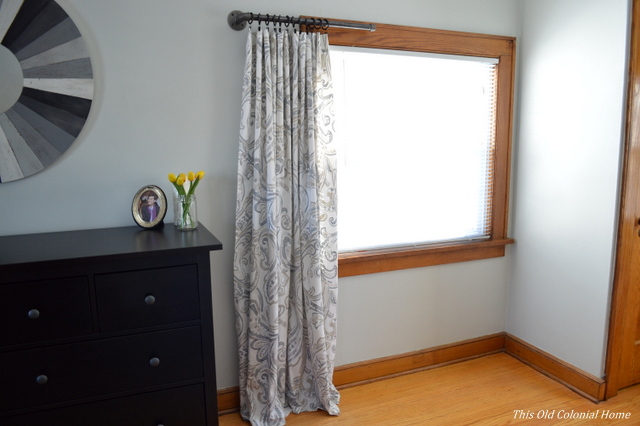
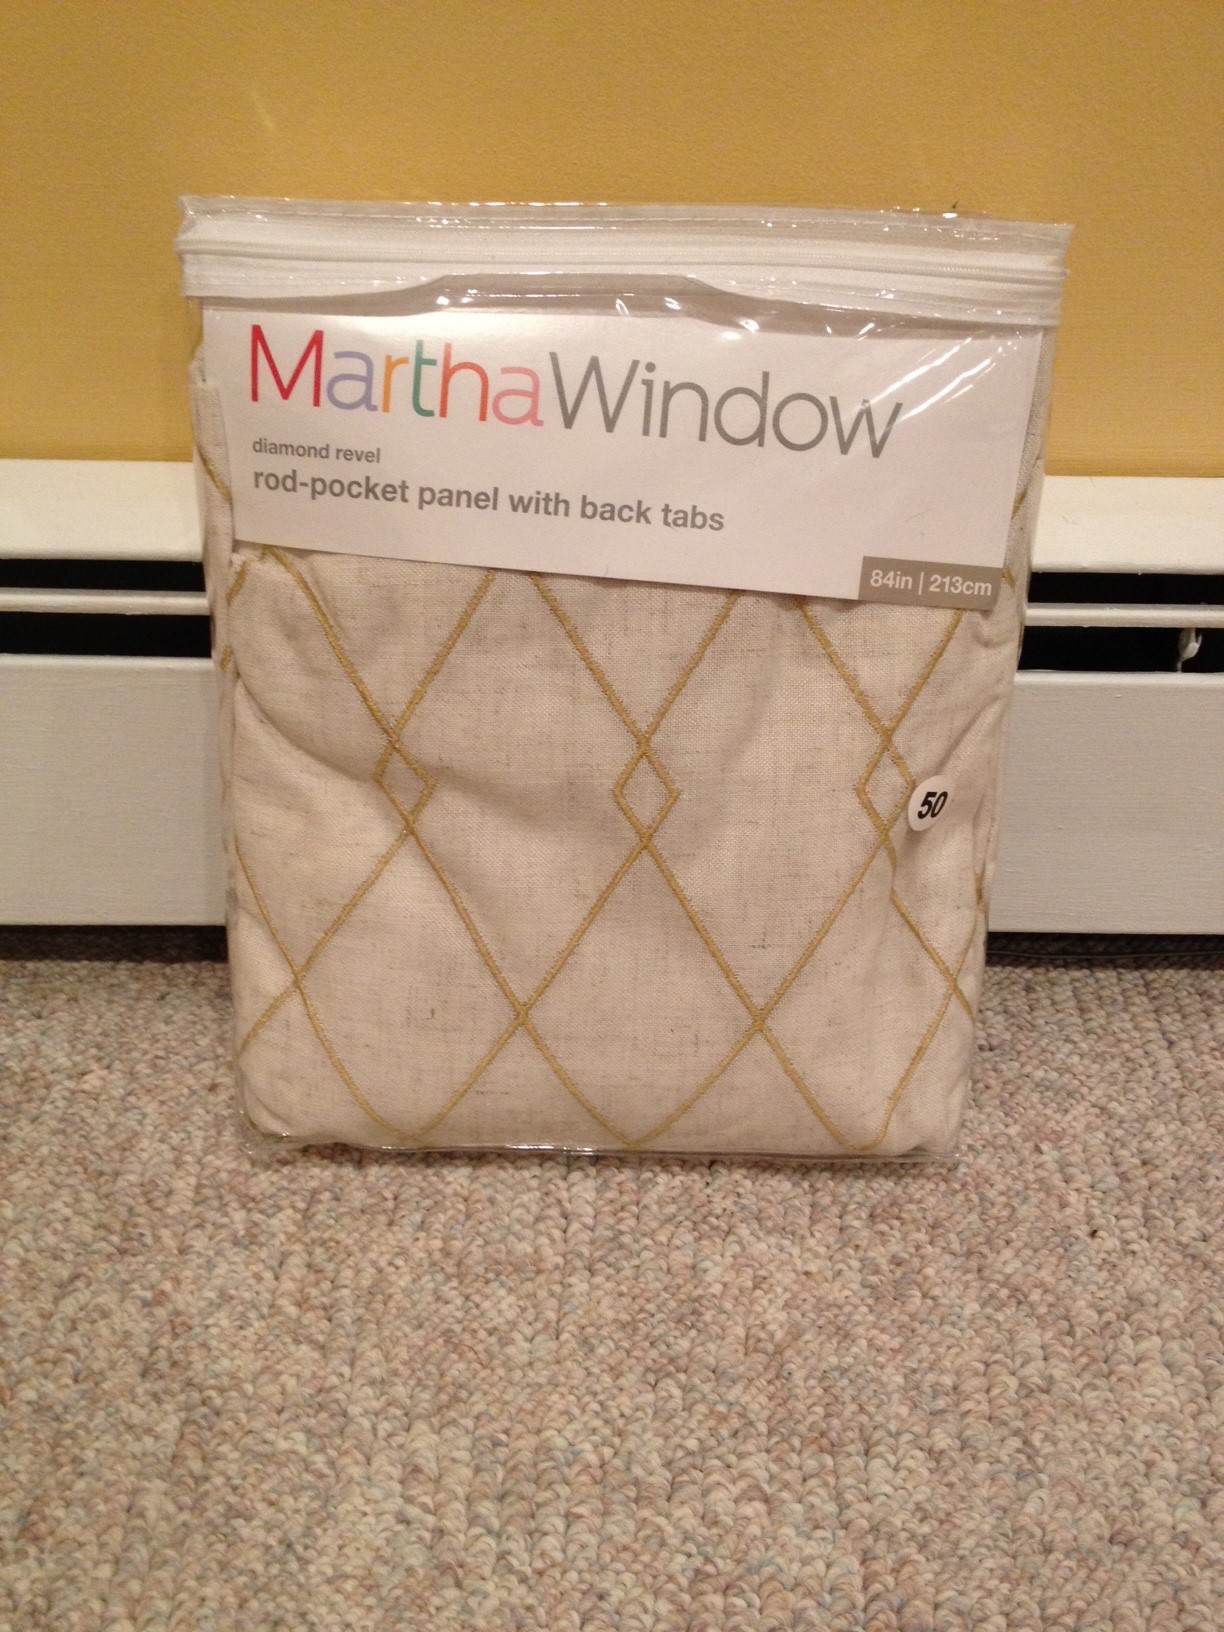
We also added curtains with some industrial pipe rods (see it here). It’s amazing how curtains can make a room look so much more complete! Master bedroom curtains
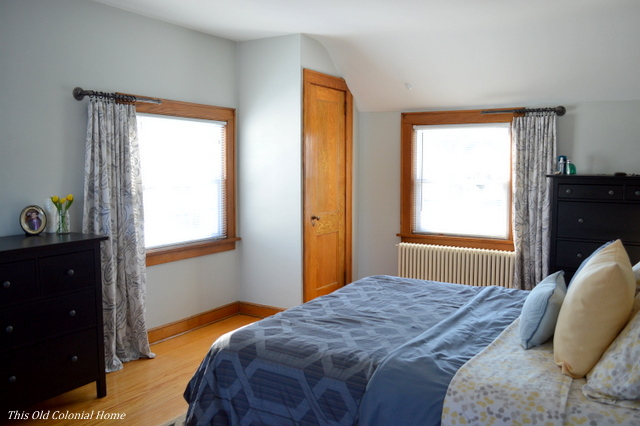
At this point I wasn’t feeling our headboard anymore. I just didn’t like the color of the wood with the new dressers. So onto Craigslist it went and the search began for a tufted one. After a few months, I found the perfect headboard on Wayfair for a crazy, awesome price! (This is not a sponsored post, but I’m telling you, you should sign up for those daily deal emails. They will literally pay off!)Tufted headboard from WayfairAnd after just a few days of ordering it, our headboard finally sold too. It was meant to be!

The ceiling fan in our room also got a nice little update. (You can read more about that here.)

So now we’re down to the final pieces of the puzzle: the nightstands.

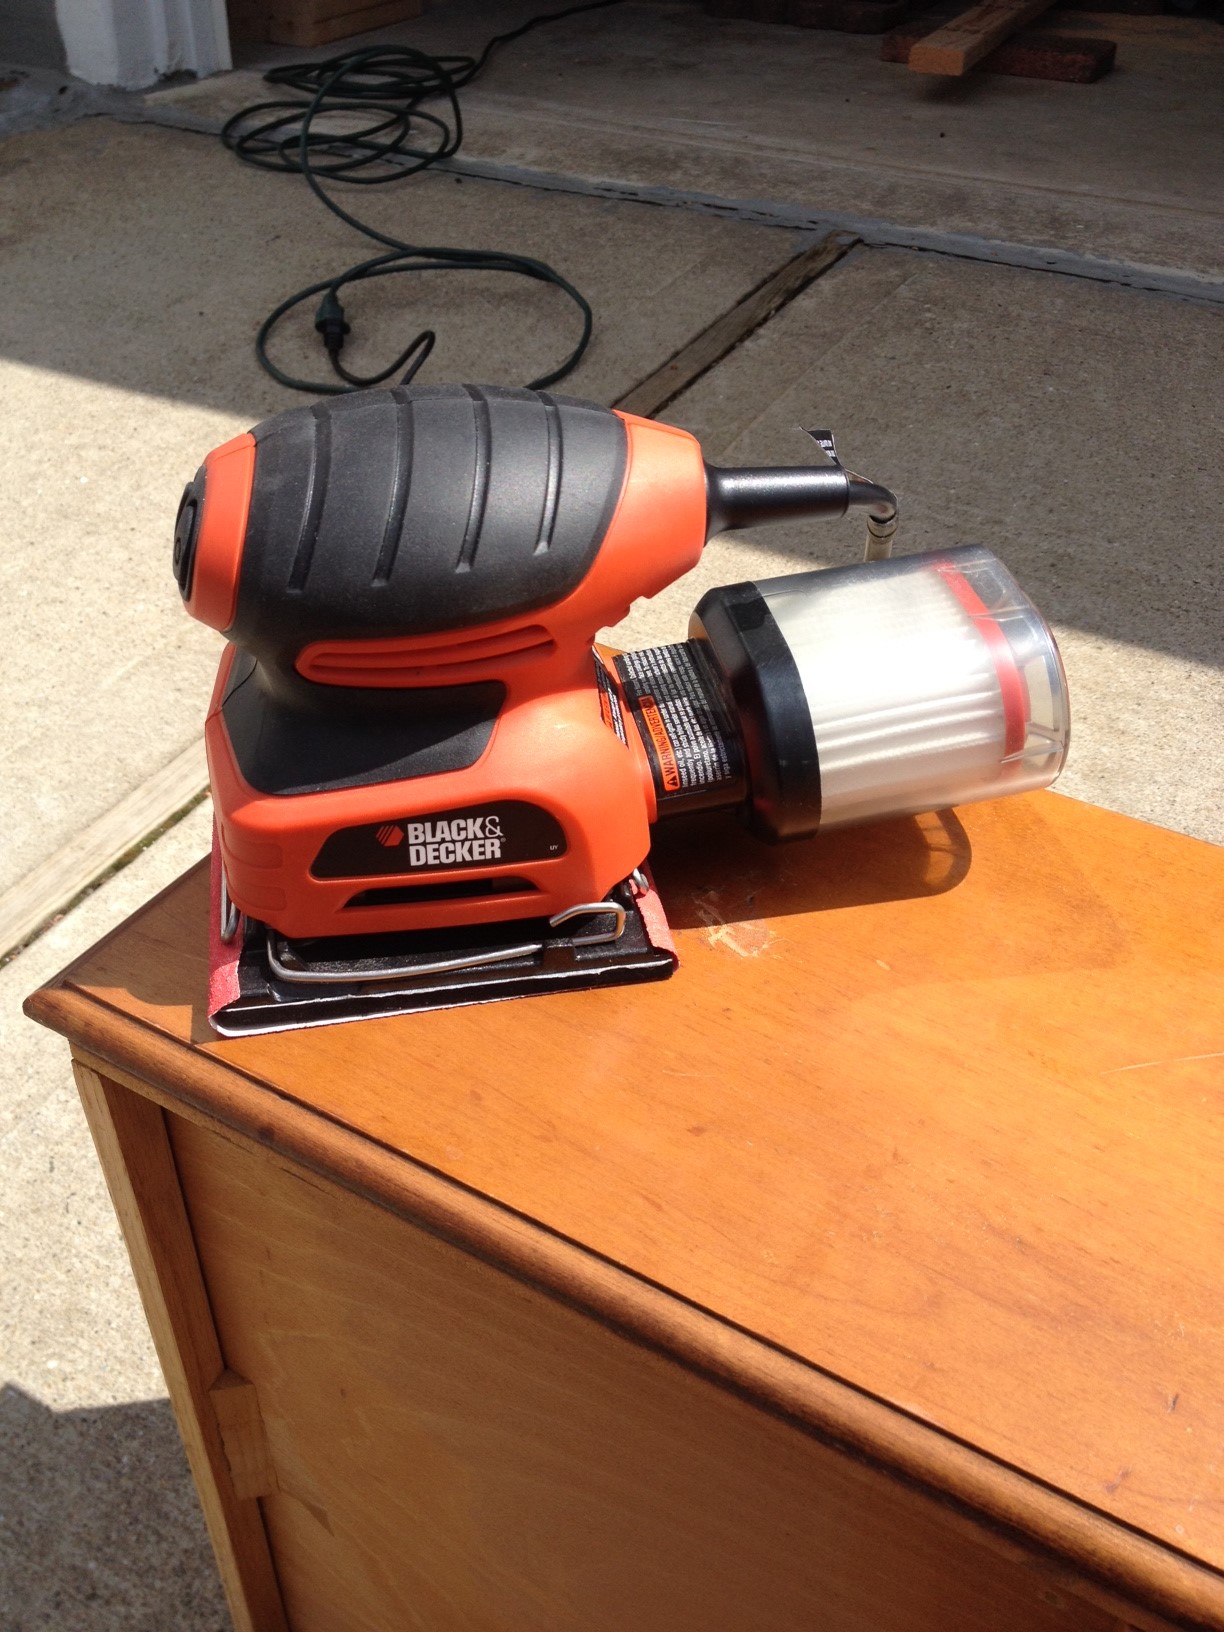
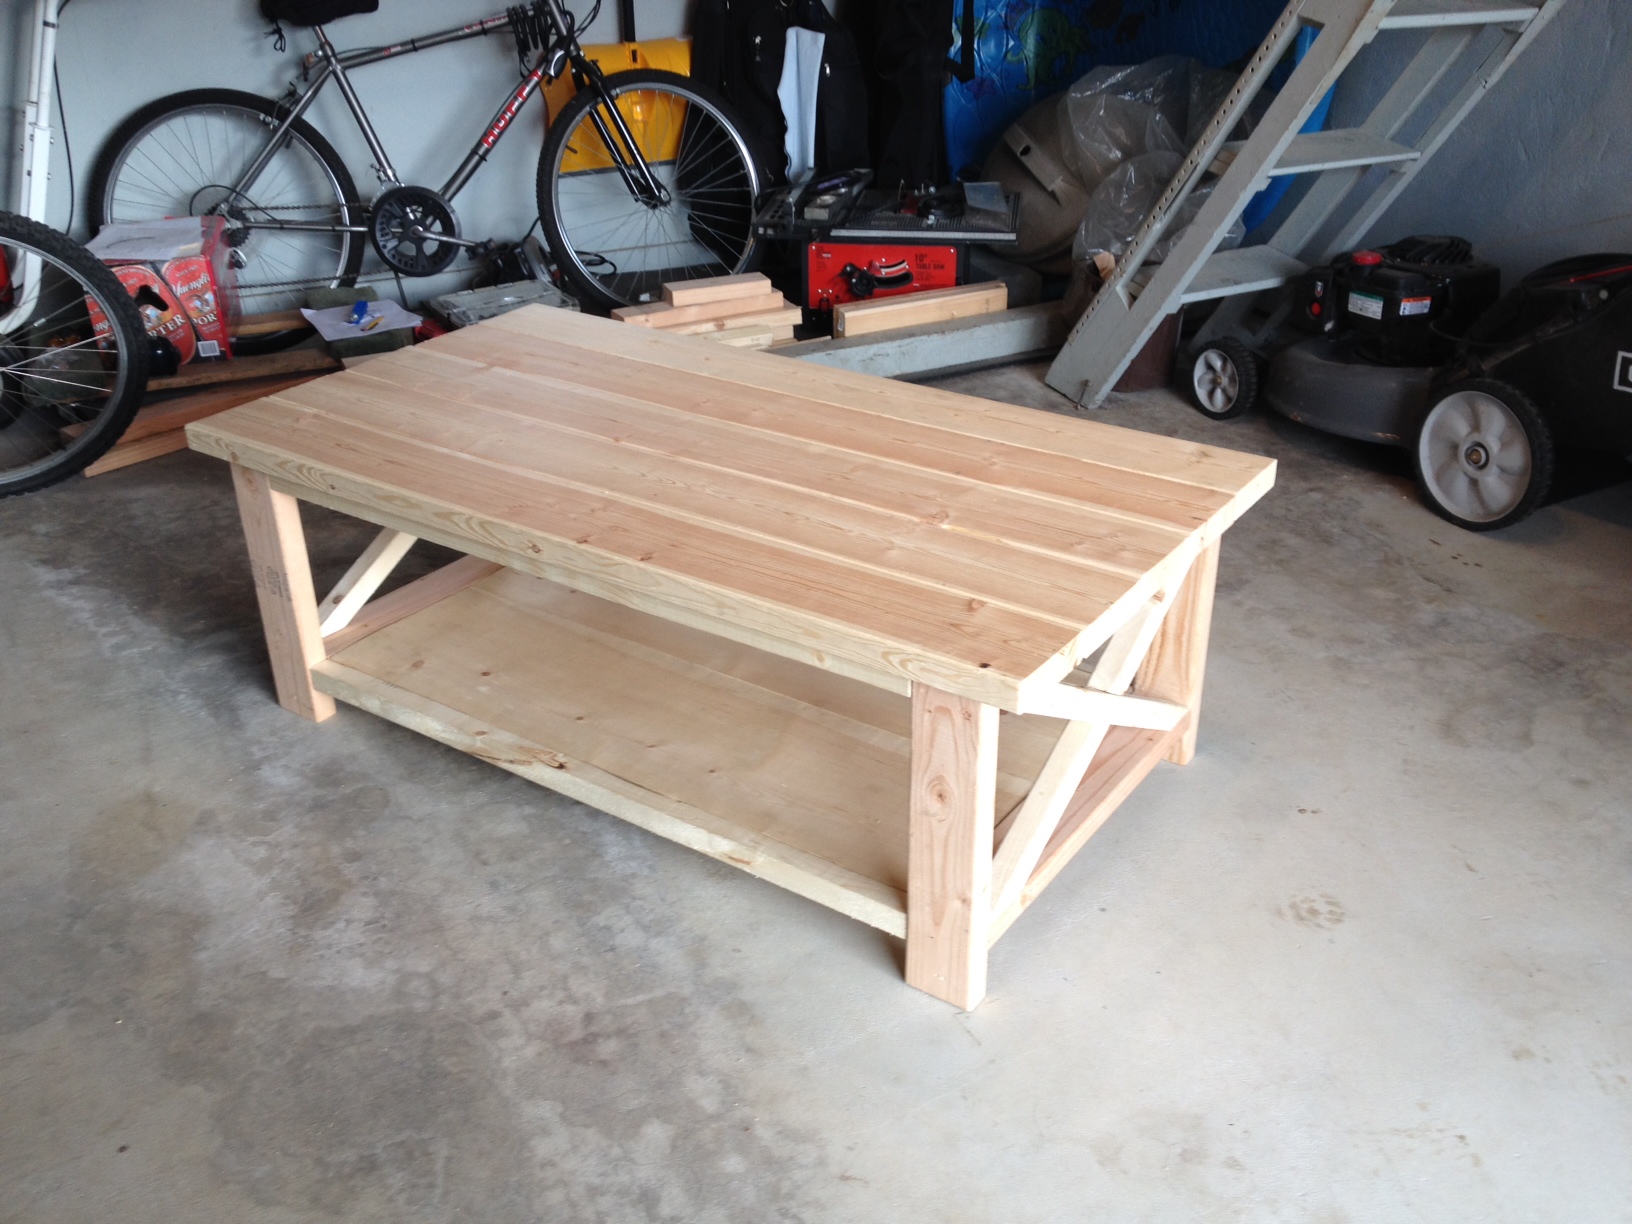
My ever-so-handy husband built us two nightstands using these free plans from ana-white.com. Here are a few shots of his work in progress:DIY nightstand wood cuts DIY wood nightstand build progressDIY farmhouse nightstands with drawerI was then tasked with finding drawer pulls, lamps, and decor. Again, each item took a little bit of searching, but it finally all came together.DIY wood nightstand DIY wood nightstand stained ebony
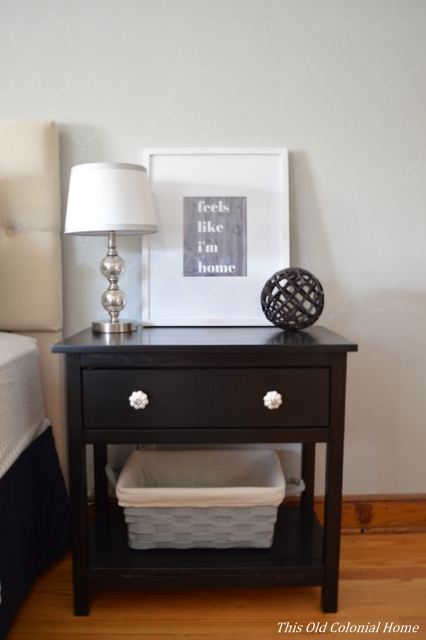
My favorite part is the artwork. Instead of buying some generic saying in the store (sorry, but I’m over the ‘Love you to the moon and back’ signs), I used Canva to create something that has more meaning to us as a couple. “When I’m with you feels like I’m home” is a lyric from the Duncan Sheik song ‘Home,’ which is the first song we danced to as husband and wife!

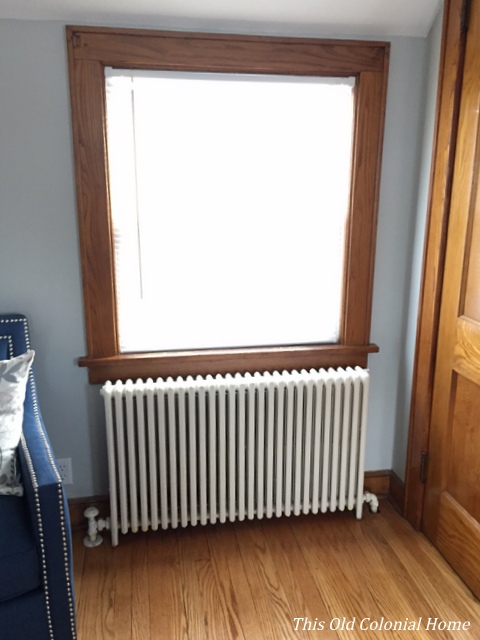
So as you can see, this room went through a lot of different phases. Here’s where we originally started when we first bought the house.Accent wall beforeAnd this is how it looks now!Gray blue master bedroom revealTufted headboard and bed with DIY nightstands
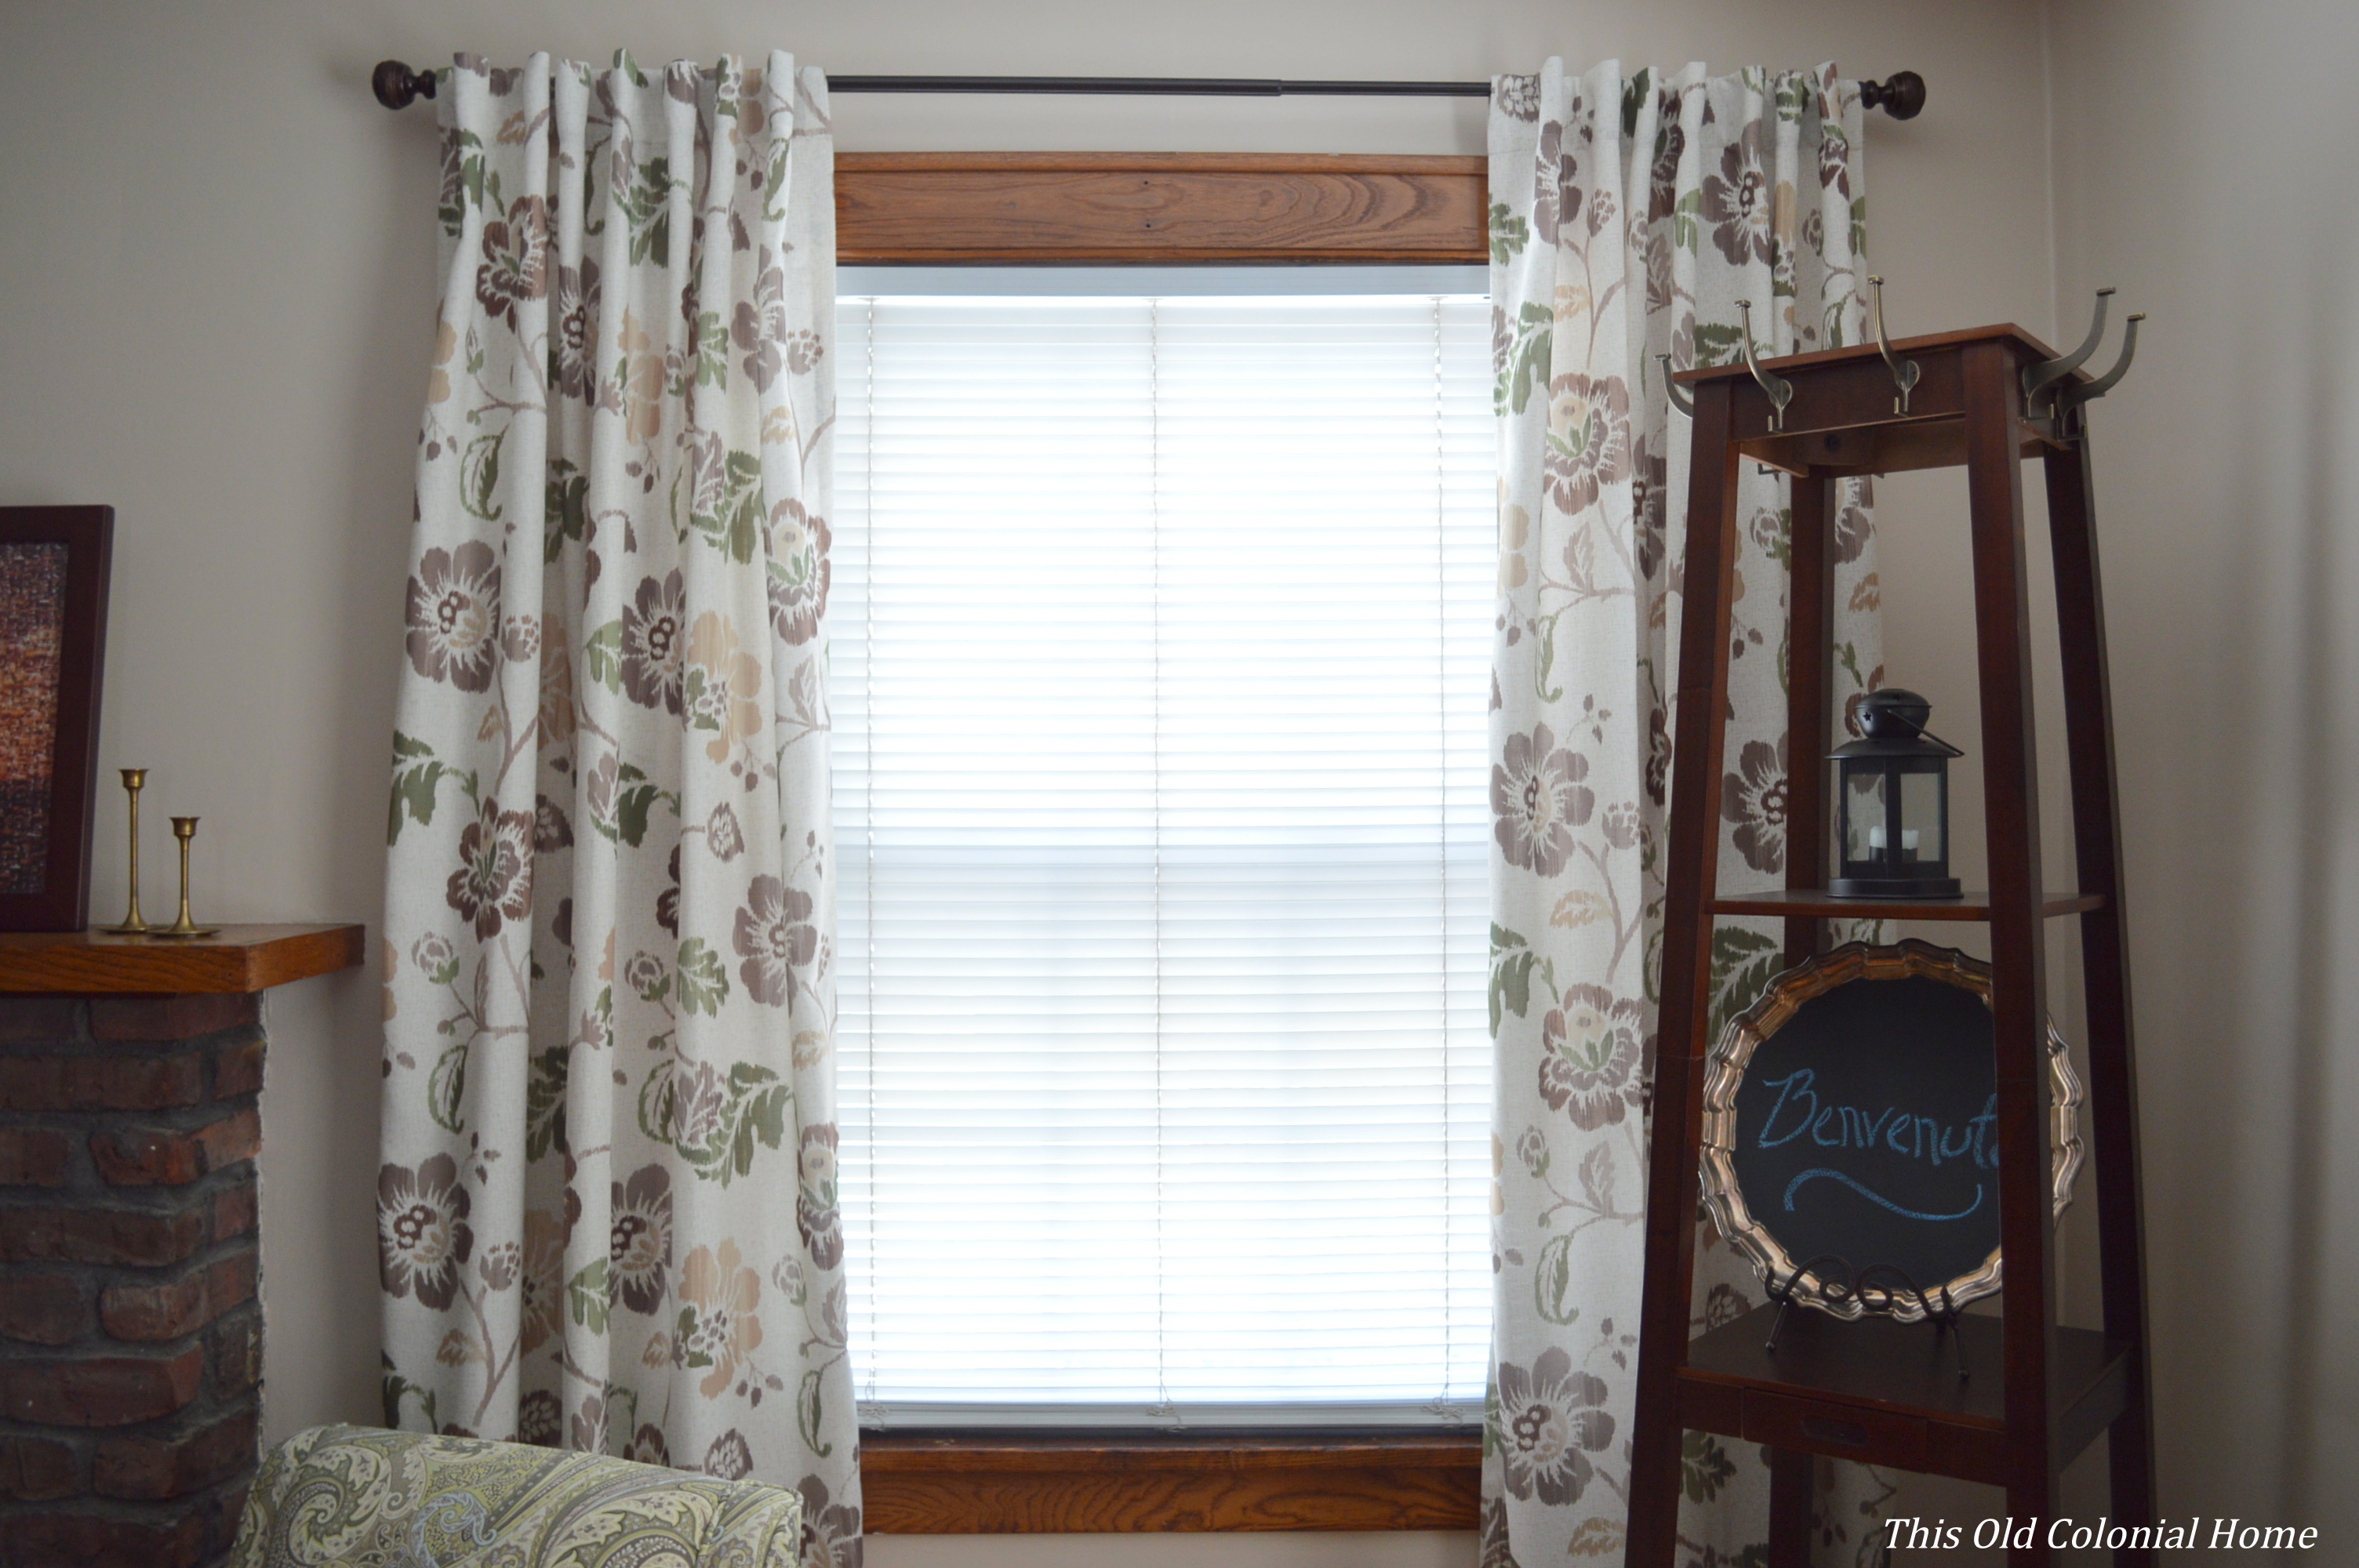
I truly love our master bedroom! I find it to be such a calming and relaxing space, and a true reflection of us. Is it time for bed yet?!


2 Comments

Fun with Curtains

I’m happy to report that we’re making some progress in the master bedroom! If you follow me on Instagram (@oldcolonialhome) then you know that I recently scored this awesome accent chair at Marshalls.Navy chair with silver nailhead trimI was supposed to be shopping for a mirror at the time, but when I came across this lovely piece with its nailhead trim, I knew I couldn’t pass it up (especially when I had passed up on one similar last summer).

I did eventually find a big, round mirror that I was looking for to fill up the huge wall above my dresser. This rustic, wooden beauty is a HomeGoods find.Round rustic mirror painted woodBut the main thing I want to share with you is our new curtains.Master bedroom curtains I love how they turned out, but man what a process it ended up being!

One of the issues we had was that each of the 3 windows in our room either butts up against the roof line or a wall or both.Window next to roof line Window butted next to wall Window against roof line and wall This makes curtain rod placement tricky, especially since I usually like to go high and wide. That wasn’t going to be an option here. I considered doing roman shades, but I didn’t like the idea of a third of our windows always being covered, blocking natural light.

So I came up with the idea of using one panel on each window and hanging it using a rod made with black steel pipes. But instead of having two ends, we just have one.Industrial steel pipe curtain rodMaking the rod was super easy and cost less than $20 each. Here’s what I used:Pipe parts for curtain rod 3/4″ Floor Flange

3/4″ x 2″ Nipple

3/4″ 90 degree Elbow

3/4″ x 24″ Threaded Pipe

3/4″ Cap

After wiping down the pipes, I assembled the pieces in that order.

Another issue we encountered was the length from the top of the window to the floor. Since the windows are at the roof line, they’re lower than normal. So the standard curtain sizes wouldn’t work — 63″ was too short and 84″ was too long. But you know what’s the perfect length at 72″? Shower curtains! Did you even notice?!Shower curtain for window curtainThey were another HomeGoods happy find, and only cost $14.99 each!

So I had my curtain rod and I had my curtains, but there was one other issue — attaching the two. The pipe obviously wouldn’t fit through the holes in the shower curtain, and most standard shower curtain hooks wouldn’t fit over the pipe, and regular curtain hooks only come 7 to 10 in a pack and shower curtains have 12 slits. Oy! I was getting ready to throw in the towel. But finally I found something and ended up getting these affordable curtain rings from Ikea.Ikea curtain ringsWho knew such a small project would turn into such a big headache? But at least the end result turned out great and that’s all that matters!Curtains in the master bedroomOne panel window curtain Master bedroom window treatmentsWe still have a few things left to do in here (like paint the ’80s ceiling fan, build nightstands, and replace the lamps), but our bedroom is finally starting to feel a lot more cozy!


6 Comments

Final Piece

You’d think with it being summertime I’d have plenty of finished projects to share with you. But that’s not quite the case. My husband and I have been spending our free time traveling and doing summery things (i.e. barbeques and relaxing) and not too much around the house.

But just so you don’t think we’re completely lazy, there is one minor thing worth noting. I FINALLY picked out curtains for the living room — which makes the room done!! It’s something that I’ve had in the back of my mind since at least March. That’s when I bought curtains from Home Goods that I thought I liked, but really only liked the price (2 panels for $16.99). I only just returned them this past weekend. Oy!

I had also picked up curtains from Lowe’s that later got returned. And then I bought 2 other curtains from Lowe’s in the same pattern but different colors. I even took a survey on Instagram (@oldcolonialhome) to get some opinions. Why is this such a tough decision?! curtainsOf the 2 I chose these! And I love them! I thought I would want blue to pick up the other accents in the room, but the brown/green ones ended up looking better in person. DSC_0462The best part about being indecisive? The price came down! All 4 panels cost less than $60 total after tax!! I’m so happy this is done. It was the very last piece to the puzzle. The living room is completely finished! Check mark! DSC_0446DSC_0453DSC_0450And in case you missed it, our living room is also “award-winning.” 😛  I entered a contest on Pinterest — #PinItToWinIt by HouseHunt.com. All you had to do was post before and after home improvement pictures to become entered to win a $50 gift card to Home Depot, and they ended up choosing my entry! Fun! You can check out their article here.

Jamie and I hope to accomplish a few more projects this summer … unless the dog days get to us first! What about you — do you plan on using the warmer months to get stuff done or to slow down a little?


Leave a comment

Projects In Progress

Jamie and I currently have several projects going on all at once. Each one seems to come with its own obstacle and unfortunately since none are done yet I haven’t been able to post about them. So I figured I could at least give you a preview of what we’re working so hard on!

#1 Our biggest and costliest project is widening our driveway. For this we’re calling in the professionals. They just don’t seem to be calling us back. The plan is to turn our one car-width driveway into two car-widths. This way we won’t have to keep moving cars around when the other is in the way. Luckily, we have the room to do it, but our town isn’t allowing us to widen it as far as we’d like. (Bureaucracy!) We’ve been given a few estimates from a couple companies, we’re just trying to finalize and lock it down. Hopefully this will be done soon so we can move forward.

#2 I finally started redoing that free dresser I scored back in February. Last weekend, the weather was nice so I brought it outside and started sanding away! I also finally got to use the electric sander Jamie got me for Valentine’s Day. You might not think that’s a romantic gift, but I do!mask

sanderdrawersI still have to find some hardware I like. Then this weekend I plan to prime it, paint it and hopefully finish it up!

#3 Over the weekend, my husband was working alongside me, but on a project of his own. He took a stab at building a coffee table for our living room. garage

I must say he did a pretty awesome job for his first time attempting something like this! If you follow me on Instagram, Twitter, or Facebook you would’ve seen a sneak peek already, but here it is again in case you missed it. coffee table 2coffee table

Now we just have to finish it up with some stain. There are so many choices! Do you have a favorite?

luca bush

(I don’t think Luca was a fan of all the noise we were making. He hid in the bushes!)

#4 I’m also trying to complete some décor odds and ends. I bought this artwork for our family room from overstock.com. BB art

I love the Brooklyn Bridge! It’s where Jamie and I had our first date (aww). Now it just needs to get hung up. I also bought some curtains for the family room, but of course I still need a curtain rod to hang them.

curtains

It was hard enough finding curtains I liked at the right price (it’s crazy how expensive they can be!) and the right length. I swear 84″ is too short and 95″ is too long 😛 (I’m not a fan of when they “puddle” on the floor.) So the thought of having to look for a rod makes my head hurt a little. Haha!

#5 There’s always more painting to do! We have 5 rooms left. The paint is already picked out and purchased for 3 of those rooms. Eventually we’ll get to it. Rome wasn’t built in a day after all!

Please be sure to keep checking back for the reveals. And make sure to follow @oldcolonialhome on Twitter and Instagram for projects in progress!  How many different projects are you working on at once?