This Old Colonial Home

Filling our house with love and a lot of DIY


6 Comments

Final Piece

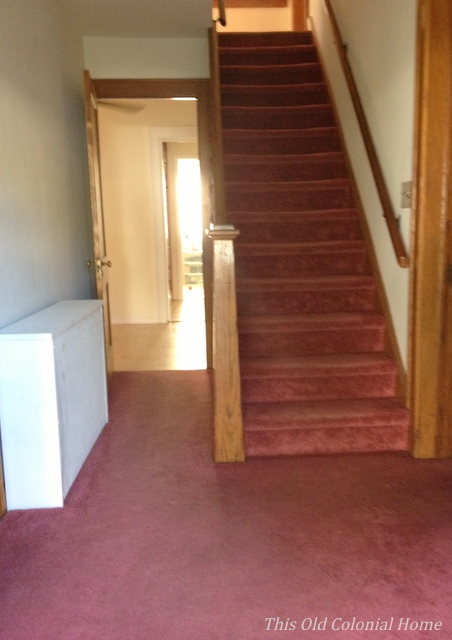
You’d think with it being summertime I’d have plenty of finished projects to share with you. But that’s not quite the case. My husband and I have been spending our free time traveling and doing summery things (i.e. barbeques and relaxing) and not too much around the house.

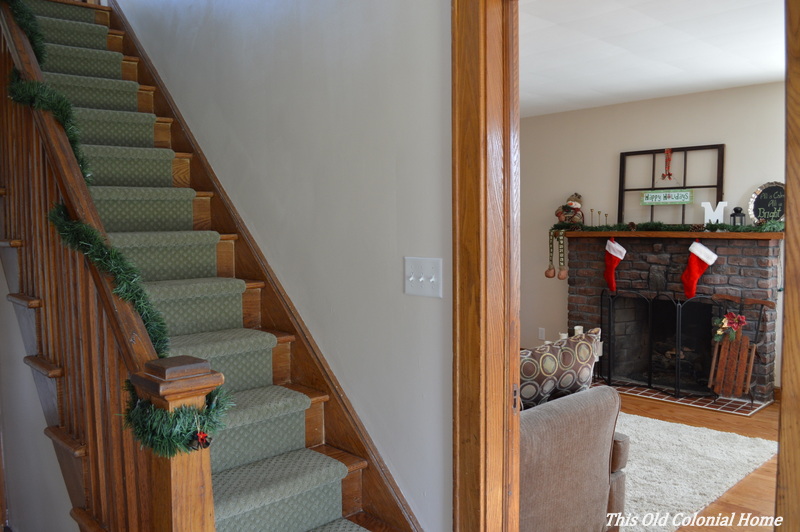
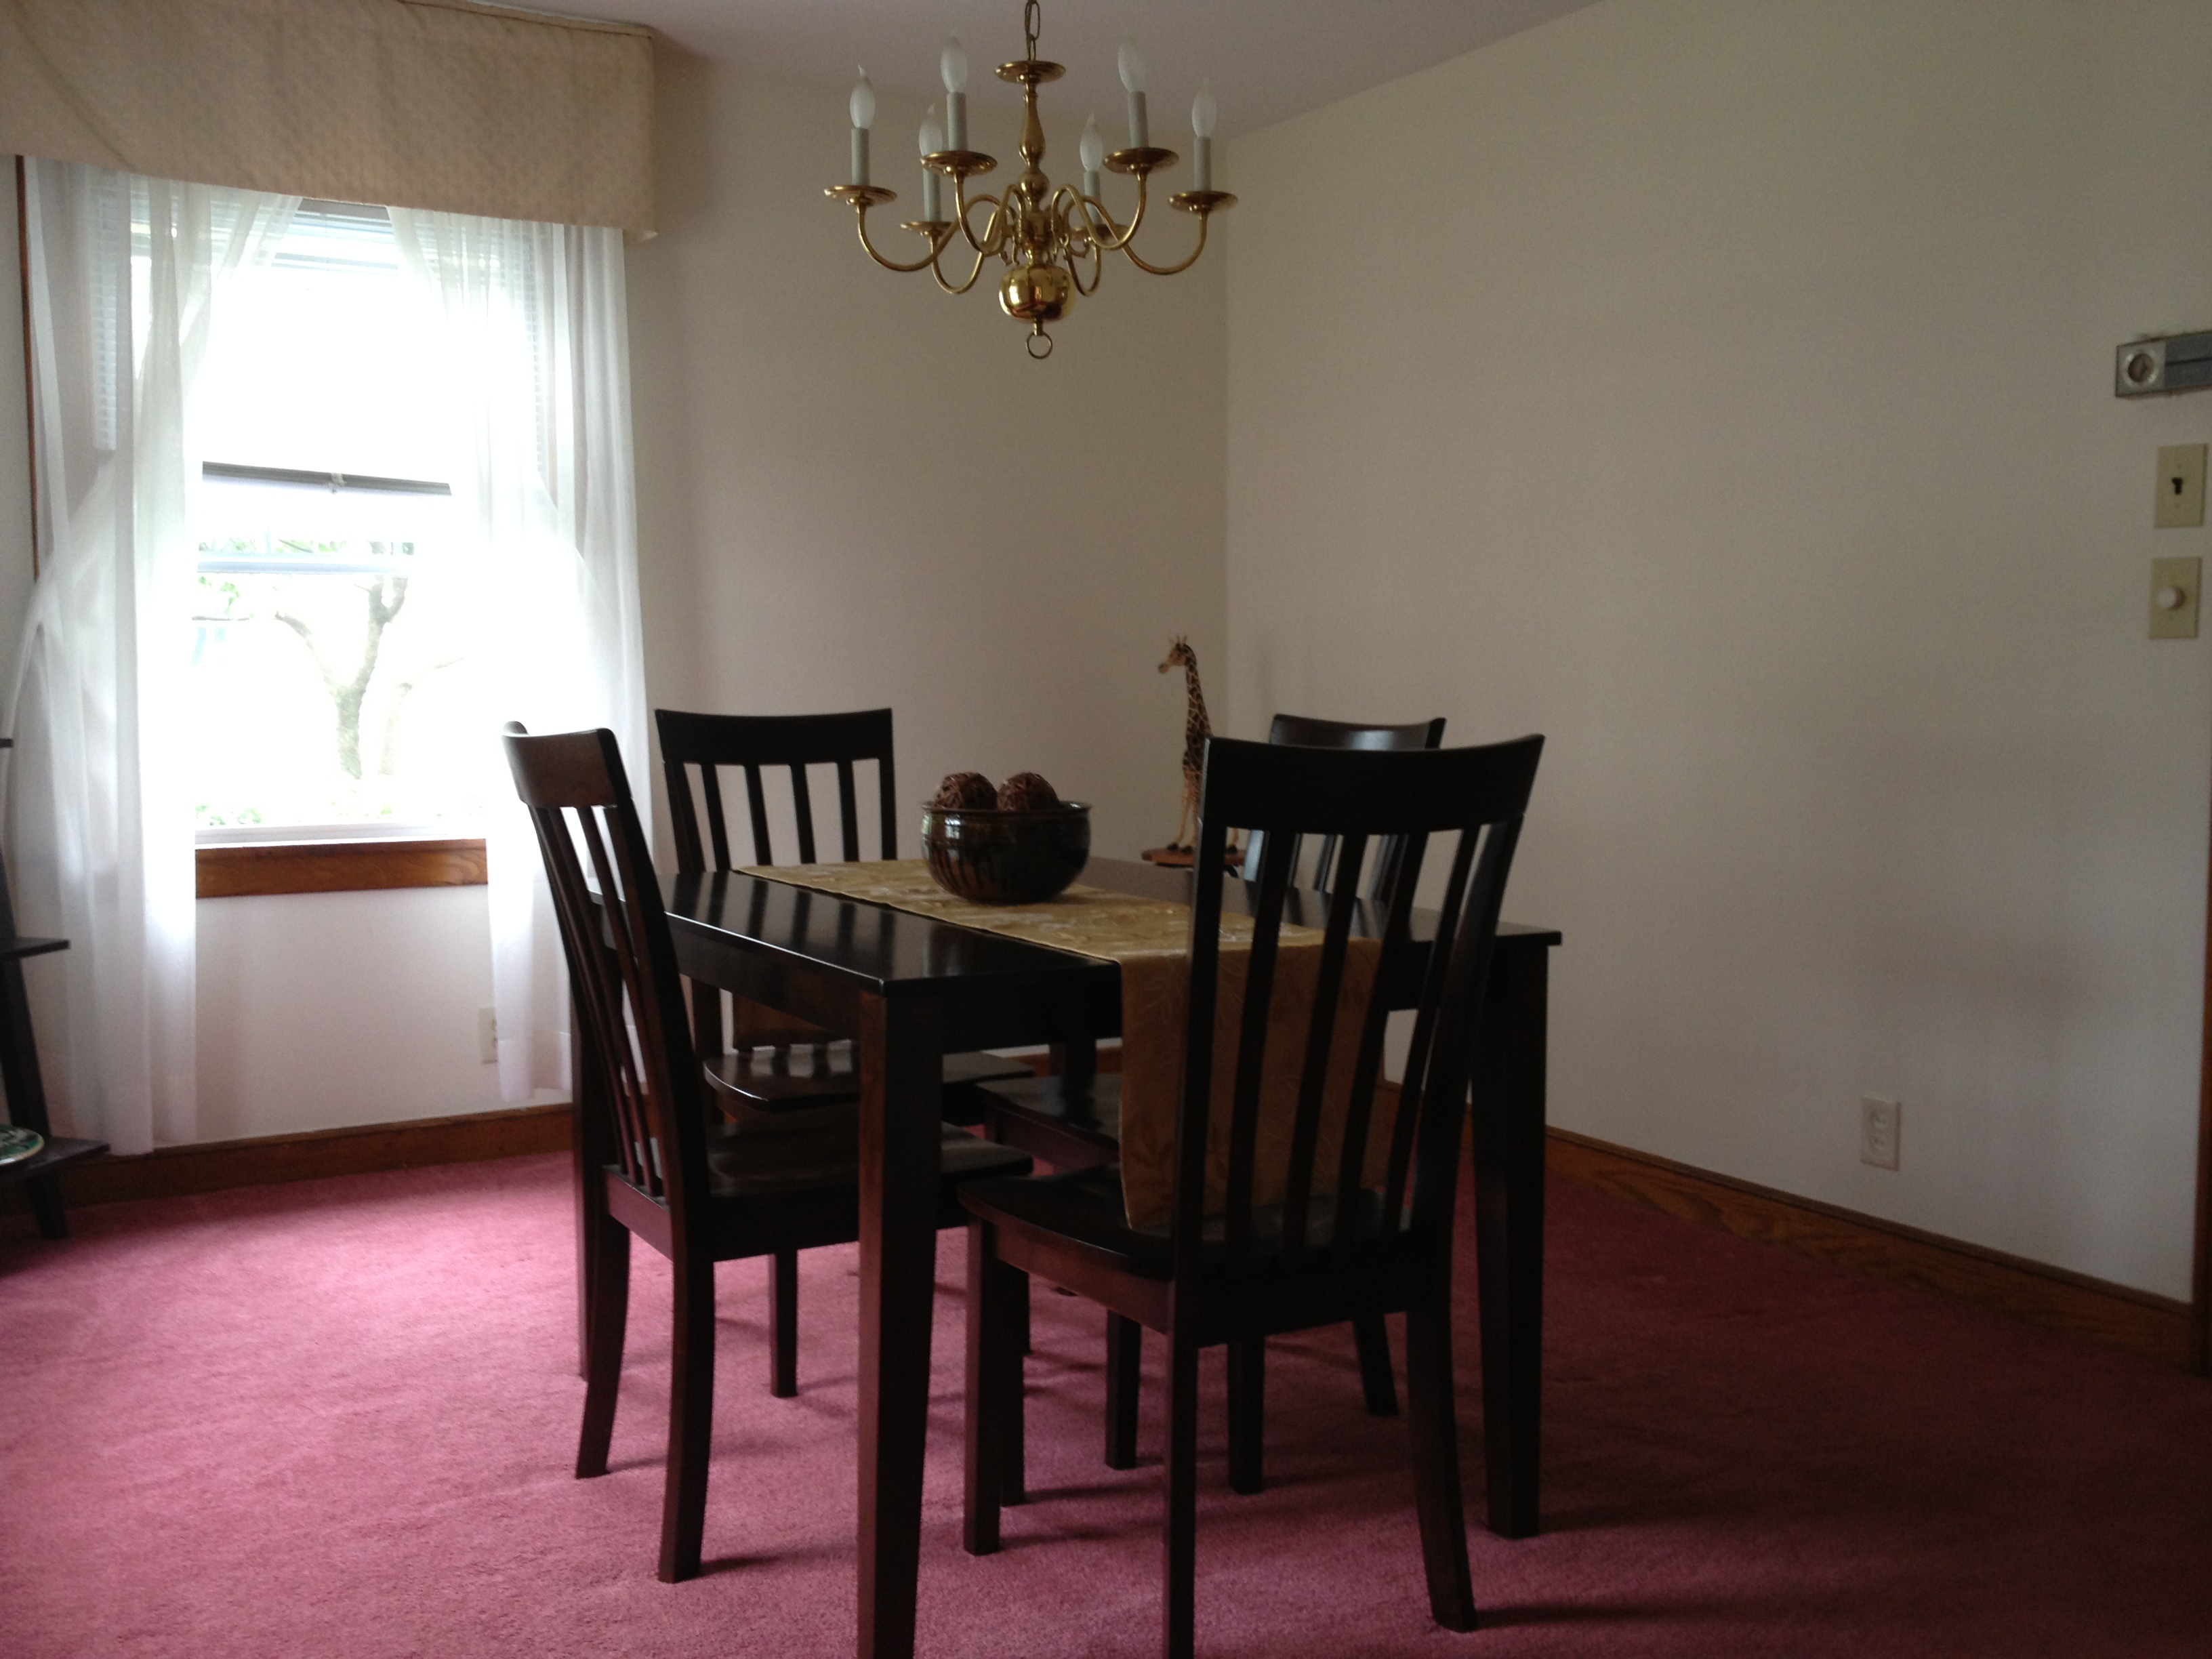
But just so you don’t think we’re completely lazy, there is one minor thing worth noting. I FINALLY picked out curtains for the living room — which makes the room done!! It’s something that I’ve had in the back of my mind since at least March. That’s when I bought curtains from Home Goods that I thought I liked, but really only liked the price (2 panels for $16.99). I only just returned them this past weekend. Oy!

I had also picked up curtains from Lowe’s that later got returned. And then I bought 2 other curtains from Lowe’s in the same pattern but different colors. I even took a survey on Instagram (@oldcolonialhome) to get some opinions. Why is this such a tough decision?! curtainsOf the 2 I chose these! And I love them! I thought I would want blue to pick up the other accents in the room, but the brown/green ones ended up looking better in person. DSC_0462
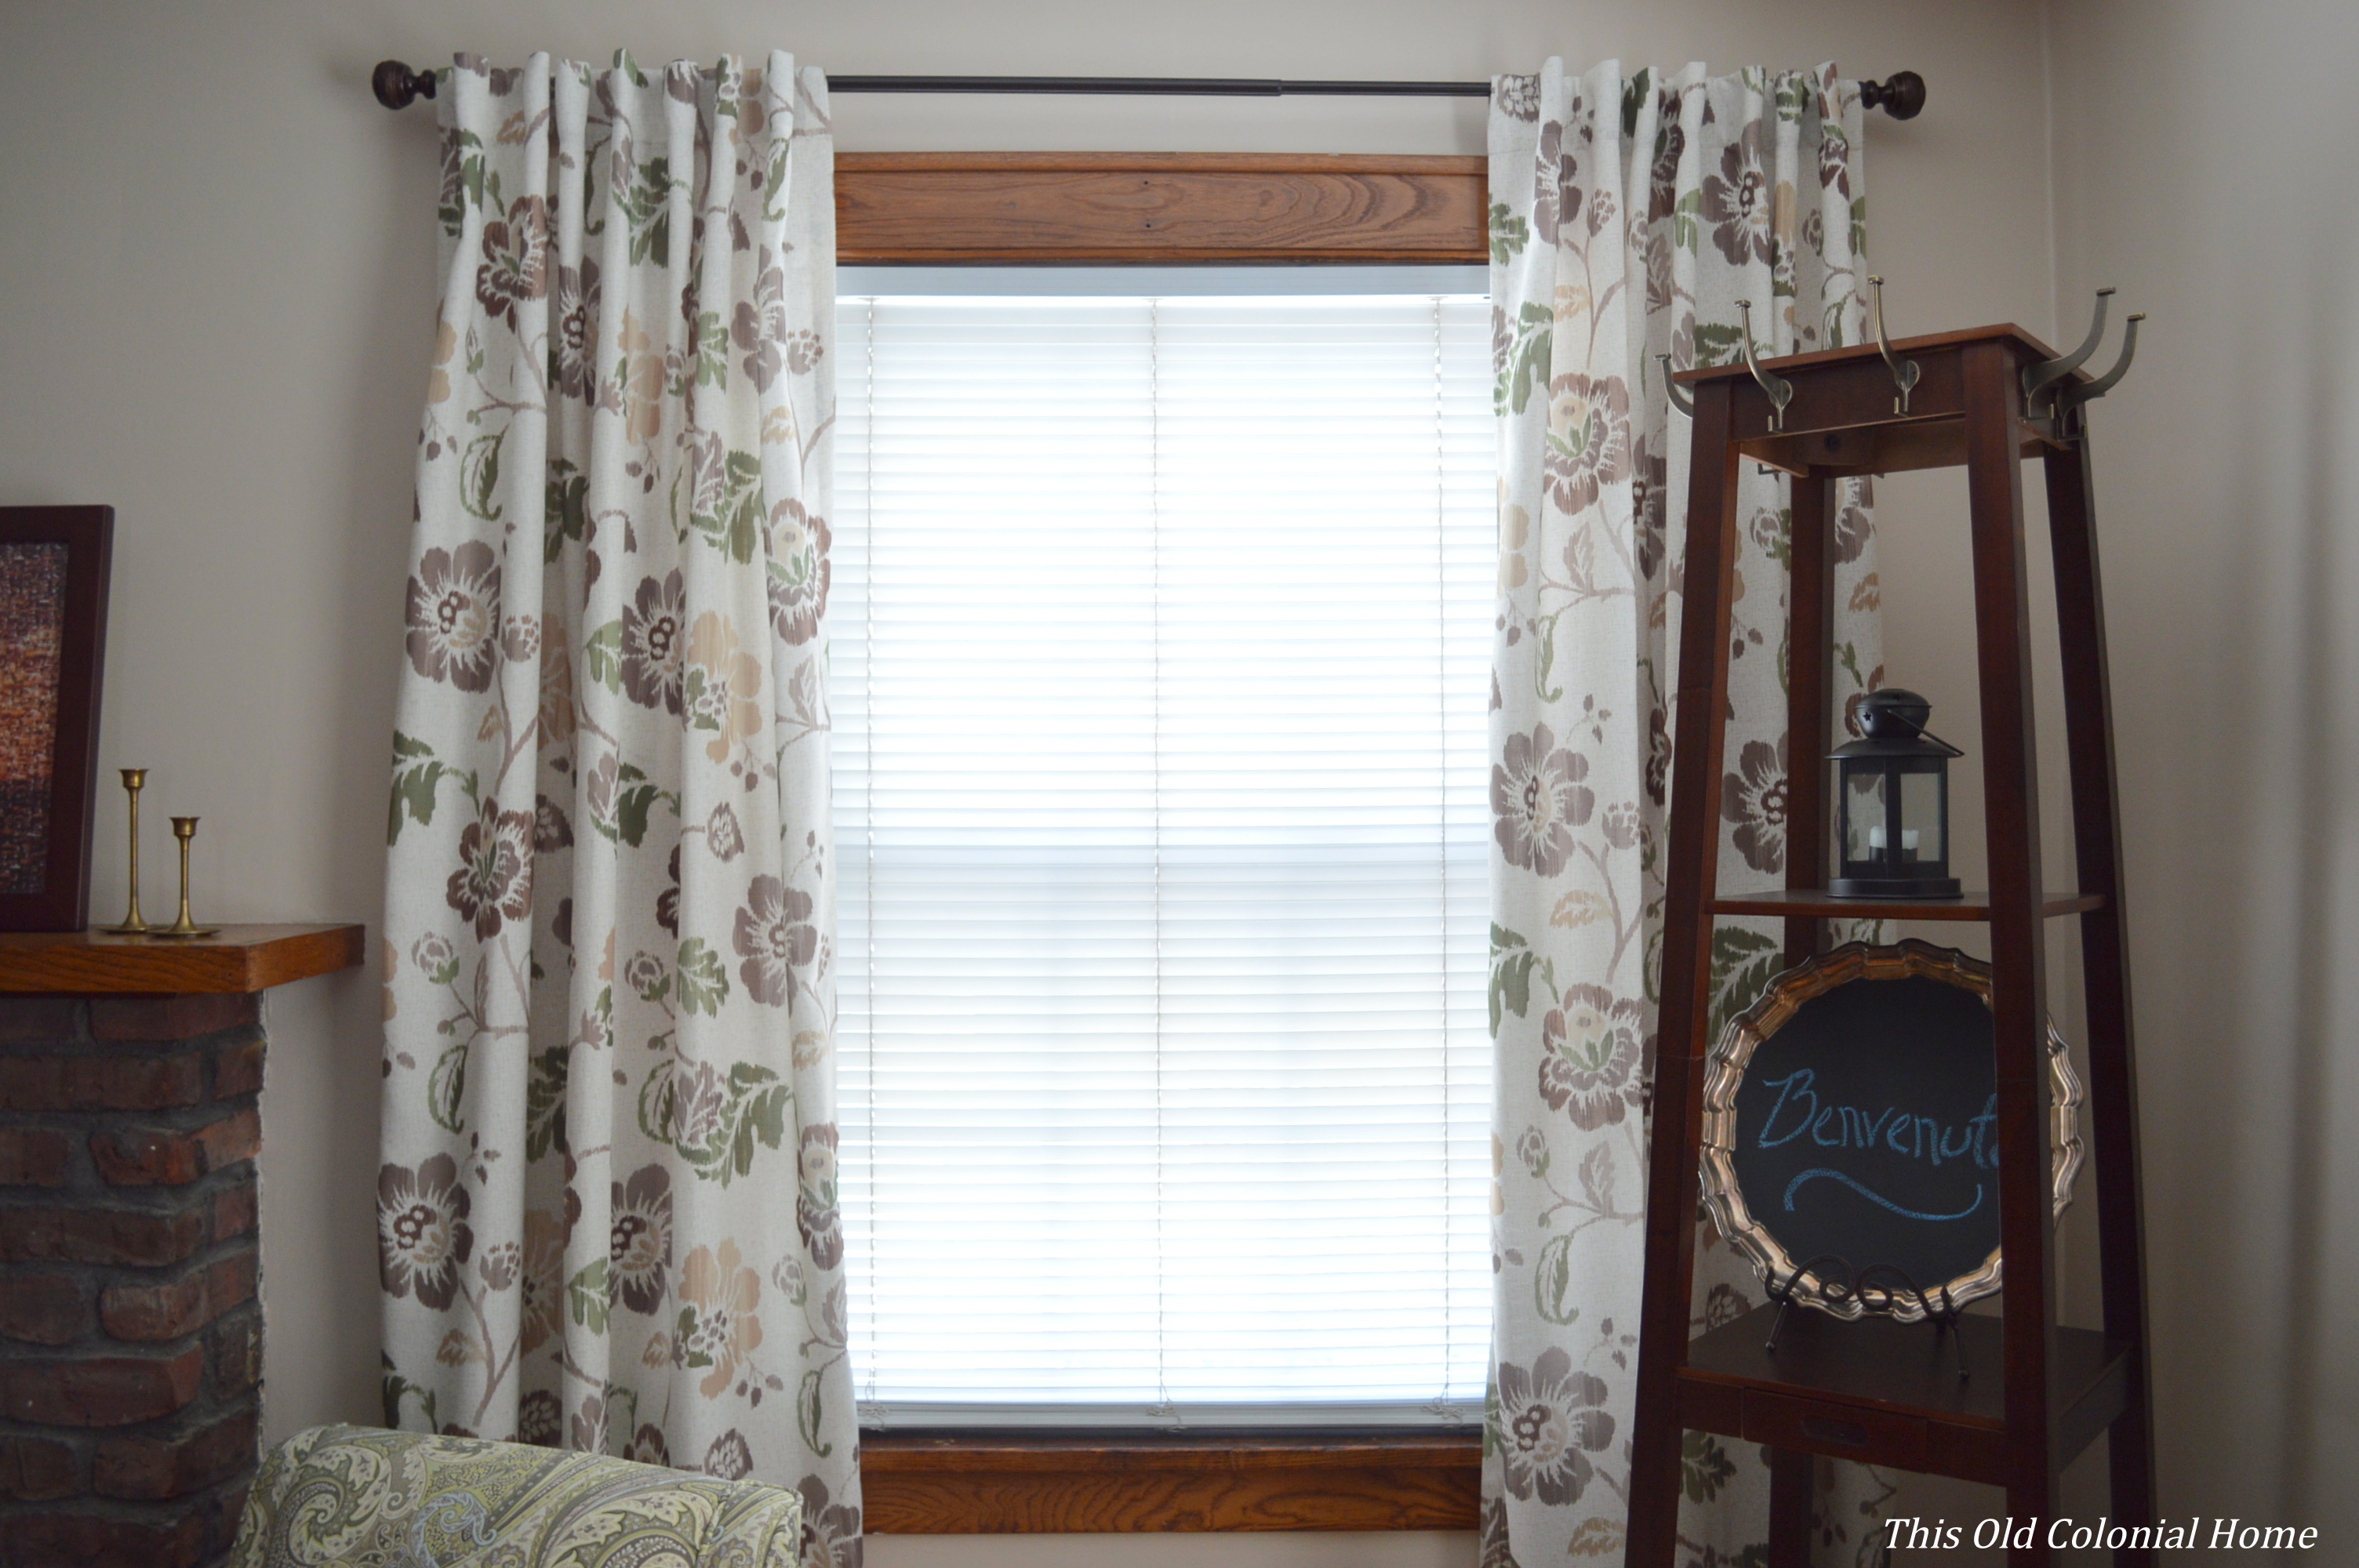
The best part about being indecisive? The price came down! All 4 panels cost less than $60 total after tax!! I’m so happy this is done. It was the very last piece to the puzzle. The living room is completely finished! Check mark! DSC_0446DSC_0453DSC_0450And in case you missed it, our living room is also “award-winning.” 😛  I entered a contest on Pinterest — #PinItToWinIt by HouseHunt.com. All you had to do was post before and after home improvement pictures to become entered to win a $50 gift card to Home Depot, and they ended up choosing my entry! Fun! You can check out their article here.

Jamie and I hope to accomplish a few more projects this summer … unless the dog days get to us first! What about you — do you plan on using the warmer months to get stuff done or to slow down a little?


4 Comments

DIY Coffee Table

Aside from finding the plans, I certainly can’t take any credit for our awesome, new coffee table.

It all started when I saw this lovely post on Pinterest/Hometalk, which then led me to the incredible site ana-white.com.

Rustic wood coffee table using Ana White plans

Courtesy Creative Little Daisy via Hometalk

If you’re not already following her – START! Her pieces are gorgeous and she provides free, easy-to-follow plans to make your own furniture — saving you some cash.

Jamie picked up the necessary materials, any tools we didn’t already have, and even got a table saw from his dad. (Thanks, Jim!)Supply of pine and douglas fir boards for coffee table Making cuts for the coffee tableWhile I was working on my dresser makeover, Jamie began working on this project. He followed the cut list and then began assembling the pieces step-by-step.The cut list of boards ready for assemblying Screwing the coffee table frame togetherCoffee table base assembledThis is what it looked like when he was done. Pretty impressive for a novice, right?!Base and top of coffee table togetherDIY coffee table assembledHe did have one slight hiccup that needed to be fixed. When we brought it inside to test if it was level – it wasn’t. After taking the top off and apart, he determined that the base was level, but some of the boards on top were warped causing it to be thrown off balance. Jamie eventually replaced the boards with new ones and – voila! All better!

After that, he filled any major holes with wood filler and gave it a good sanding. He then applied a wood conditioner before moving on to the stain. (We picked Minwax Special Walnut.) He brushed on the stain, let it sit for a few minutes and then wiped it off with a rag.Applying pre-stain before stainingA can of Minwax stain Special WalnutApplying the first coat of stainIt took 3 coats to get the look we were going for.Coffee table completely stained with 3 coatsI just LOVE how it turned out! Who knew my husband was so handy?! (I think I’ll keep him around!) Here it is in our living room, where I think it fits in perfectly!DIY coffee table in living room DIY wood coffee table and gallery wall in living room  Close-up of wood coffee tableDIY coffee table and decor Side view of coffee table with XRustic coffee table with blue and green accentsFront view of DIY coffee table Rustic living room with handmade coffee table In the end, this project cost only about $100! Try finding that in a furniture store!


Leave a comment

Mirror, Mirror on the Wall

A few months ago I was visiting a friend and I noticed she had window-pane mirrors in her finished basement. They looked awesome! I immediately knew I wanted to incorporate something similar in our own house. After doing a little online searching, I realized it would be more affordable if I took matters into my own hands. Besides, I already had a 6-pane window going unused. (It’s the bottom half of the window that’s on our mantel.)6-panel window pane Now I had to figure out how to turn the window into a mirror.

Solution found: Rust-Oleum Mirror Effect spray paint!Mirror effect spray paintI ordered it from Home Depot. It’s a little pricey at $8.50 for a 6 oz. can (and I bought two), but when I consider that $17 is all I spent for this project, I’d say that’s pretty good.

So I started by taping off the window. It has dark wood on one side and light wood on the other. I wanted the lighter side to be the front so I taped off the back. You spray paint the reverse side to create the reflective mirror-like finish. Taping the window was pretty time consuming. You might even say it was a pain! Haha get it?!Tape off mirror before painting Taped off window pane for spray paintingMy first attempt at trying to paint it back in January didn’t go so well. The can says it needs to be between 50 and 90 degrees with 85% or less humidity. I tried doing it in our garage on a rainy day and I think it was just too humid out. The paint was very runny. So I had to wait for better weather, which meant I had to wait awhile since it’s Winter in the Northeast. Spraying inside definitely wasn’t an option. The smell is very strong. But finally, this past weekend was nice enough, and this go around was much better! It took several light coats to get the desired mirror effect.Spray light layers of paint on glass Thin layers of mirror effect spray paint Final layers on reverse side of window It doesn’t have a perfect mirror finish, almost an aged look to it. But I love how it turned out!View of mirror effect from the front After adding some hardware to the window and using anchor screws, we decided to hang it above the love seat in our living room.diy window pane mirror in living room easy window mirror using mirror effect spray paint 6-pane window mirror above couch easily turn a window into a mirrorThere actually used to be a window along this wall (most likely this very window) but it was closed up after an addition was put on the back of the house. I kind of like that part of it is now back where it used to be!


2 Comments

Gallery Wall

It’s been several months in the making, but we finally completed and hung a gallery wall in our living room. We have a lot of blank walls to fill, and after seeing this post by With Love, From California I was truly inspired! I knew it would be the perfect addition.Blank wall behind couch perfect for gallery wall 
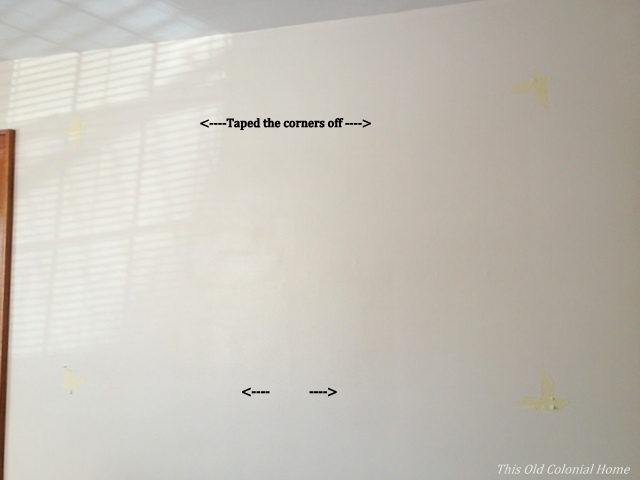
Following her lead, Jamie and I measured the wall above our couch factoring in a 12″ perimeter. There was one tricky part though. Our couch isn’t centered along the wall because of a door that swings open. So since the couch is off-centered, we figured it was best to keep the gallery wall the same way. That way it’ll still be centered over the couch and we won’t have pieces hidden behind the door, which is almost always open wide.

Once we had the measurements, like With Love, From CA, I cut pieces of string to mirror the dimensions and laid them on the floor to recreate the wall space. I now had a place where I could play with the arrangement of frames, artwork, etc. until I got it just the way I wanted. As for deciding what went into the gallery wall, I started by collecting various frames and artwork I already had. Since I mainly had black and silver and some ivory mats, I decided to stick with that theme knowing I wanted to use just black and white photos. This was the first layout I came up with.lay gallery wall pieces on floor to rearrange (Notice the brown dinner plate. I liked the idea of using a circular piece there to break it up a little, but I didn’t have anything at the time that would work. I also wasn’t sure what to put in the lower right corner. Hence the ‘?’)

I eventually found a clock (on Kohls.com) that I loved. Even though we already have a clock on the mantel, this one was the perfect size and I really liked the skeletons keys on it! So I went for it. I also swapped out the silver frame with the ‘&’ for a black one that I found at Home Goods. I felt there was too much silver. I also swapped the small, silver square frame with the medium, rectangular silver frame for better spacing.Rearranging gallery wall layoutI was almost there. I still needed something for that lower corner. I had thought about just making a piece of artwork out of scraps of wood we have. But then I came across another great frame, this time at Target. Finally, it was set to go!Gallery wall final layout To hang it, we started by using the original measurements and marked off the corners on the wall.Measure and mark corners for hanging gallery wall Jamie then took over the hanging process. He started by doing each corner first then working his way in, fixing any spacing issues or slight measuring errors along the way. (Luckily, any mistake holes just get covered.)In progress hanging gallery wall Here’s what it looked like when he was done.Gallery wall completely hung And here’s how the absolute final product looks with all the appropriate photos in it. I love how it turned out!Gallery wall behind couch in living room Complete gallery wall in living room Use scrapbook paper in some of the frames I  used scrapbook paper in some of the frames.Eye chart displayed in frame I decided to nix the ‘&’ and printed a free and custom eye chart from http://www.eyechartmaker.com. Bonus points if you know what it says!


1 Comment

Everyday Mantel

Yes, I’m doing yet another post on our fireplace. You’ve seen it decked out for Fall and Christmas, but now I wanted to share our ‘everyday’ mantel.

With all of the other projects we’ve been working on (aren’t there always projects?!) – it’s taken me a little while to get to this. But I finally incorporated some new items we received and I’m pretty happy with it. It just needs some candles, though I don’t mind the candlesticks just by themselves. What do you think?Brick fireplace with rustic mantel decorI decided to keep the old window, which I had used at Christmas. We got this great clock from Hobby Lobby as a Christmas gift from my parents. The crock was a gift from Jamie’s mom. All the other items we already had, except for the brass owl. That was a flea market find from my Dad. And don’t you just love old, hardcover books?Vintage scale and old hard-covered booksRustic mantel with window pane and clock So I think this will pretty much be how the mantel remains throughout the year – until I get bored with it haha! But right now I’m loving its simple, vintage vibe!


3 Comments

Deck the Halls

Since Thanksgiving fell so late this year, we quickly had to turn from thankfulness to the Christmas craziness. I don’t know about you, but I just can’t allow myself to get into the holiday spirit until after Thanksgiving, even if that does mean there are only 4 weeks left (eek!). That being said, we wasted no time this past weekend getting ready for the first Christmas in our new home.

The first thing I tackled – after cleaning – was the mantel. I didn’t really have a plan of attack. The only thing I knew I wanted to incorporate was a 6-pane window I found in the attic of our garage. So I started with that and worked around it using items I already had. One issue I encountered – there’s an outlet on the wall above the mantel, which you can easily hide with a picture or clock, but with a window, not so much. In comes the “Happy Holidays” sign. I decided to hang that from the window using gift wrapping ribbon and voila, the outlet is now strategically hidden!

window-001

I continued to go through our Christmas storage bins, picking out anything that caught my eye and might work. I used pre-lit garland, candle sticks, my favorite chalkboard platter, and real pine cones left over from my Thanksgiving place card holders! Oh and remember those two wooden sleds I snagged for free (see post here)? I used the smaller one by the fireplace, adding a little faux garland to it. Here’s the final result:

DSC_0022-001

 DSC_0023 DSC_0025 DSC_0026  DSC_0029-002DSC_0033

In the dining room, I changed out the table runner and added a simple glass bowl filled with ornaments. I also put a few decorative items on the ladder shelf, including 3 mason jars with pine cones inside, to carry over from the living room.

DSC_0057

DSC_0036 DSC_0040 DSC_0043

Outside, I used the larger sled on our front steps. I added real pine branches, which I found in someone’s curbside leaf pile, and I used that same gift wrapping ribbon for the bow! I am beyond happy with this decoration. It was completely free!

sled

And, of course, it wouldn’t be Christmas without lights! I placed candles in all of the front windows and my husband adorned the bushes. I love white lights, they’re so classy!

DSC_1046

Next weekend we get the tree! What are some of your decorating tricks?


Leave a comment

There’s No Place Like Home

After 4 months, our house is finally starting to feel like home! Every change we make, it becomes more and more our own.

In the living room, we finally have furniture. It’s been an empty and echoey room up until now. We picked up a sectional my mother-in-law had for us. So that went in the family room where our nicer couches had been, and we could finally move these into the living room.

DSC_0002

DSC_0003

We also changed out the chandelier in the dining room. That wasn’t something we planned on doing right away, but my dad had this beauty lying around and gave it to us. I think it really softens up the room and even matches our table really well! It had been a gold candle chandelier before.
DSC_0005

DSC_0006

And the biggest difference is in the entryway. We had a stair runner installed last week. I love the sage color! We also took down the handrail that ran up the wall, which I think gives it a much cleaner look.

DSC_0011

DSC_0012

It’s all about baby steps (no pun intended!) What changes have you made to make your house feel more homey?


Leave a comment

We’re Floored

Our hardwood floors are finally finished, and wow what a difference! We brought professionals in to do the job. For the past week they worked hard to bring them back to life. They spent a few days just sanding them down. Then they stained them Minwax Golden Oak and added a feature strip in the entryway per our request. They added several coats of water-based poly and finished it off with shoe molding (that’s the molding that fills the gap between the baseboard and the floor). I’ll let the pictures speak for themselves, with a reminder of where we started just a short time ago.Colonial house living room with fireplace beforeCarpet ripped up in living room hardwood floors refinished minwax golden oak Colonial house dining room with carpet before Dining room with carpet removedDining room hardwood floors refinished minwax golden oak Center hall colonial stairs with carpet before Carpet removed from stairs Entryway floors refinished Minwax golden oakEntryway landing with unfinished floors Entryway floor feature strip in progress Refinished entryway landing with feature accenting herribone pattern


Leave a comment

Small Weekend Project

This weekend’s project consisted of going to Lowe’s to pick up paint supplies for the living room. We purchased rollers, brushes, pans, and tape. We, of course, also grabbed some paint card samples and brought them home to decide. You really can’t choose under those fluorescent lights in the store.

Paint Samples

We knew we wanted something in the beige family, and luckily we both agreed on one! It’s looking like Desert Fortress (middle) is the winner.

Paint Winner

But before we go back out and get the paint, we need to do a little prep work first — spackling and sanding. And by we, I really mean my husband! He’s also in the midst of changing all of the outlets. He’s converting them from two-prong to three-prong and adding new cover plates.

photo 3 photo 4

Obviously those will have to be taken back off once we paint, but it looks so much better and is now more functional. Little changes can make a big difference!


Leave a comment

Uncovering the Past

I will never understand why people cover up hardwood floors. Obviously styles change throughout the years, but I just feel hardwoods are timeless. So after years of being hidden under carpets, our 75-year-old floors are once more revealed! My husband and I, with some help from my father-in-law, pulled up the carpets ourselves. None of us had ever done it before, but it was a fairly easy – and FREE – project.

IMG_1233  IMG_1236

The carpet, padding and staples all came up with little effort. The tack strips, however, were the hardest part. The guys eventually got it down to a science. But needless to say, I wasn’t much help in that department. My job was to make sure our dog didn’t step on the nails!

IMG_1224  IMG_1247

All that’s left to unearth are the stairs. That’ll be for another day in the near future.

IMG_1239  IMG_1248

The condition of the floors aren’t too bad, but they will need to be refinished. And for that, we’re calling in the pros. I realize we could save some money if we rented a sander and did it ourselves, but for something like this we don’t want to run the risk of screwing it up! Plus, did you notice the awesome herringbone edging?! I’d hate to mess that up.IMG_1249We’re still debating whether we want to do a darker stain trim around the edge to accentuate it. We definitely plan on doing something in the entryway, but I’m torn on doing it in all three rooms. Any thoughts? Either way, I can’t wait to see these babies shine! Be sure to check back to see the final product!