This Old Colonial Home

Filling our house with love and a lot of DIY


2 Comments

Dresser Makeover

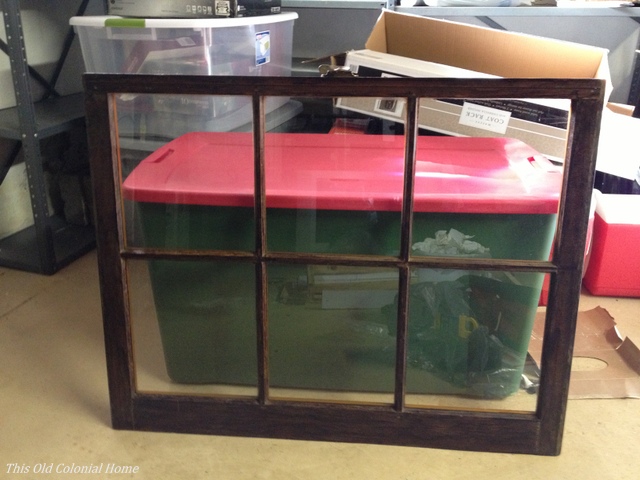
You may recall several months ago I snagged a free dresser that someone was throwing away. It was literally sitting in the snow amongst other garbage before I rescued it.Dresser set out for curbside trashFree 6-drawer dresser 
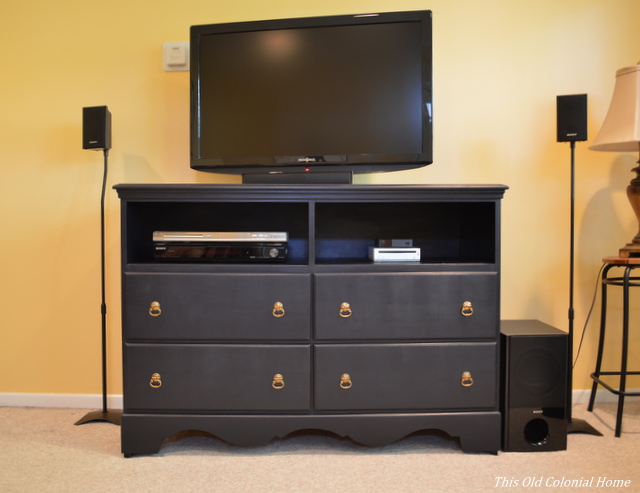
The plan was to turn it into a TV stand. After a good cleaning and sitting in our dining room through the remainder of our endless winter, that idea has finally come to fruition!

It needed to be refinished and I knew I wanted to paint it, so I started with the drawers. I took off the hardware and began sanding it with my new electric sander. (Thanks, honey!)Dresser drawer with hardware beforeUnscrewing hardware from drawerUsing electric sander on drawersI highly recommend using an electric sander for big jobs. I had a battery-powered one for a previous project and it always died quickly. Electric is way better because, in my best Tim the Tool Man Taylor impression, it has more power!  I used course sandpaper – 80-grit – to start and then went back over with finer 150-grit to smooth it out.Drawer sanded downTwo drawers one sanded one not I then took the same approach on the base, going over some of the smaller areas by hand.Dresser base before sanding Dresser base after sanding 
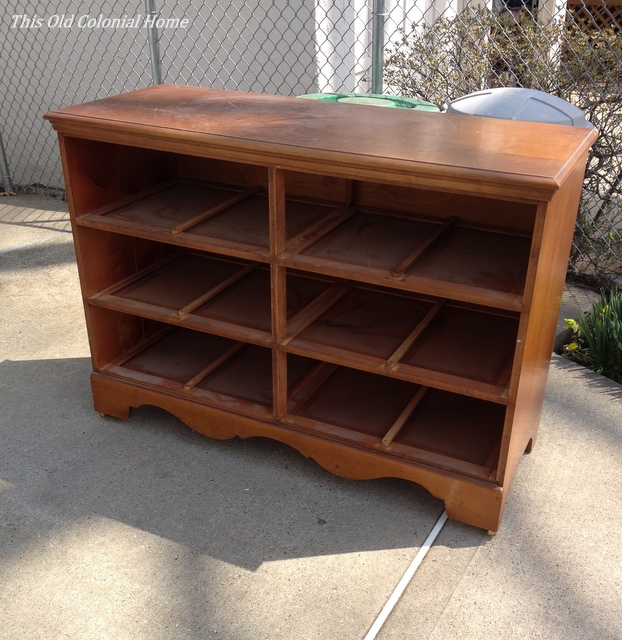
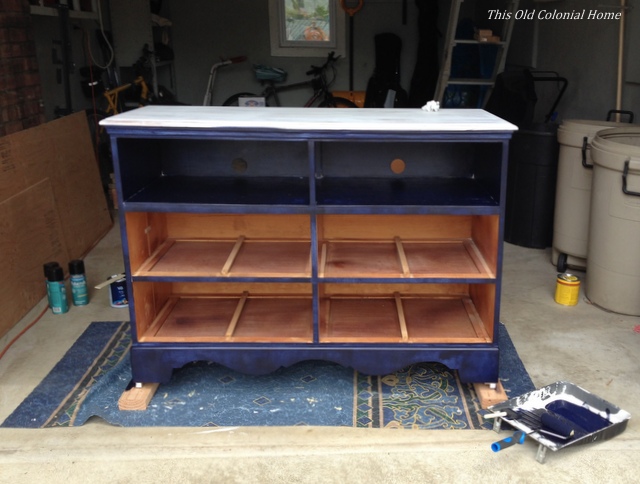
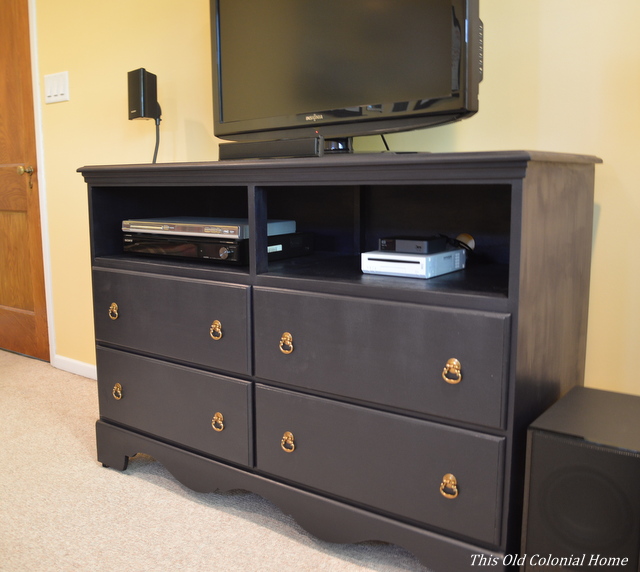
The plan was to keep the top two drawer areas open. This is where we would put our DVD player and such. My husband drilled out two holes in the back for the cables to go through … and he measured, cut and added plywood to make for a sturdier shelf.Holes drilled in back of dresser for TV cablesPlywood inside dresser for sturdier shelf He also added a few brackets on the inner sides to support some minor splits in the wood.

After wiping it all down with a wet cloth, I then started to prime it. I used one coat of Zinsser Primer that I applied with a paint brush. Once it dried, I lightly sanded it with 180-grit sand paper and then wiped it down one more time. It was finally ready to paint!Drawers primed and ready for paint Dresser base primed and ready for paint 
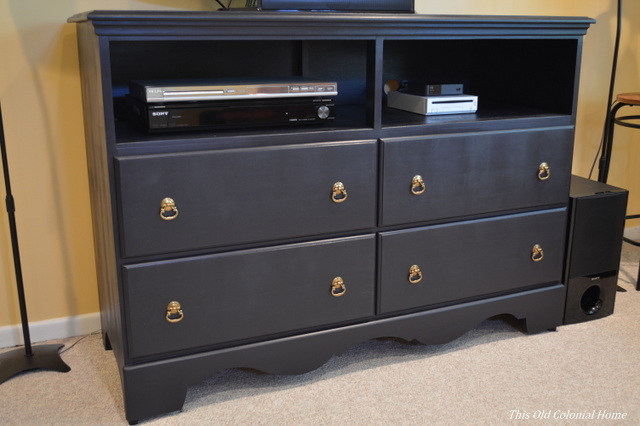
I chose regular latex paint – Mystified by Valspar in semi-gloss. I applied light coats using a foam roller and foam paint brush. To get the dark look I was going for it actually ended up needing 4 coats! I thought the painting would never end! The drawers weren’t so bad, but doing the shelf area was kind of a pain.Navy painted drawers In progress painting of dresserPainted dresser with 4 coats
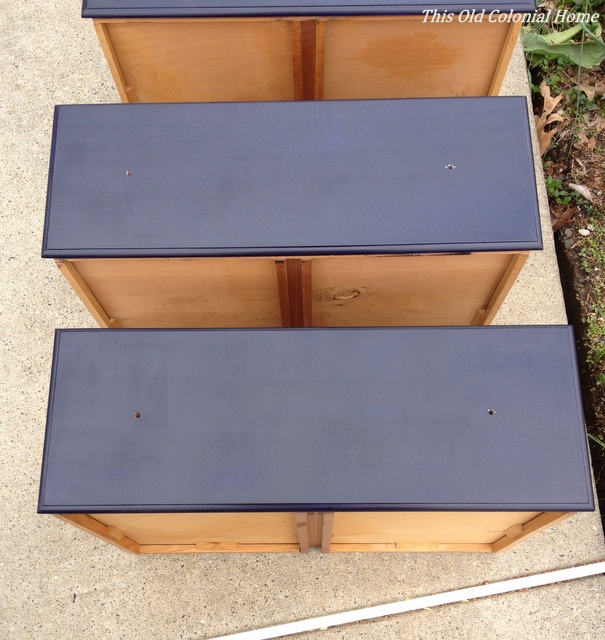
I’m not sure how necessary it was, but I also ended up sealing it with Minwax Polycrylic. It was easy to spray on and I was able to do the recommended 3 coats pretty quickly.Polycrylic spray can Once it was dry, I added new hardware, which I had ordered from Lowe’s. Love this antique look!Brass drawer pulls from Lowes The entire project definitely took me way longer than I had anticipated (3 separate weekends), but I am so happy with how it turned out! And all of my hard work paid off, literally — the total cost was less than $100!!

Dresser before diy project

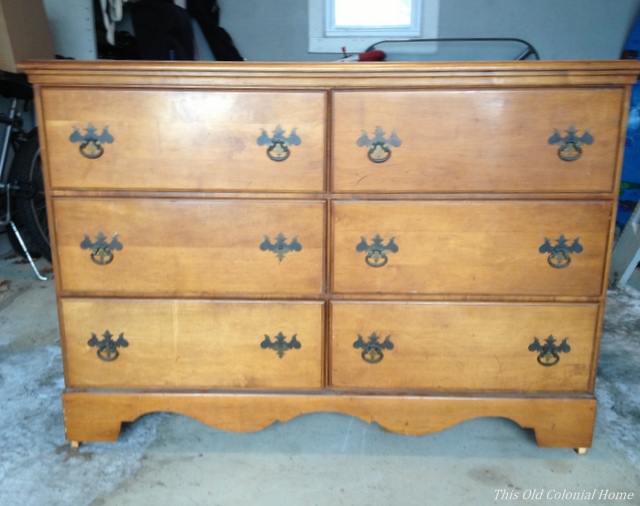
Quick reminder of the before

Dresser turned TV stand for family room DIY dresser into TV console TV stand from old dresser Turn a dresser into a TV stand DIY


Leave a comment

Mirror, Mirror on the Wall

A few months ago I was visiting a friend and I noticed she had window-pane mirrors in her finished basement. They looked awesome! I immediately knew I wanted to incorporate something similar in our own house. After doing a little online searching, I realized it would be more affordable if I took matters into my own hands. Besides, I already had a 6-pane window going unused. (It’s the bottom half of the window that’s on our mantel.)6-panel window pane Now I had to figure out how to turn the window into a mirror.

Solution found: Rust-Oleum Mirror Effect spray paint!Mirror effect spray paintI ordered it from Home Depot. It’s a little pricey at $8.50 for a 6 oz. can (and I bought two), but when I consider that $17 is all I spent for this project, I’d say that’s pretty good.

So I started by taping off the window. It has dark wood on one side and light wood on the other. I wanted the lighter side to be the front so I taped off the back. You spray paint the reverse side to create the reflective mirror-like finish. Taping the window was pretty time consuming. You might even say it was a pain! Haha get it?!Tape off mirror before painting Taped off window pane for spray paintingMy first attempt at trying to paint it back in January didn’t go so well. The can says it needs to be between 50 and 90 degrees with 85% or less humidity. I tried doing it in our garage on a rainy day and I think it was just too humid out. The paint was very runny. So I had to wait for better weather, which meant I had to wait awhile since it’s Winter in the Northeast. Spraying inside definitely wasn’t an option. The smell is very strong. But finally, this past weekend was nice enough, and this go around was much better! It took several light coats to get the desired mirror effect.Spray light layers of paint on glass Thin layers of mirror effect spray paint Final layers on reverse side of window It doesn’t have a perfect mirror finish, almost an aged look to it. But I love how it turned out!View of mirror effect from the front After adding some hardware to the window and using anchor screws, we decided to hang it above the love seat in our living room.diy window pane mirror in living room easy window mirror using mirror effect spray paint 6-pane window mirror above couch easily turn a window into a mirrorThere actually used to be a window along this wall (most likely this very window) but it was closed up after an addition was put on the back of the house. I kind of like that part of it is now back where it used to be!


Leave a comment

Displaying a Little History

I think it goes without saying that I love our house. But one of my favorite things about it (and one of the many reasons we chose to buy it) is the original chestnut trim. You can see some of it in this picture I took for my Gallery Wall post.Original chestnut trim in colonial home 
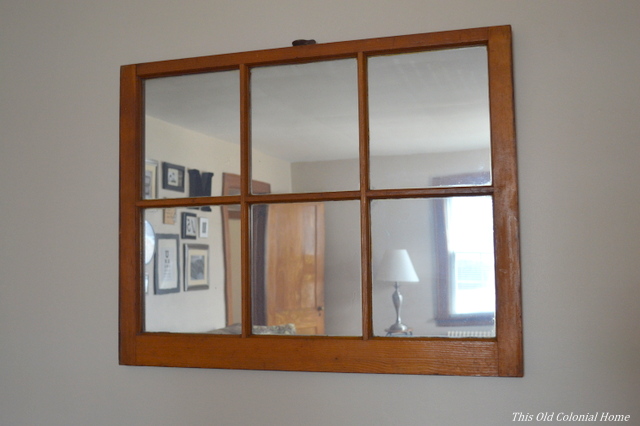
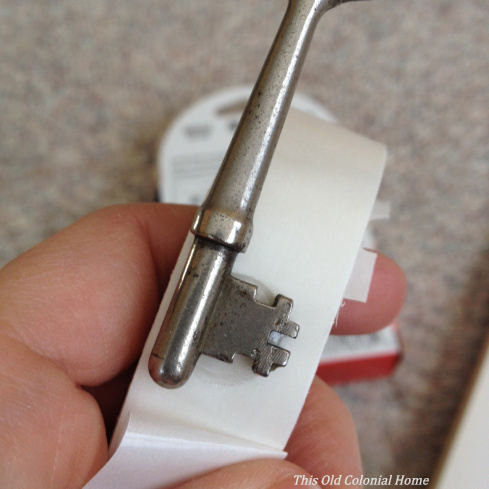
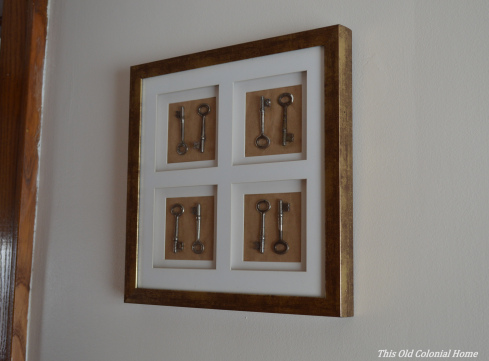
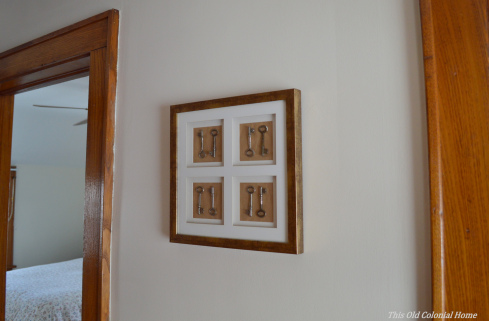
Upon closer inspection, the trim is a little beat up and worn, but that’s what gives it character. And luckily it was never painted over (except in 2 rooms, which I hope to strip someday). That’s not bad for a house that’s pre-war. Along with the chestnut trim are chestnut doors. In fact, we have a total of 18 chestnut doors in our house if you include the closets! That’s a lot of doors! But you know what goes with all of those doors? These awesome skeleton keys!Old metal skeleton keysI couldn’t just let these beauties sit in a drawer somewhere. I knew I had to put them on display! So here’s what I did. I used this picture frame that I had just sitting around. It has some depth to it, almost like a shadow box.Shadow box picture frame with 4 square matte The flower picture is actually glued to the backing, so I had to cover it since the keys were going to be displayed in each square window. I wanted a vintage feel to it, so I simply cut up a brown paper bag and taped it around the backing sort of like a present.Cut paper bag to fit around frame backingTape bag to frame backing Frame backing wrapped like a present Here’s what it looked like from the front.New paper bag frame background I put the matte on it and then worked on the arrangement of the keys. Once I was satisfied, I used these handy 1/2″ Craft Glue Dots from A.C. Moore for about $3.00. (You could also use a glue gun.)Keys arranged within matte I stuck a dot on the top and bottom of each key and then adhered it to the paper bag backing. I didn’t mark or measure each key’s placement, I just eyeballed it. And then I reassembled the frame.Use craft glue dots to adhere keys to backingI actually gave this to my husband for his birthday! Here’s the final product now properly hung in our upstairs hallway!Skeleton key art on display in hallwayEasy DIY skeleton key display DIY art for antique skeleton keys I love having a little piece of history on display! What are some of your favorite items to showcase?


Leave a comment

Free Find

It amazes me some of the stuff people throw away sometimes, and some of the awesome things I come across while just walking my dog! Another great item was sitting out on the curb for garbage over the weekend. My husband helped me lug back this great find!

dresser

Their garbage is my (FREE) gain! I actually found it at the same house where I got those free antique sleds. (Don’t remember? Check it out here.)

I had been looking around for an old dresser to make new again — with the idea being to turn it into a TV stand for our family room. Something like this, which I saw on Pinterest:

pinterest dresser

The one we snatched up is in pretty good condition. It just needs some sanding and paint and new hardware. I haven’t decided yet what color it should be. What color do you think I should paint or stain it? Be sure to check back at a later date for the makeover reveal!


Leave a comment

Happy Thanksgiving!

Candle and leaves centerpiece with Scrabble tiles Thanksgiving is my favorite holiday. In our family it’s a day dedicated to spending time with one another, giving thanks for what we have, and indulging in some pretty awesome food! We refuse to allow Black Friday to take over and ruin this special day. It’s a time to gather around the table and enjoy each other’s company.

Every year we have Thanksgiving at my aunt and uncle’s house, and setting the table has always been my job – ever since I was a little kid. This year, thanks to Pinterest, I was inspired to make it extra special. I made place cards and used pine cones as the holders. I made menus and also incorporated scrabble tiles and leaf garland. If you can’t go the extra mile for the holidays, when can you? And you’d never know we were eating on a ping pong table. 🙂DIY Thanksgiving menusThanksgiving place setting with menuThanksgiving menu on plate and napkin Pine cone place card holderBig Thanksgiving tablescape Cozy, candlelit Thanksgiving table Fall candlelit centerpieceI hope your Thanksgiving was filled with as much joy and love as ours was!


7 Comments

A Work in Progress

Just like this blog, so too is our house — a work in progress. Since this is my first post, a little introduction is needed. My name is Kelly. I’m a public relations professional, new homeowner and fan of flea markets. My husband and I recently bought this old colonial home in New Jersey that we share with our border collie mix, Luca. IMG_1183We fell in love with the house upon first viewing — its size, ample storage and charming chestnut trim. No major issues came up in our inspection and so far we haven’t had any big surprises (knock on wood). There are plenty of projects, however, that we plan to tackle. It’s pretty much a clean slate with white walls everywhere, which means much painting is in our future. But the very first and foremost project involves ripping up the lovely 1980s pinkish-red carpets that are hiding 75 year old hardwoods underneath! Down the road we hope to redo the upstairs bathroom (which by the way has no electrical outlet. What?!); replace the concrete patio with a more inviting wood deck; and knock down a wall to make our galley kitchen a little more functional. With all these projects, we’re hoping to be thrifty when it comes to furnishing and decorating. I’m just not the type of person who can spend $500+ on a dresser or even $40 on a pillow. It’s just a pillow! We’ll hit up flea markets, estate sales, craigslist and use some good old DIY to get similar, expensive looks for less. So please, keep coming back for updates as we work to make this house into our home.