This Old Colonial Home

Filling our house with love and a lot of DIY


2 Comments

Office Paint Job

This isn’t the most glamorous room, but it’s kinda the only DIY project that we’ve done as of late. So let’s just get real life for a moment.

Pale green home office

Before

I’ve never shown our home office before because, well, it looked like this. Please excuse the drabness. I mean it is an office after all filled with papers and bills and mail. Ideally, I would want it to look more like this:houzz-organized-officeBut c’mon people, is anyone’s home office legitimately that organized and clutter-free all the time? If so, then I’m seriously jealous intrigued.

Eventually we hope to improve the décor in here, but for now we decided to at least give it a new color. Jamie painted it Silver Blueberry by Olympic.

Blue home office

After

Even though they say you shouldn’t paint small rooms dark colors, I like it! It definitely feels more office-y. Maybe now I’ll be more efficient. (Probably not.)

As you can see we each have our own desks and separate computers. Jamie doesn’t want to share with me. 😛 The plan is to one day build a desk in the back corner, possibly similar to the one in the above Houzz picture.

I also really want to make some pipe shelves. I think these are so awesome! Like this one. But, man, piping is pricey!pipe shelvesWe also desperately need organizers of some sort and maybe a bulletin board. Piece by piece it will eventually get there. But remember, this is real life. We have a whole entire house that we’re painting, improving, decorating, etc. It takes time and we can’t do it all at once. But it’s fun to dream up ideas and future DIYs. Am I right?


Leave a comment

Mason Jar Possibilities

Mason jars. We all love them. Some of us might still use them for canning, but many of us have been coming up with creative ways to use them for organization, gifts or decor. For instance, I recently blogged about our DIY Mason Jar Sconce. Hometalk reached out telling me how much they loved it and asked me to curate a board on mason jar projects. I happily obliged!thisoldcolonialhome1409-mason-jar-ideasVases, lighting, and candles tend to be the most popular, but I love how everyone puts their own little spin on it using paint, ribbon, jute rope, etc. I also love the ideas of using just the lids! Traci from Beneath My Heart came up with a fun and easy way to make coasters out of them. And Erin at DIY on the Cheap shows off a cute way to make ornaments.

What I love most is there are options for all 4 seasons! Here are some of my favorites:

1. Fall

Kelly from Live Laugh Rowe simply placed a votive candle in the center of the jar and added vase filler — like popcorn kernels and acorns. These are items you may already have around the house or the backyard! So easy and inexpensive!DIY Fall Decor with Hanging Mason Jars2. Winter

Diana at Anyone Can Decorate made “snow globes” out of her mason jars. She glued bottle brush Christmas trees to the underside of the lids and then filled the jar with fake snow and glitter and turned the jar upside down. I love how she also attached some jars to candle sticks to vary the height. How festive!mason-jar-snow-globes-anyone-can-decorate3. Spring

Tiffany from Offbeat and Inspired came up with this centerpiece that’s perfect for spring! It’s so bright and colorful while also rustic and industrial. She used 6 mason jars along with pipe clips, nuts, bolts, and mending braces to create a snake-like vase display that can be bent any way you like. How unique!mason-jar-vase-centerpiece-offbeat-and-inspired4. Summer

Dee over at Meatloaf and Melodrama guest posted on PinkWhen her bright, fresh, and fruity mason jar utensil holder. All it took was a little spray paint and ribbon. And she simply used a black sharpie for the watermelon seeds. So cute and perfect for a backyard barbeque!summer-mason-jars-pink-when As you can see, the door of possibilities isn’t just ajar (see what I did there?!) … it’s wide open! Head over to my Hometalk board to see the rest of these fantastic ideas.

What mason jar projects have you made?


Leave a comment

Take a Tour

I don’t know about you, but I love getting an inside look at other houses! I love seeing the different styles and tastes, and being inspired by their beauty.

So guess what? Now you can snoop around this old colonial home! You’ll notice at the top right-hand side of the page there is now a House Tour menu option. So please come on in and take a look around!White colonial house with black shutters and red doorMake sure to keep checking back for updates as the projects are always ongoing. Enjoy!


5 Comments

Mason Jar Sconce

In our entryway we have a doorbell niche. It’s a long, narrow cutout in the wall with only the chime at the top. It’s a plain feature that’s been begging for a little pizazz. (Sorry, I forgot to take a “before” picture.)

I toyed with the idea of tiling it or painting it a different color. I still may do the latter someday. But for now, I decided it would be a good place for flowers. I thought maybe a nice, faux orchid … but while scouring Pinterest I stumbled upon a mason jar sconce. It seemed like an easy and inexpensive DIY project and one that would go with our vintage style décor.

Simple jar sconce

Found on Pinterest

For this project all we needed was a mason jar, a piece of wood, a pipe clamp, stain, and flowers. We already had a mason jar and we used a piece of scrap wood as well as stain left over from Jamie’s awesome coffee table. I picked up a pipe clamp from Home Depot for only around $1.50. More on the flowers in a moment.

Jamie ended up taking the lead on this quick DIY while I worked on another project. He cut the board, sanded it, rounded the edges and stained it. Once it was dry, I simply hand sanded the corners a little to make it look worn. He added a sawtooth hook to the back and then nailed the pipe clamp to the board and tightened it around the mason jar.Nail pipe clamp to wood

Attach mason jar to wood with pipe clampAs for the flower part of it, I found some clear, vase filler gems at Target for under $5 and I chose a fake hydrangea from A.C. Moore for under $4. You could really fill it however you want. But I like how this adds a little pop of color to the room!Easy DIY wall sconce

Shabby chic decorBall jar with hydrangeas and vase fillerPop of color in entrywaySuch a simple solution that helps make the entryway feel a little more welcoming.

We’re adding a few more additions to the foyer … so look for that soon!


Linking to:

Serenity Now | DIY on the Cheap | The Shabby Nest


6 Comments

Final Piece

You’d think with it being summertime I’d have plenty of finished projects to share with you. But that’s not quite the case. My husband and I have been spending our free time traveling and doing summery things (i.e. barbeques and relaxing) and not too much around the house.

But just so you don’t think we’re completely lazy, there is one minor thing worth noting. I FINALLY picked out curtains for the living room — which makes the room done!! It’s something that I’ve had in the back of my mind since at least March. That’s when I bought curtains from Home Goods that I thought I liked, but really only liked the price (2 panels for $16.99). I only just returned them this past weekend. Oy!

I had also picked up curtains from Lowe’s that later got returned. And then I bought 2 other curtains from Lowe’s in the same pattern but different colors. I even took a survey on Instagram (@oldcolonialhome) to get some opinions. Why is this such a tough decision?! curtainsOf the 2 I chose these! And I love them! I thought I would want blue to pick up the other accents in the room, but the brown/green ones ended up looking better in person. DSC_0462The best part about being indecisive? The price came down! All 4 panels cost less than $60 total after tax!! I’m so happy this is done. It was the very last piece to the puzzle. The living room is completely finished! Check mark! DSC_0446DSC_0453DSC_0450And in case you missed it, our living room is also “award-winning.” 😛  I entered a contest on Pinterest — #PinItToWinIt by HouseHunt.com. All you had to do was post before and after home improvement pictures to become entered to win a $50 gift card to Home Depot, and they ended up choosing my entry! Fun! You can check out their article here.

Jamie and I hope to accomplish a few more projects this summer … unless the dog days get to us first! What about you — do you plan on using the warmer months to get stuff done or to slow down a little?


Leave a comment

Projects In Progress

Jamie and I currently have several projects going on all at once. Each one seems to come with its own obstacle and unfortunately since none are done yet I haven’t been able to post about them. So I figured I could at least give you a preview of what we’re working so hard on!

#1 Our biggest and costliest project is widening our driveway. For this we’re calling in the professionals. They just don’t seem to be calling us back. The plan is to turn our one car-width driveway into two car-widths. This way we won’t have to keep moving cars around when the other is in the way. Luckily, we have the room to do it, but our town isn’t allowing us to widen it as far as we’d like. (Bureaucracy!) We’ve been given a few estimates from a couple companies, we’re just trying to finalize and lock it down. Hopefully this will be done soon so we can move forward.

#2 I finally started redoing that free dresser I scored back in February. Last weekend, the weather was nice so I brought it outside and started sanding away! I also finally got to use the electric sander Jamie got me for Valentine’s Day. You might not think that’s a romantic gift, but I do!mask

sanderdrawersI still have to find some hardware I like. Then this weekend I plan to prime it, paint it and hopefully finish it up!

#3 Over the weekend, my husband was working alongside me, but on a project of his own. He took a stab at building a coffee table for our living room. garage

I must say he did a pretty awesome job for his first time attempting something like this! If you follow me on Instagram, Twitter, or Facebook you would’ve seen a sneak peek already, but here it is again in case you missed it. coffee table 2coffee table

Now we just have to finish it up with some stain. There are so many choices! Do you have a favorite?

luca bush

(I don’t think Luca was a fan of all the noise we were making. He hid in the bushes!)

#4 I’m also trying to complete some décor odds and ends. I bought this artwork for our family room from overstock.com. BB art

I love the Brooklyn Bridge! It’s where Jamie and I had our first date (aww). Now it just needs to get hung up. I also bought some curtains for the family room, but of course I still need a curtain rod to hang them.

curtains

It was hard enough finding curtains I liked at the right price (it’s crazy how expensive they can be!) and the right length. I swear 84″ is too short and 95″ is too long 😛 (I’m not a fan of when they “puddle” on the floor.) So the thought of having to look for a rod makes my head hurt a little. Haha!

#5 There’s always more painting to do! We have 5 rooms left. The paint is already picked out and purchased for 3 of those rooms. Eventually we’ll get to it. Rome wasn’t built in a day after all!

Please be sure to keep checking back for the reveals. And make sure to follow @oldcolonialhome on Twitter and Instagram for projects in progress!  How many different projects are you working on at once?


Leave a comment

Mirror, Mirror on the Wall

A few months ago I was visiting a friend and I noticed she had window-pane mirrors in her finished basement. They looked awesome! I immediately knew I wanted to incorporate something similar in our own house. After doing a little online searching, I realized it would be more affordable if I took matters into my own hands. Besides, I already had a 6-pane window going unused. (It’s the bottom half of the window that’s on our mantel.)6-panel window pane Now I had to figure out how to turn the window into a mirror.

Solution found: Rust-Oleum Mirror Effect spray paint!Mirror effect spray paintI ordered it from Home Depot. It’s a little pricey at $8.50 for a 6 oz. can (and I bought two), but when I consider that $17 is all I spent for this project, I’d say that’s pretty good.

So I started by taping off the window. It has dark wood on one side and light wood on the other. I wanted the lighter side to be the front so I taped off the back. You spray paint the reverse side to create the reflective mirror-like finish. Taping the window was pretty time consuming. You might even say it was a pain! Haha get it?!Tape off mirror before painting Taped off window pane for spray paintingMy first attempt at trying to paint it back in January didn’t go so well. The can says it needs to be between 50 and 90 degrees with 85% or less humidity. I tried doing it in our garage on a rainy day and I think it was just too humid out. The paint was very runny. So I had to wait for better weather, which meant I had to wait awhile since it’s Winter in the Northeast. Spraying inside definitely wasn’t an option. The smell is very strong. But finally, this past weekend was nice enough, and this go around was much better! It took several light coats to get the desired mirror effect.Spray light layers of paint on glass Thin layers of mirror effect spray paint Final layers on reverse side of window It doesn’t have a perfect mirror finish, almost an aged look to it. But I love how it turned out!View of mirror effect from the front After adding some hardware to the window and using anchor screws, we decided to hang it above the love seat in our living room.diy window pane mirror in living room easy window mirror using mirror effect spray paint 6-pane window mirror above couch easily turn a window into a mirrorThere actually used to be a window along this wall (most likely this very window) but it was closed up after an addition was put on the back of the house. I kind of like that part of it is now back where it used to be!


Leave a comment

Displaying a Little History

I think it goes without saying that I love our house. But one of my favorite things about it (and one of the many reasons we chose to buy it) is the original chestnut trim. You can see some of it in this picture I took for my Gallery Wall post.Original chestnut trim in colonial home 
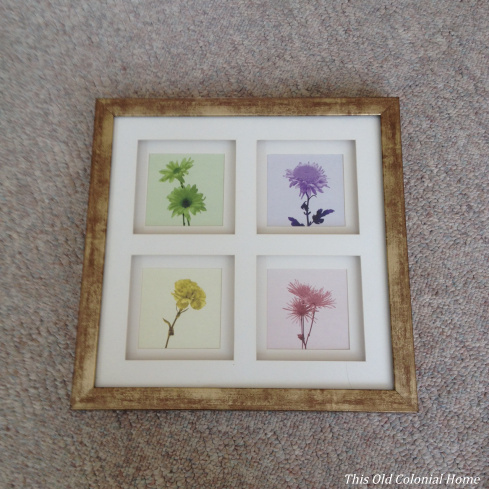
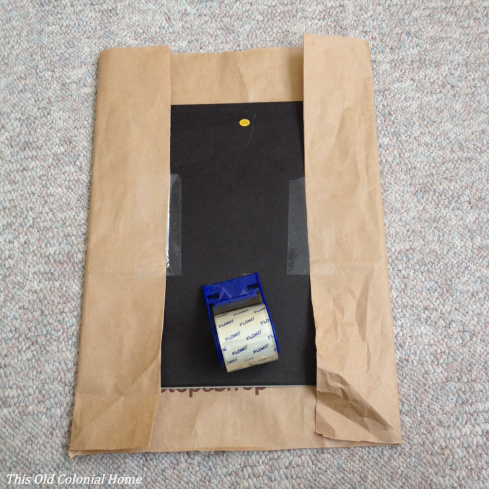
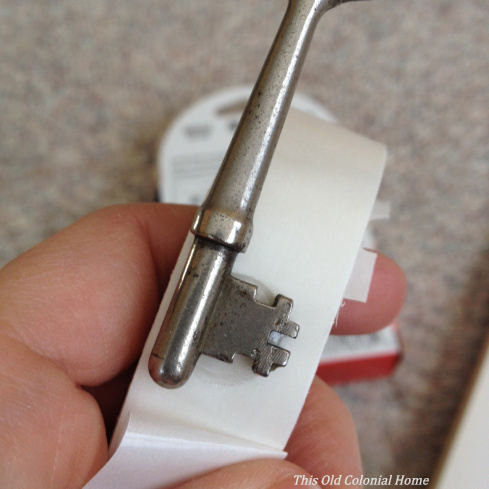
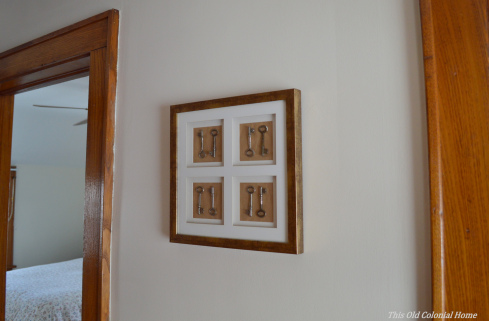
Upon closer inspection, the trim is a little beat up and worn, but that’s what gives it character. And luckily it was never painted over (except in 2 rooms, which I hope to strip someday). That’s not bad for a house that’s pre-war. Along with the chestnut trim are chestnut doors. In fact, we have a total of 18 chestnut doors in our house if you include the closets! That’s a lot of doors! But you know what goes with all of those doors? These awesome skeleton keys!Old metal skeleton keysI couldn’t just let these beauties sit in a drawer somewhere. I knew I had to put them on display! So here’s what I did. I used this picture frame that I had just sitting around. It has some depth to it, almost like a shadow box.Shadow box picture frame with 4 square matte The flower picture is actually glued to the backing, so I had to cover it since the keys were going to be displayed in each square window. I wanted a vintage feel to it, so I simply cut up a brown paper bag and taped it around the backing sort of like a present.Cut paper bag to fit around frame backingTape bag to frame backing Frame backing wrapped like a present Here’s what it looked like from the front.New paper bag frame background I put the matte on it and then worked on the arrangement of the keys. Once I was satisfied, I used these handy 1/2″ Craft Glue Dots from A.C. Moore for about $3.00. (You could also use a glue gun.)Keys arranged within matte I stuck a dot on the top and bottom of each key and then adhered it to the paper bag backing. I didn’t mark or measure each key’s placement, I just eyeballed it. And then I reassembled the frame.Use craft glue dots to adhere keys to backingI actually gave this to my husband for his birthday! Here’s the final product now properly hung in our upstairs hallway!Skeleton key art on display in hallwayEasy DIY skeleton key display DIY art for antique skeleton keys I love having a little piece of history on display! What are some of your favorite items to showcase?


2 Comments

Gallery Wall

It’s been several months in the making, but we finally completed and hung a gallery wall in our living room. We have a lot of blank walls to fill, and after seeing this post by With Love, From California I was truly inspired! I knew it would be the perfect addition.Blank wall behind couch perfect for gallery wall 
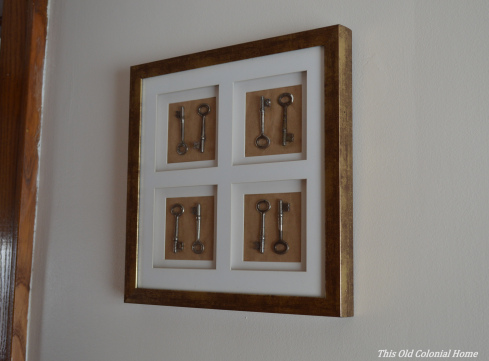
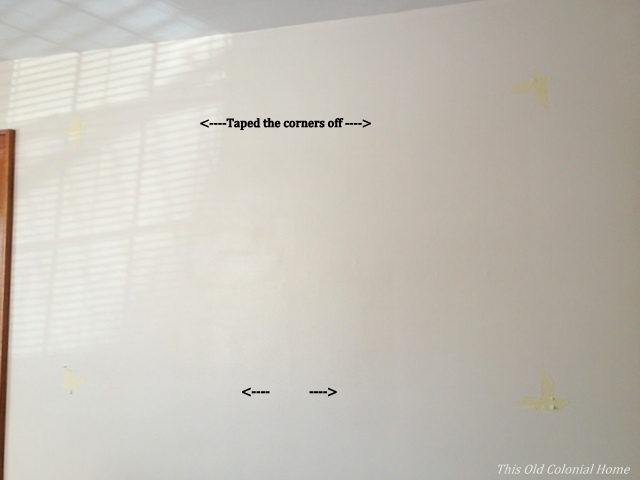
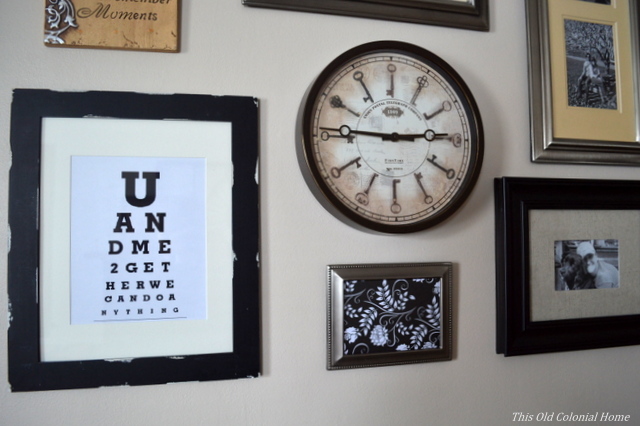
Following her lead, Jamie and I measured the wall above our couch factoring in a 12″ perimeter. There was one tricky part though. Our couch isn’t centered along the wall because of a door that swings open. So since the couch is off-centered, we figured it was best to keep the gallery wall the same way. That way it’ll still be centered over the couch and we won’t have pieces hidden behind the door, which is almost always open wide.

Once we had the measurements, like With Love, From CA, I cut pieces of string to mirror the dimensions and laid them on the floor to recreate the wall space. I now had a place where I could play with the arrangement of frames, artwork, etc. until I got it just the way I wanted. As for deciding what went into the gallery wall, I started by collecting various frames and artwork I already had. Since I mainly had black and silver and some ivory mats, I decided to stick with that theme knowing I wanted to use just black and white photos. This was the first layout I came up with.lay gallery wall pieces on floor to rearrange (Notice the brown dinner plate. I liked the idea of using a circular piece there to break it up a little, but I didn’t have anything at the time that would work. I also wasn’t sure what to put in the lower right corner. Hence the ‘?’)

I eventually found a clock (on Kohls.com) that I loved. Even though we already have a clock on the mantel, this one was the perfect size and I really liked the skeletons keys on it! So I went for it. I also swapped out the silver frame with the ‘&’ for a black one that I found at Home Goods. I felt there was too much silver. I also swapped the small, silver square frame with the medium, rectangular silver frame for better spacing.Rearranging gallery wall layoutI was almost there. I still needed something for that lower corner. I had thought about just making a piece of artwork out of scraps of wood we have. But then I came across another great frame, this time at Target. Finally, it was set to go!Gallery wall final layout To hang it, we started by using the original measurements and marked off the corners on the wall.Measure and mark corners for hanging gallery wall Jamie then took over the hanging process. He started by doing each corner first then working his way in, fixing any spacing issues or slight measuring errors along the way. (Luckily, any mistake holes just get covered.)In progress hanging gallery wall Here’s what it looked like when he was done.Gallery wall completely hung And here’s how the absolute final product looks with all the appropriate photos in it. I love how it turned out!Gallery wall behind couch in living room Complete gallery wall in living room Use scrapbook paper in some of the frames I  used scrapbook paper in some of the frames.Eye chart displayed in frame I decided to nix the ‘&’ and printed a free and custom eye chart from http://www.eyechartmaker.com. Bonus points if you know what it says!


1 Comment

Everyday Mantel

Yes, I’m doing yet another post on our fireplace. You’ve seen it decked out for Fall and Christmas, but now I wanted to share our ‘everyday’ mantel.

With all of the other projects we’ve been working on (aren’t there always projects?!) – it’s taken me a little while to get to this. But I finally incorporated some new items we received and I’m pretty happy with it. It just needs some candles, though I don’t mind the candlesticks just by themselves. What do you think?Brick fireplace with rustic mantel decorI decided to keep the old window, which I had used at Christmas. We got this great clock from Hobby Lobby as a Christmas gift from my parents. The crock was a gift from Jamie’s mom. All the other items we already had, except for the brass owl. That was a flea market find from my Dad. And don’t you just love old, hardcover books?Vintage scale and old hard-covered booksRustic mantel with window pane and clock So I think this will pretty much be how the mantel remains throughout the year – until I get bored with it haha! But right now I’m loving its simple, vintage vibe!